Security Tools
Finally we will start installing and using our tools to secure our application and cloud infrastructure.
Horusec
Horusec is an open source tool that performs a static code analysis to identify security flaws during the development process.
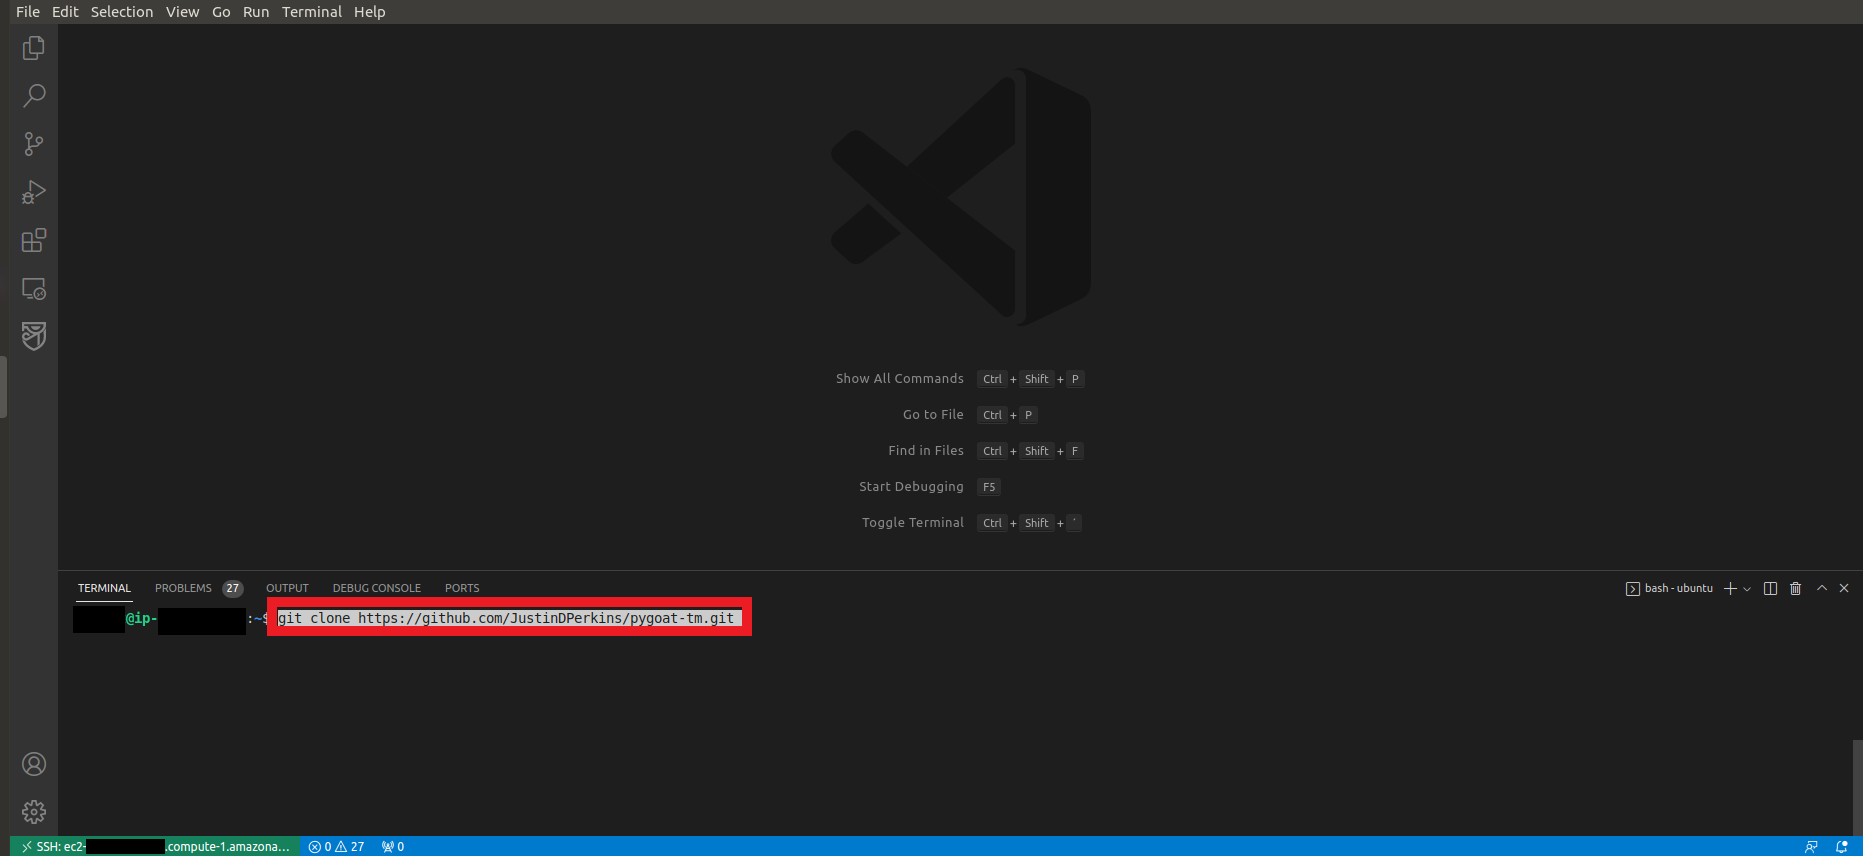
1. Let’s start downloading the source code of our application in our development environment
- On your local machine or on the EC2 that we created earlier, let’s download the code
- For this, we can use the command
git clone https://github.com/JustinDPerkins/pygoat-tm.git
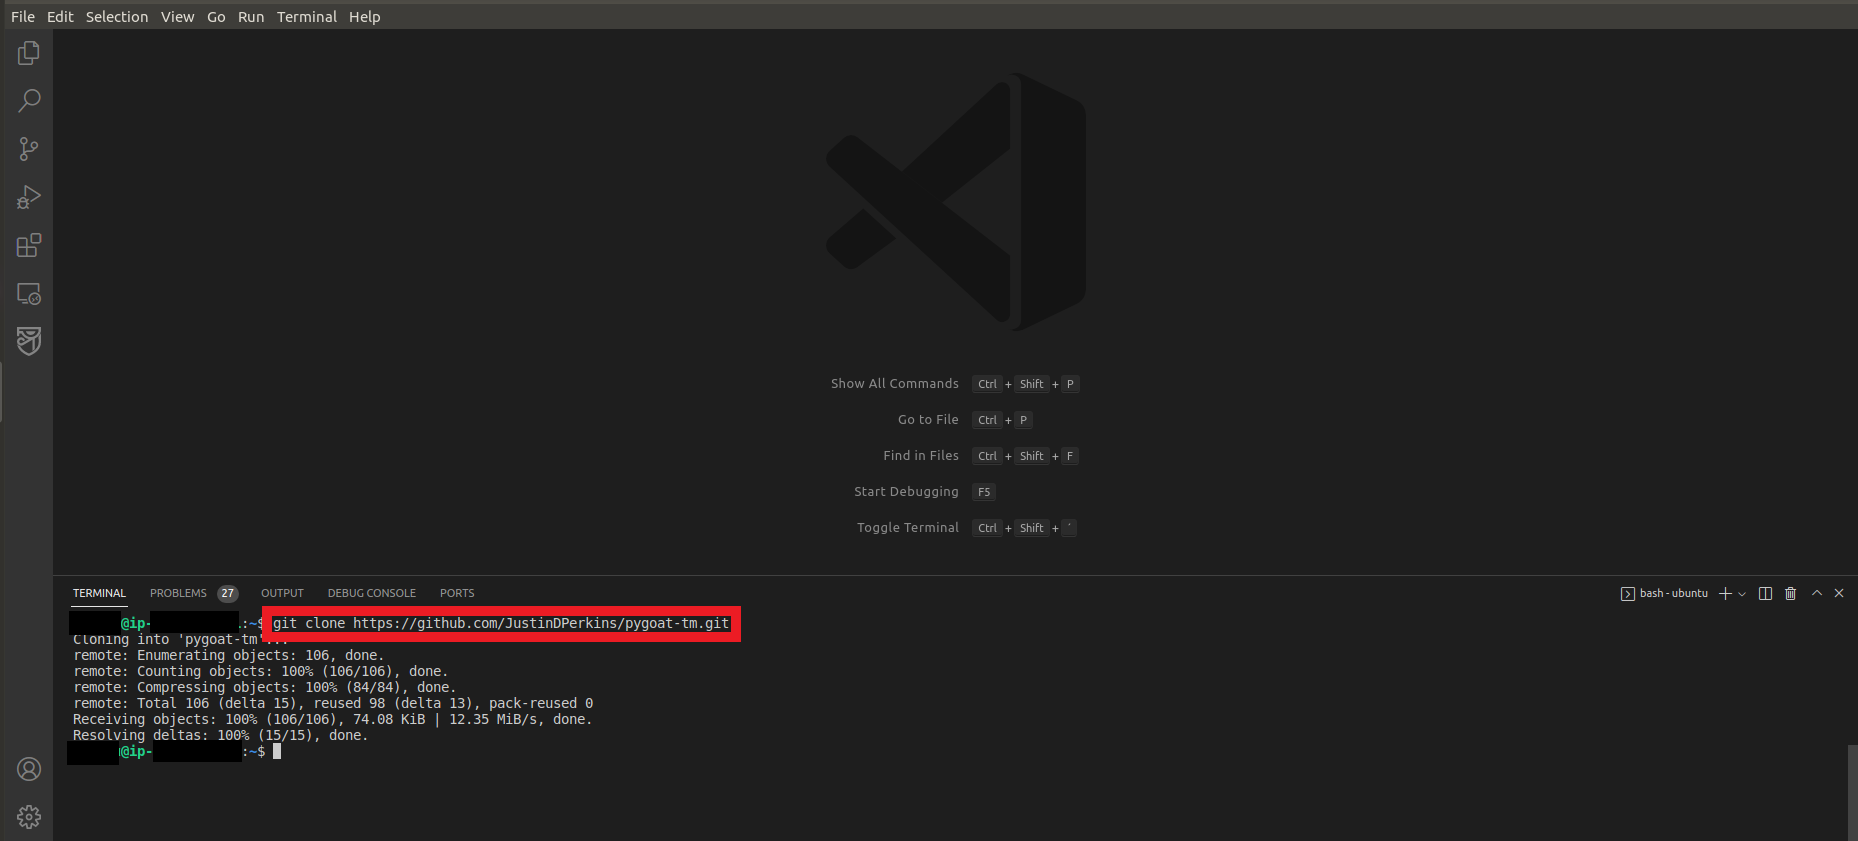
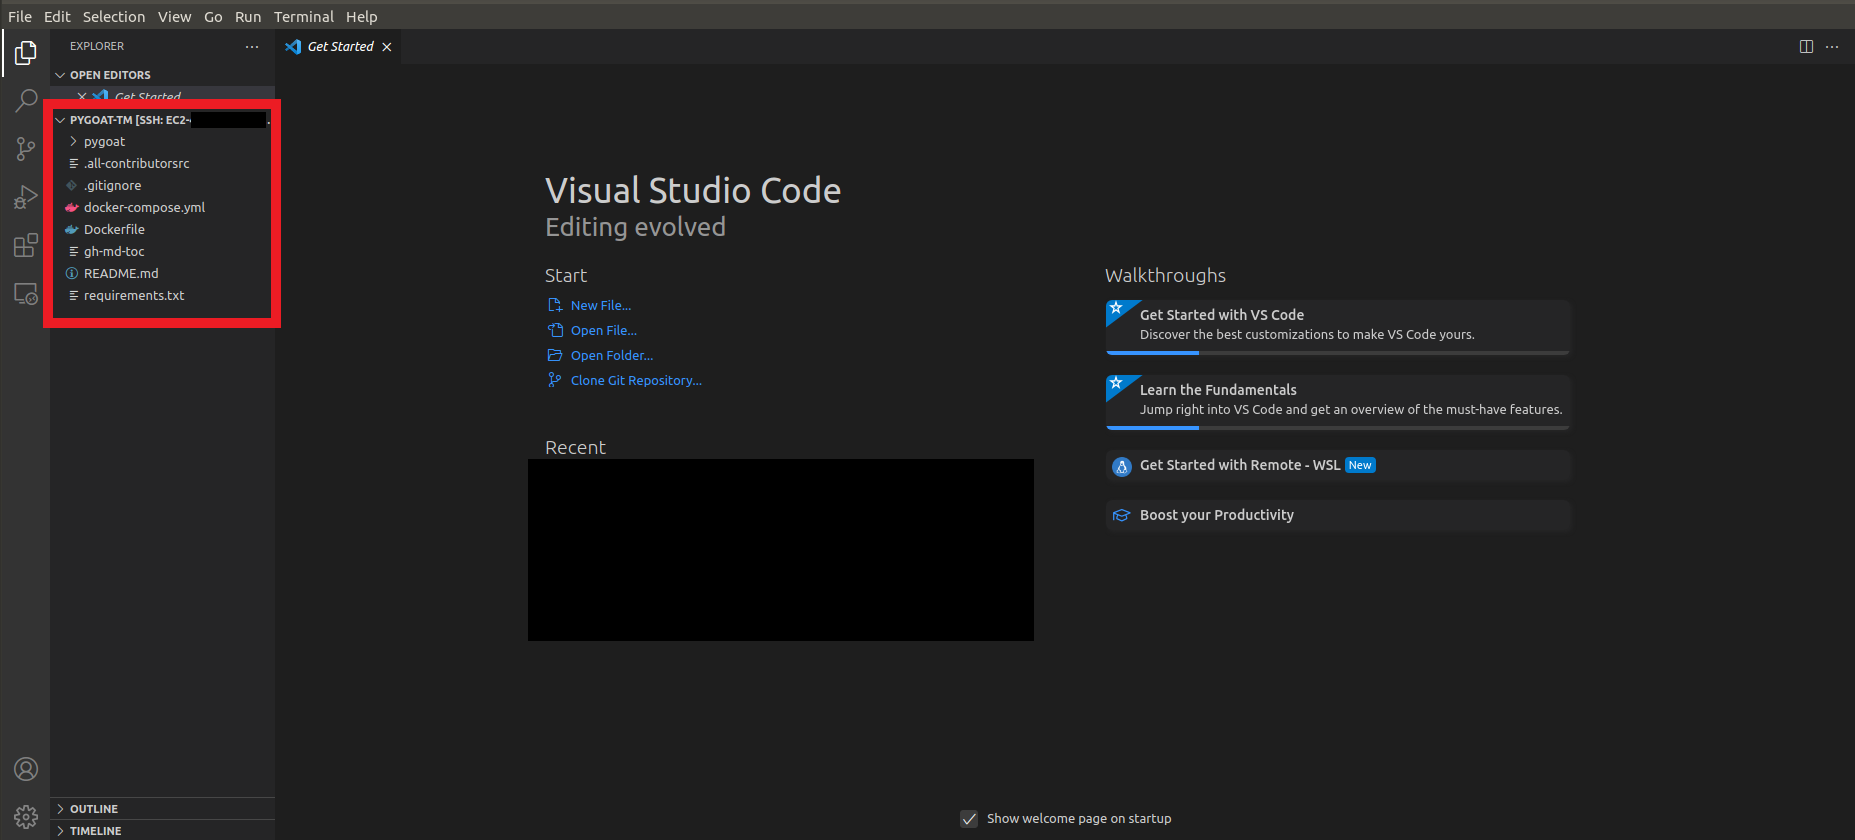
2. Let’s access the directory of our application
-
cd pygoat-tm/ -
To open the directory in VS Code
-
Click on the button Explorer which is the first icon in the left column
-
Click on the button Open Folder
-
Click on the button pygoat-tm
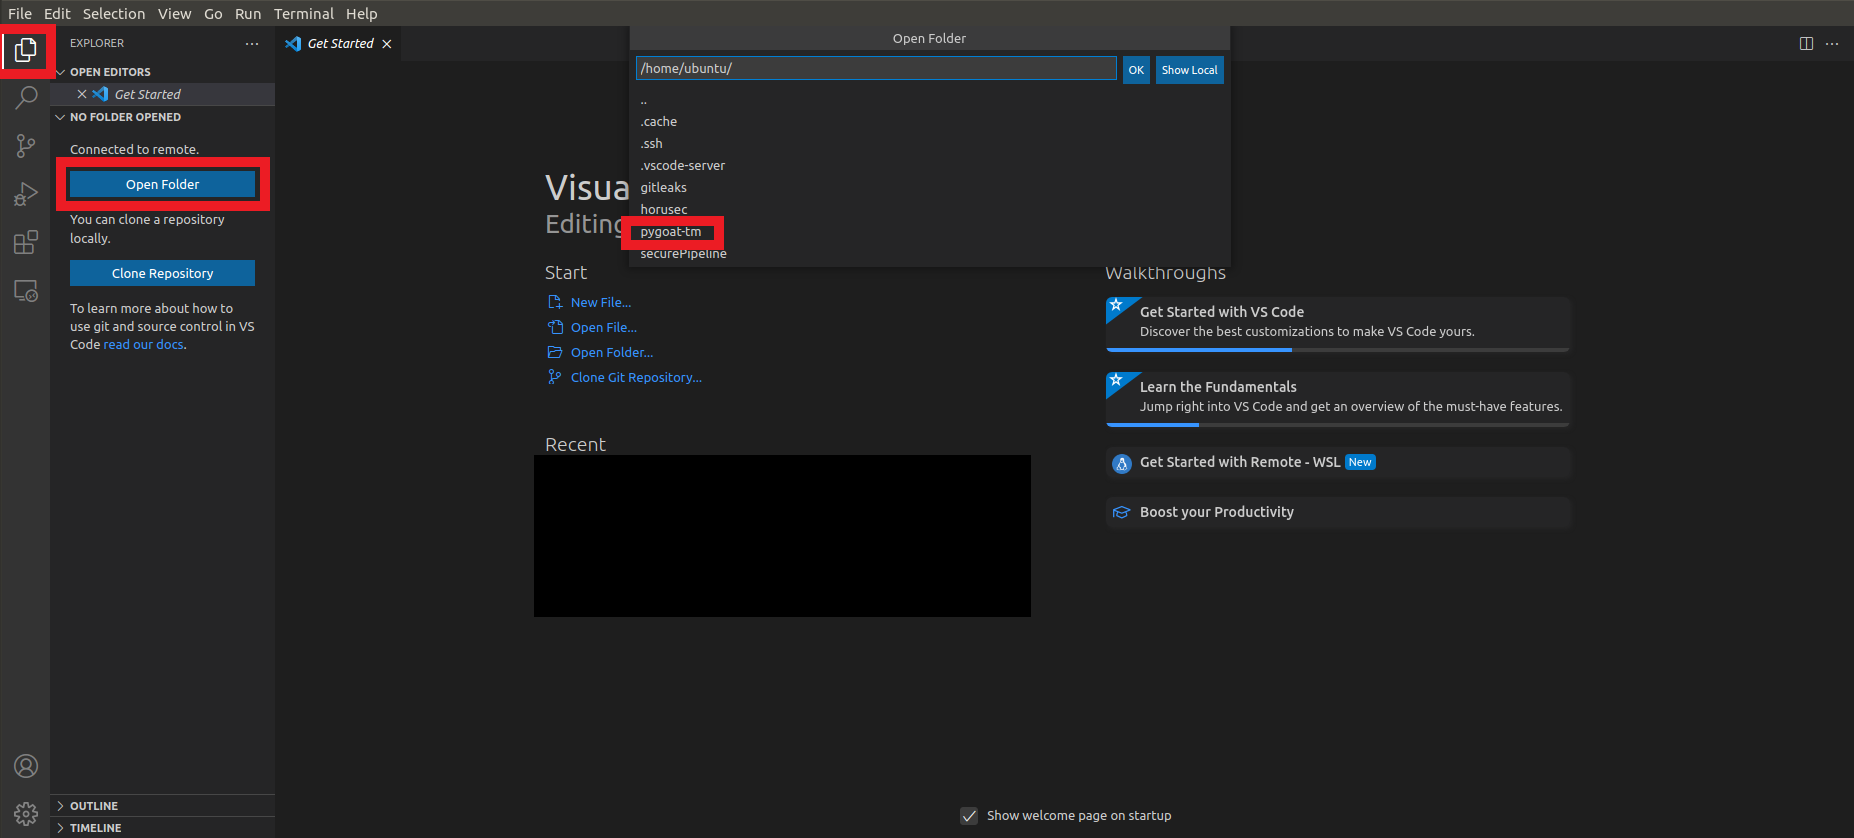
- Click on the button Ok
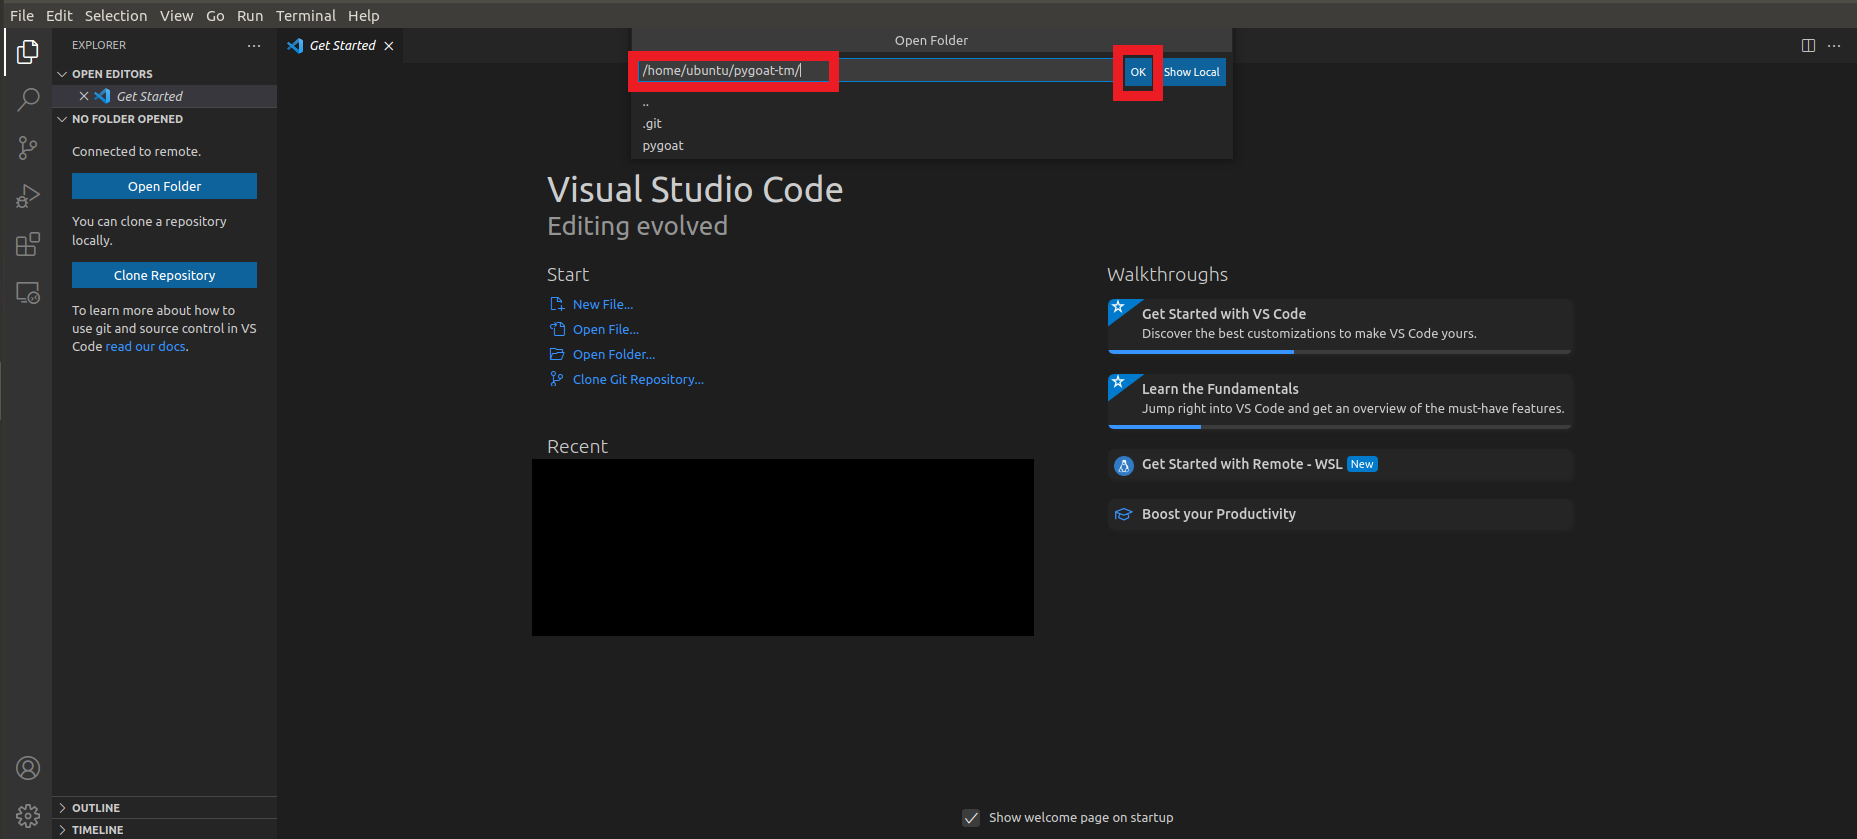
- Wait for the directory to open in VS Code
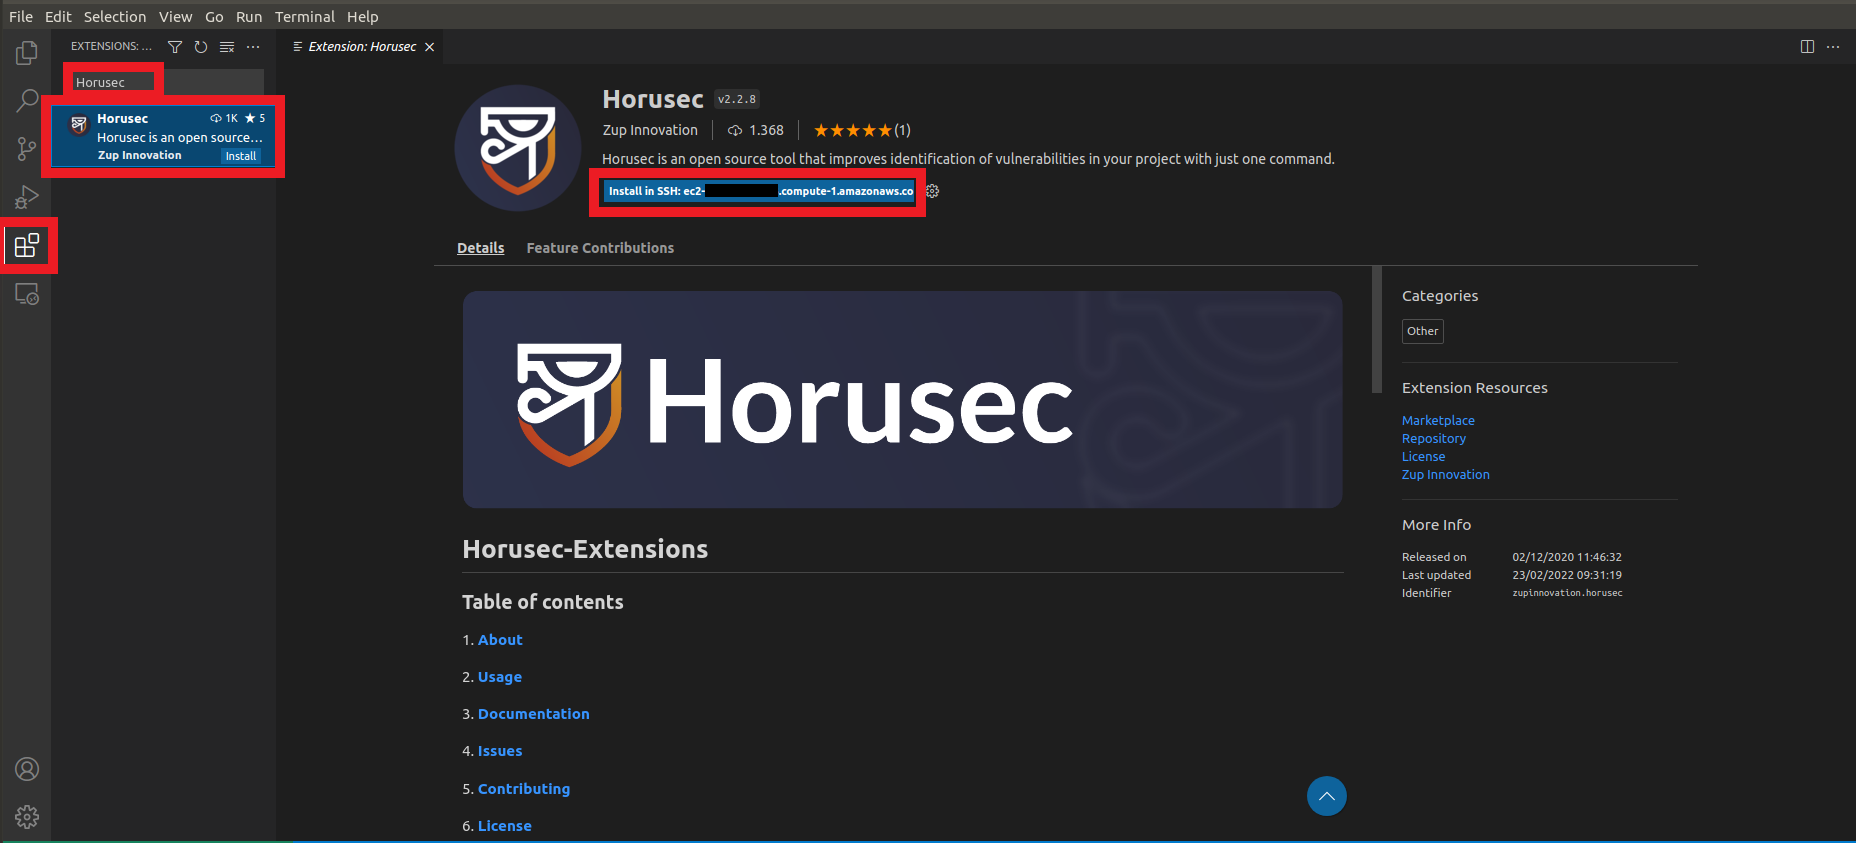
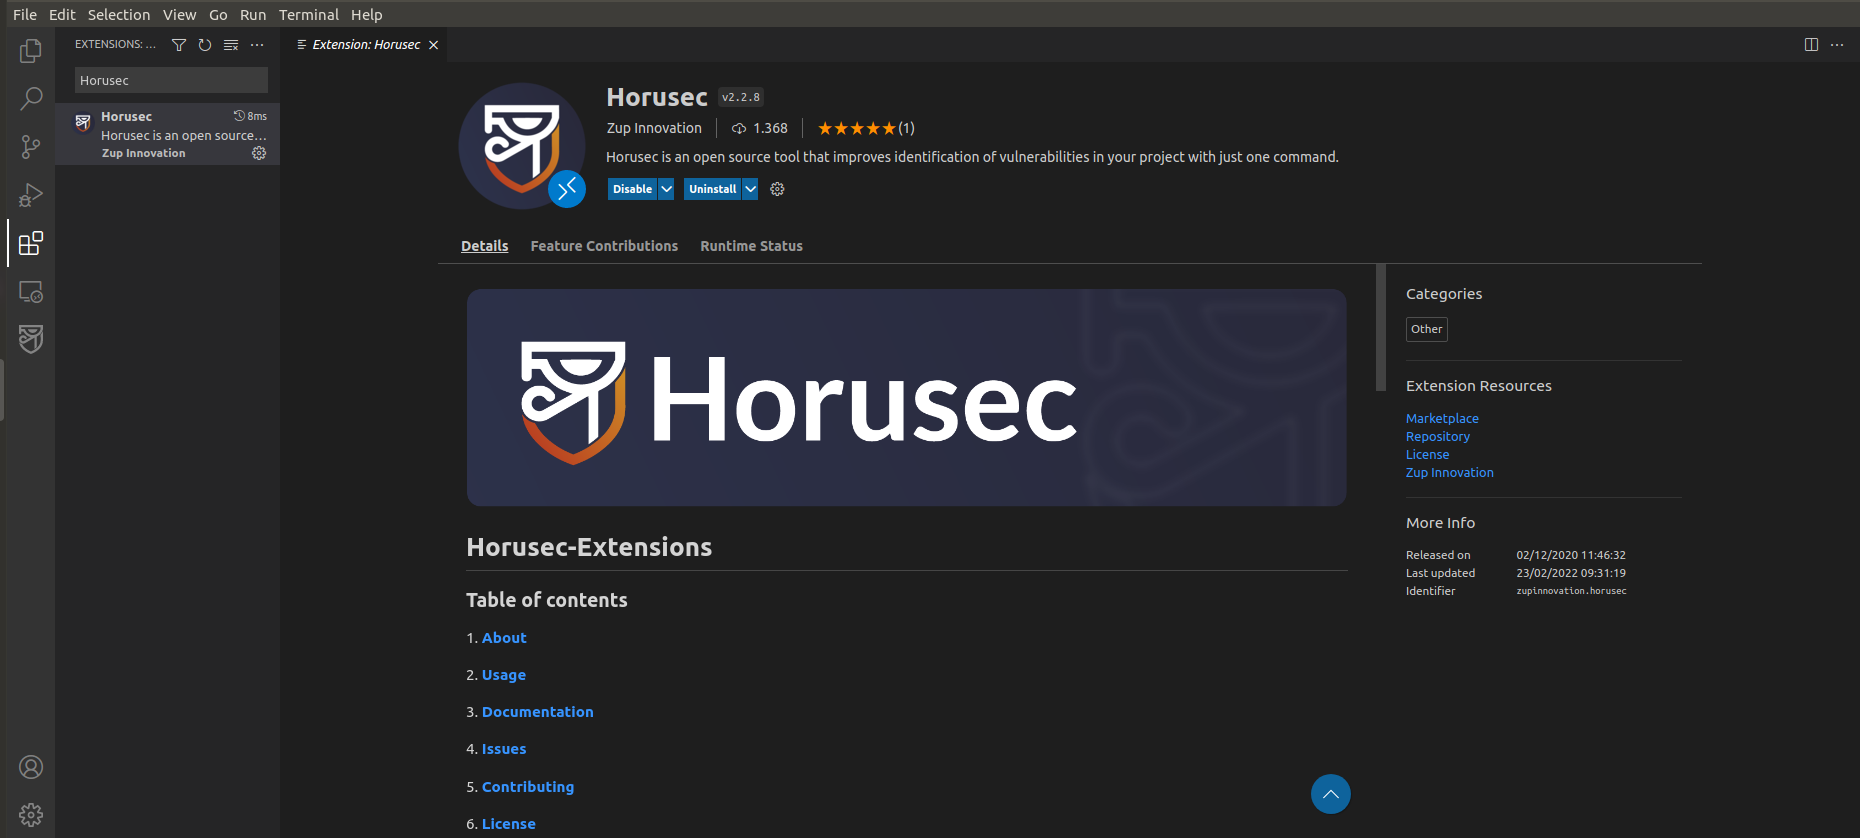
3. Let’s install the Horusec Extension on VS Code
- Click on the penultimate icon called Extension in VS Code
- Search for
Horusec - Click on install in the ec2 machine
- Wait until you install the Extension
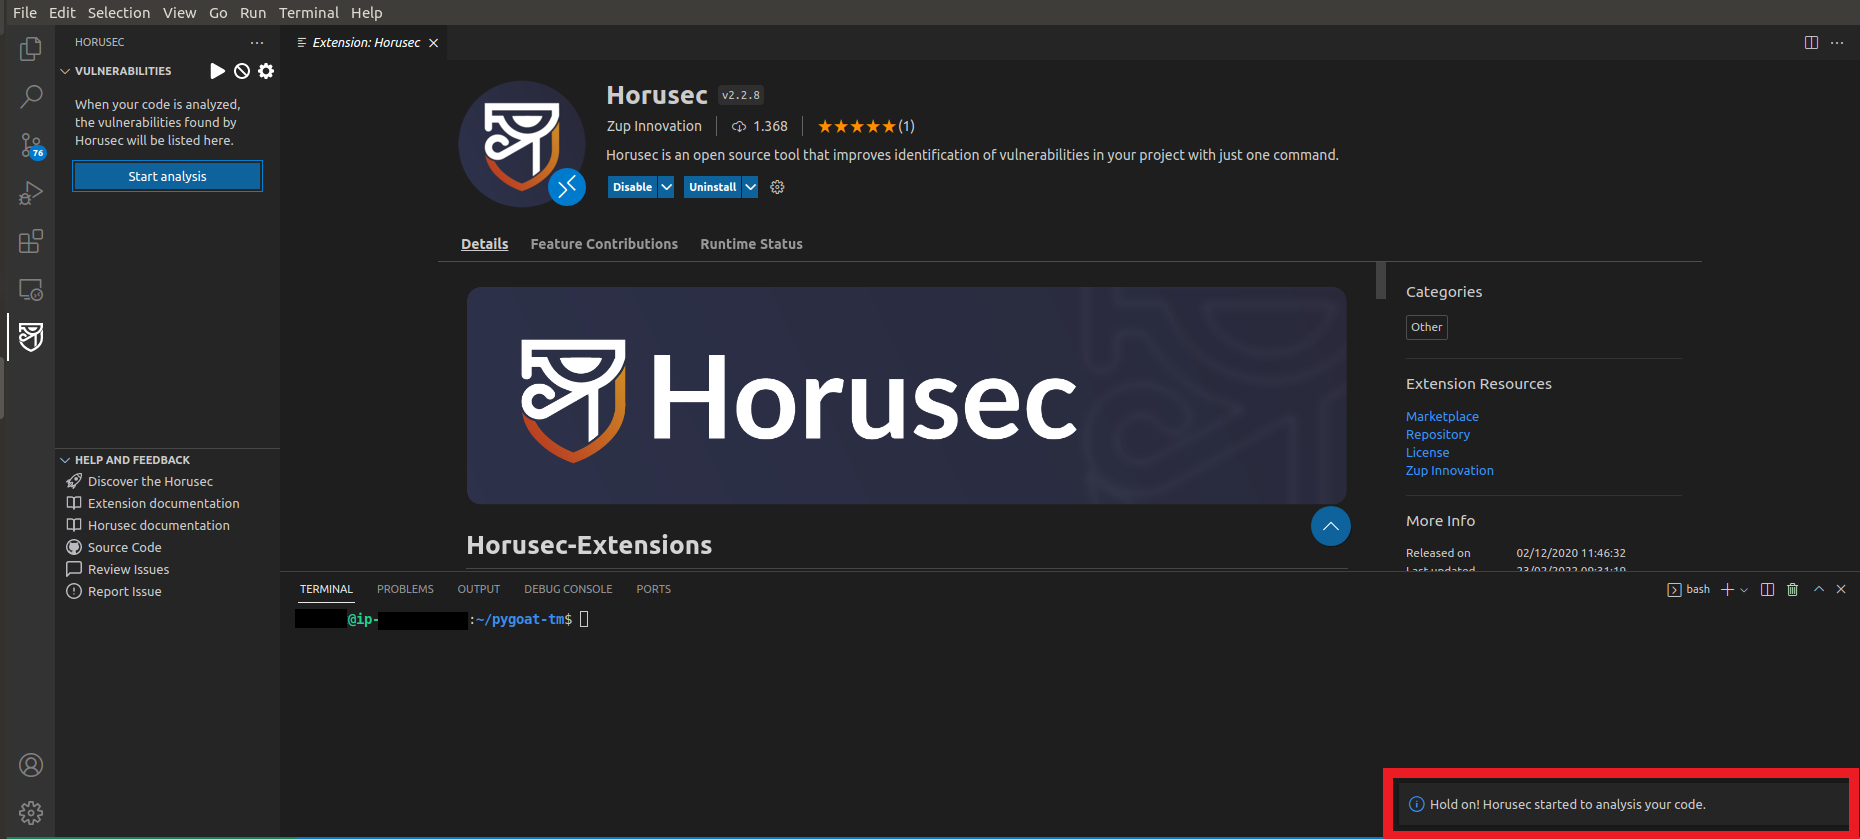
4. Static Scan the code to see if our application has any vulnerabilities
- Click on the last icon in the left column in VS Code called Horusec
- Click the blue button Start Analysis
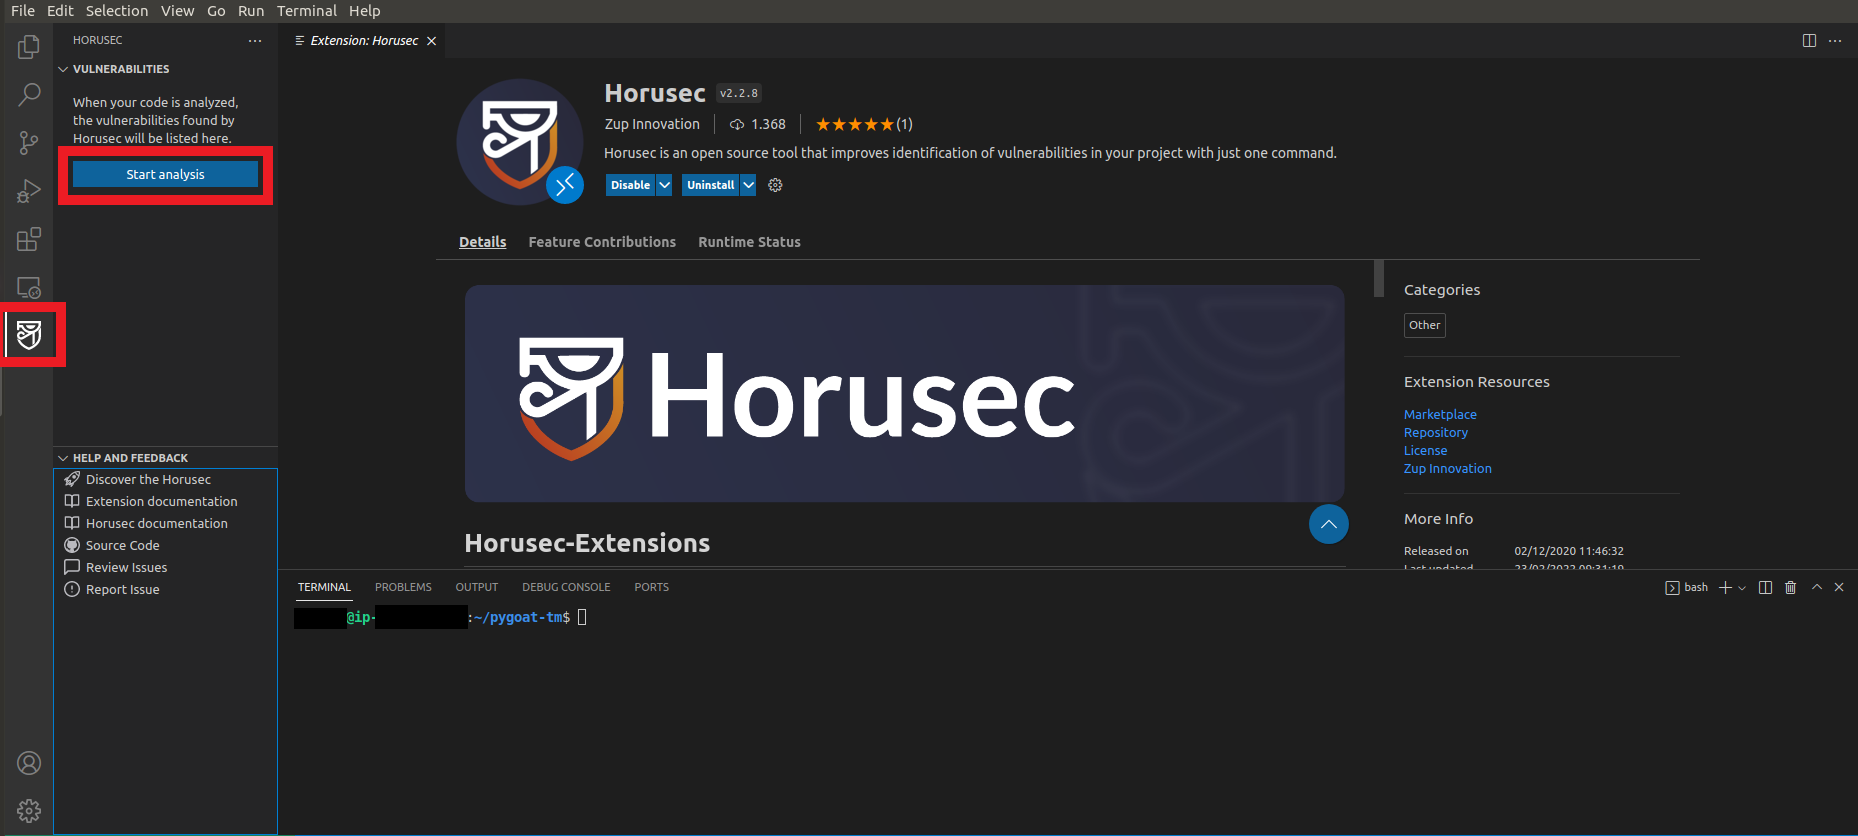
- Wait a while for the analysis to complete
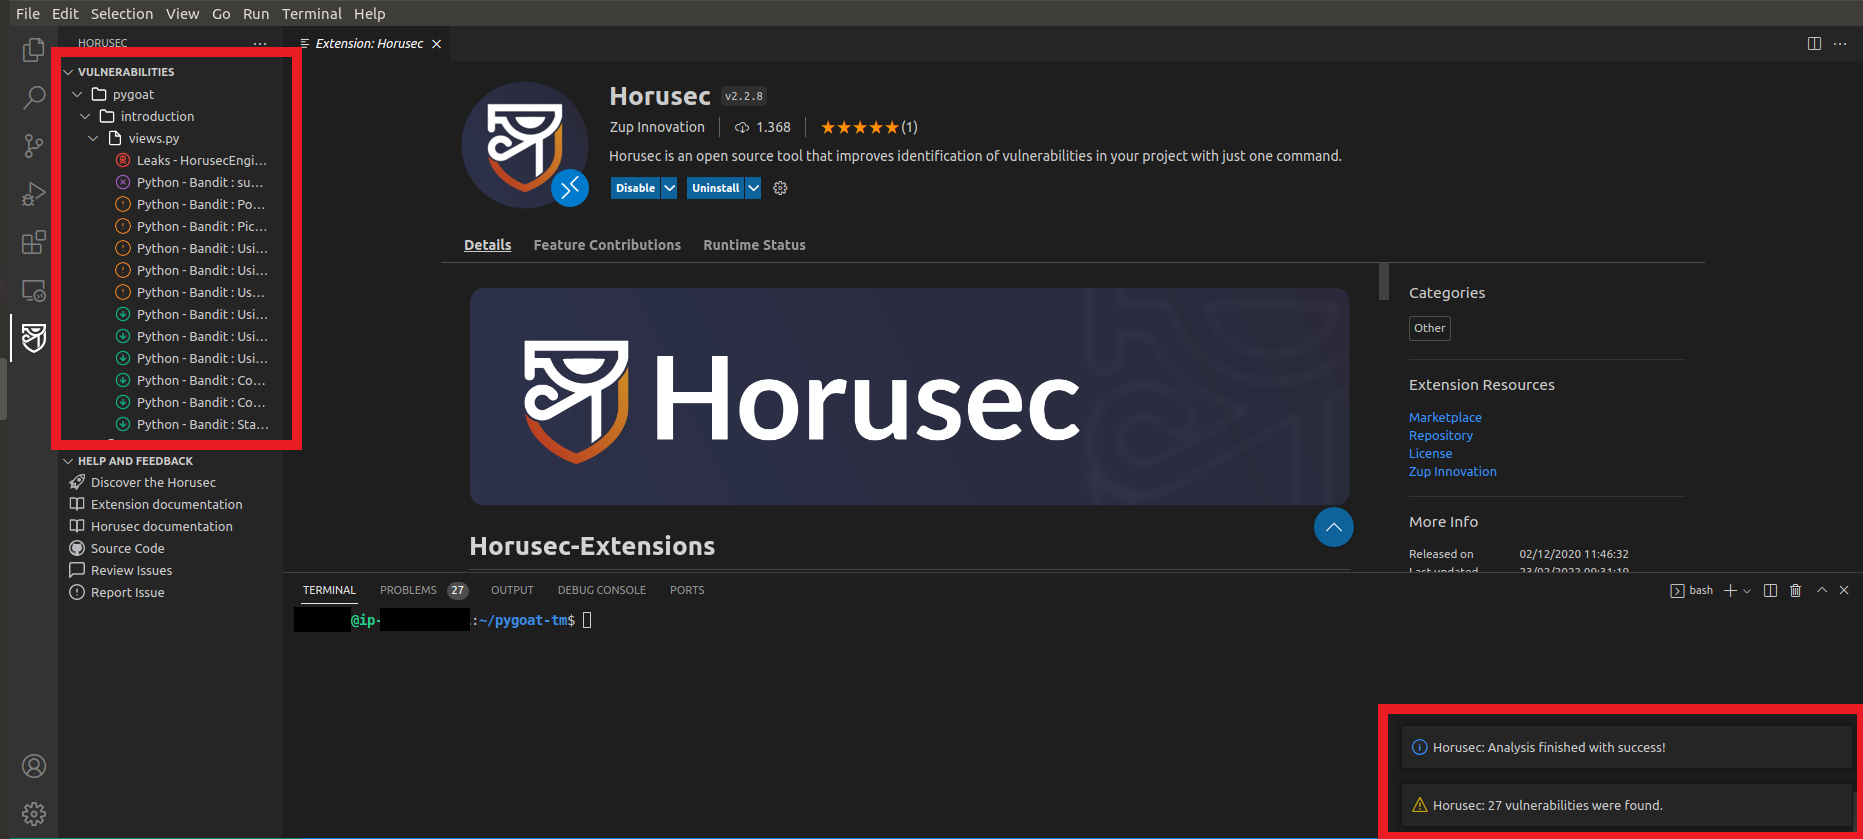
Okay, we found that our application has 27 vulnerabilities and we can explore what they are and where they are in the code!!
- Click on the first vulnerability Leaks
- You will be redirected to the location in the code where the vulnerability is
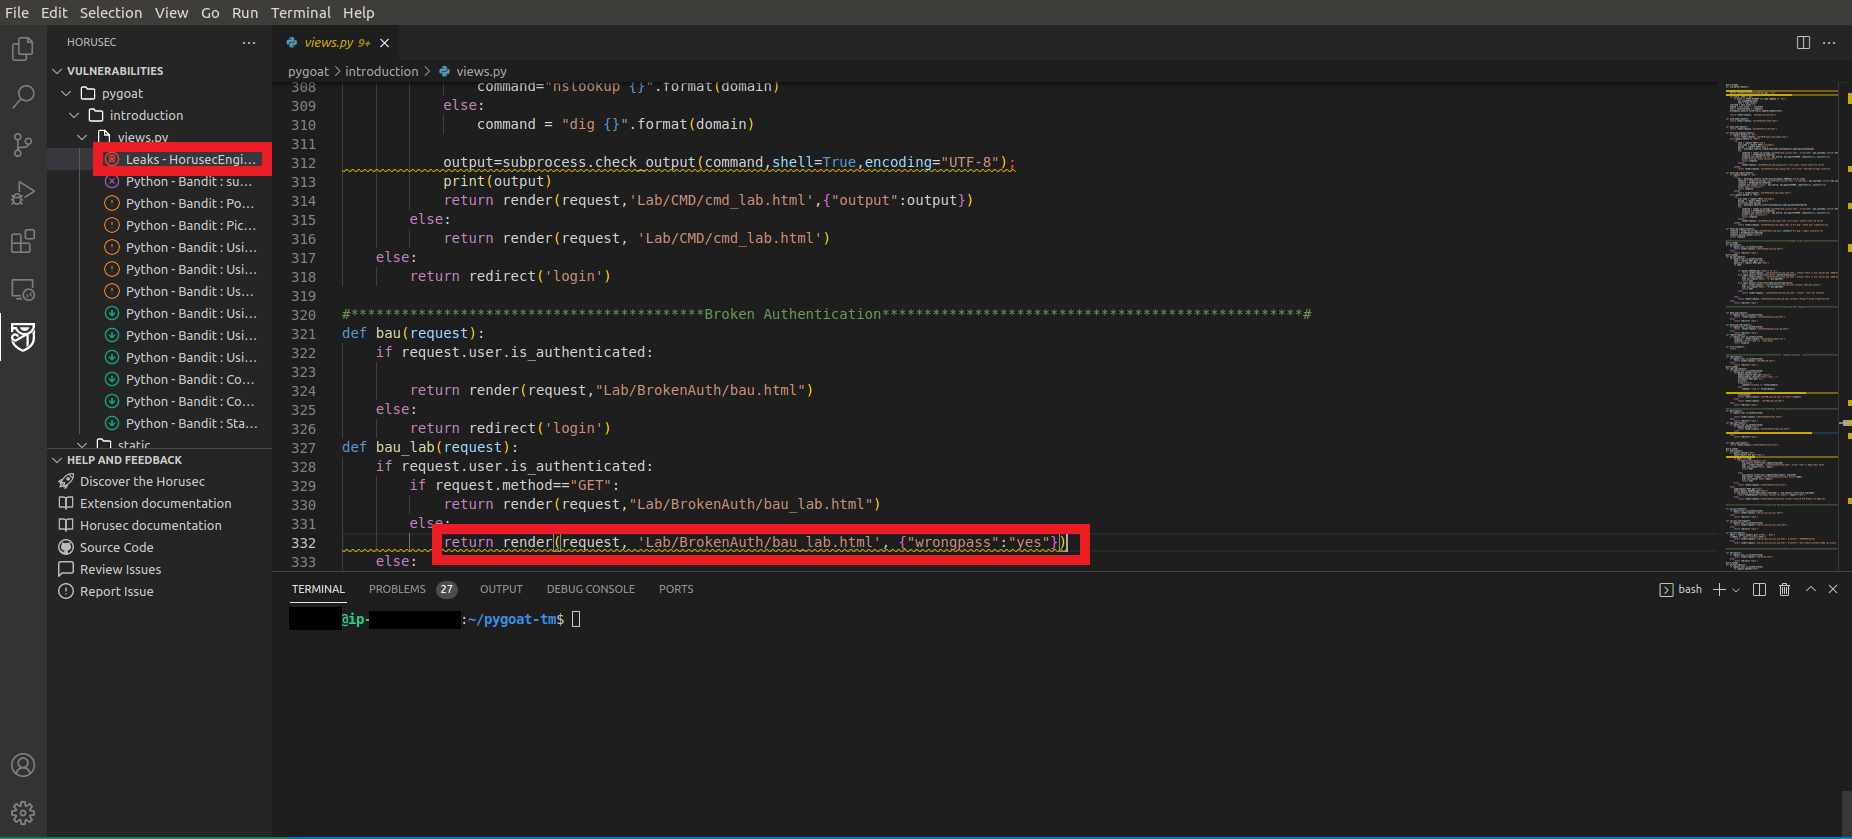
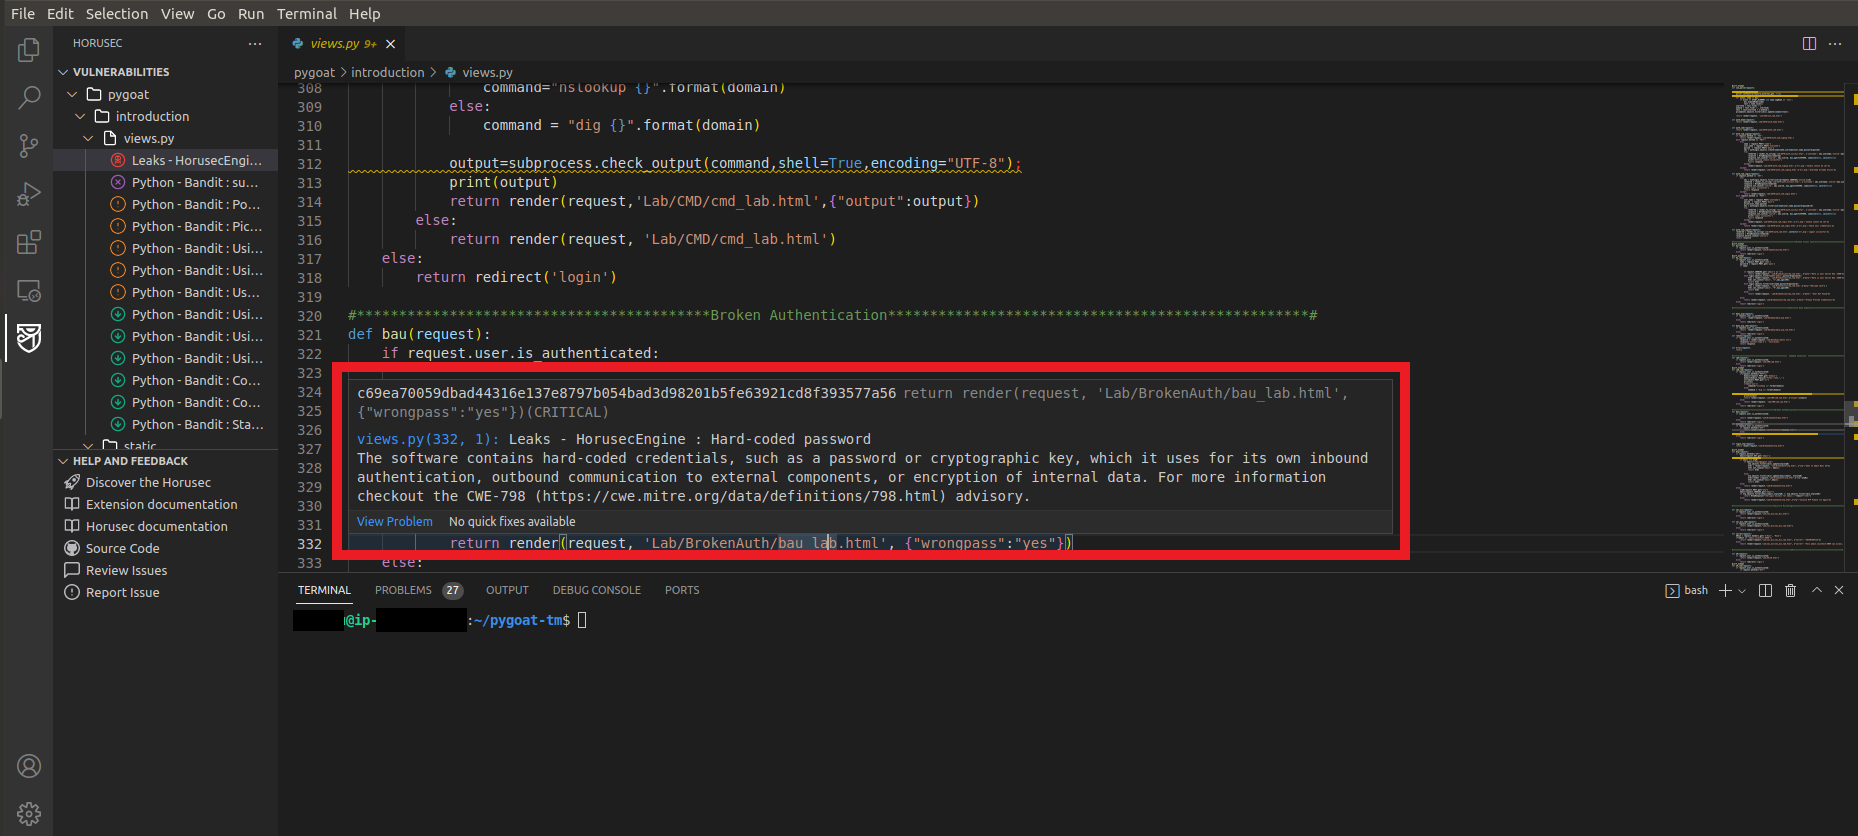
- You can hover the mouse over the line of code indicated
- And there will be more information about the vulnerability
Introducing Trend Micro Cloud One™ – Open Source Security by Snyk
Cloud One - Open Source Security by Snyk provides detection and management of open source vulnerabilities in source code repositories and build pipelines, supporting developers to build stronger applications.
Here we will use a VS Code Extension and check our 3rd party open source libraries to see if there are any vulnerabilities in them.
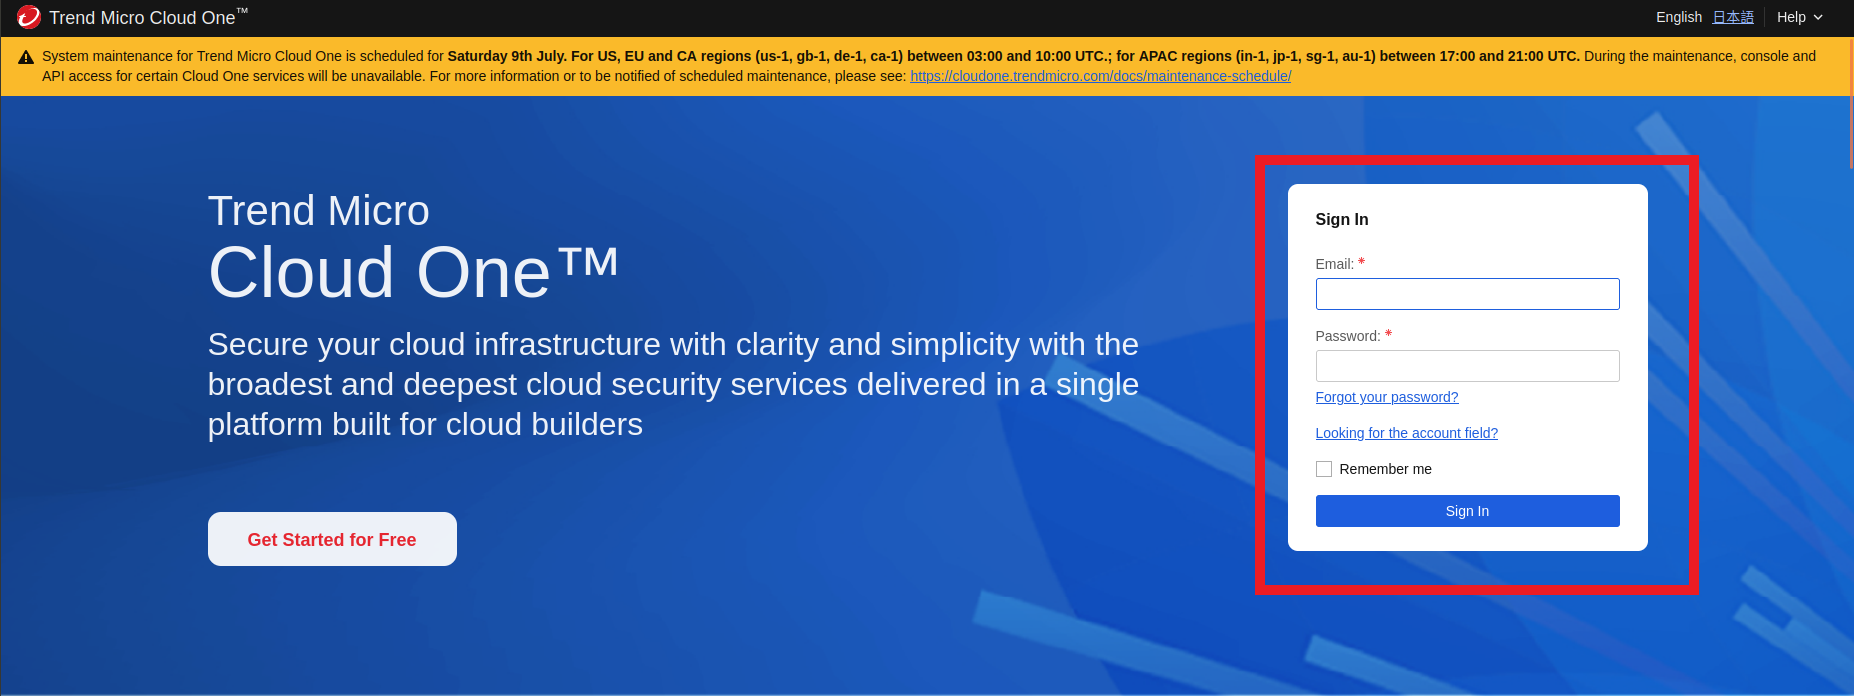
A Cloud One Account is required to proceed. If you have not registered for a Cloud One account please go here.
1. Let’s log in to Trend Micro Cloud One
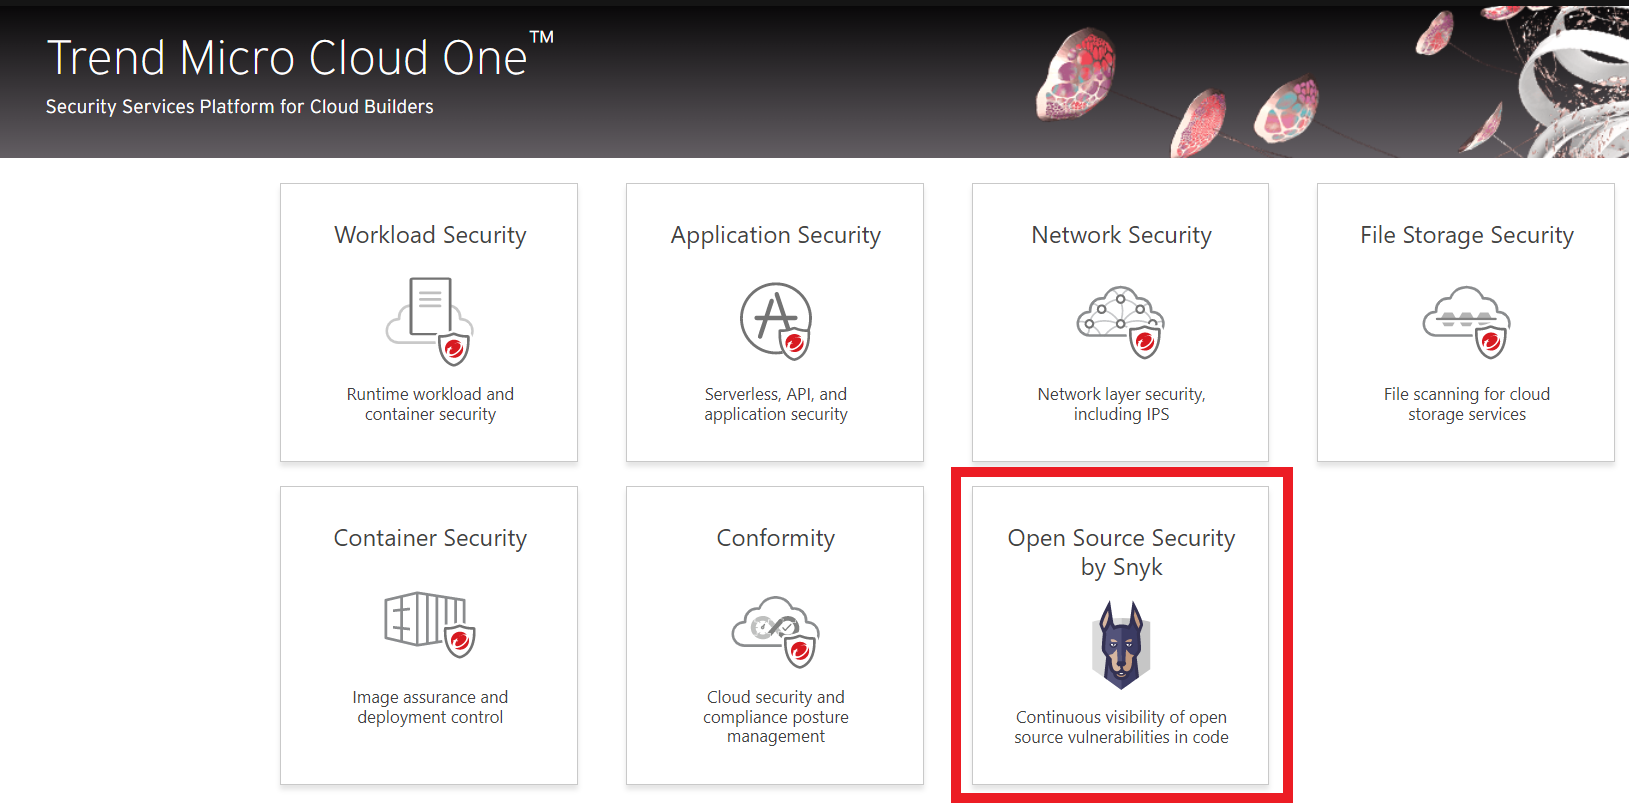
2. Click the Open Source Security by Snyk box
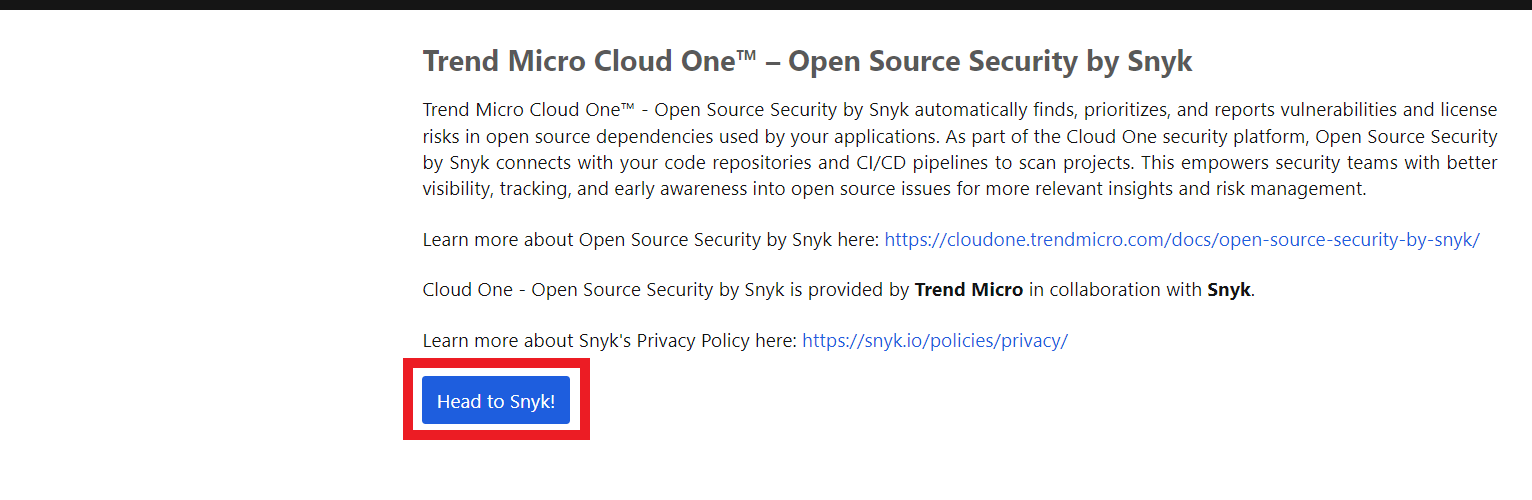
3. Clique em Head to Snyk!
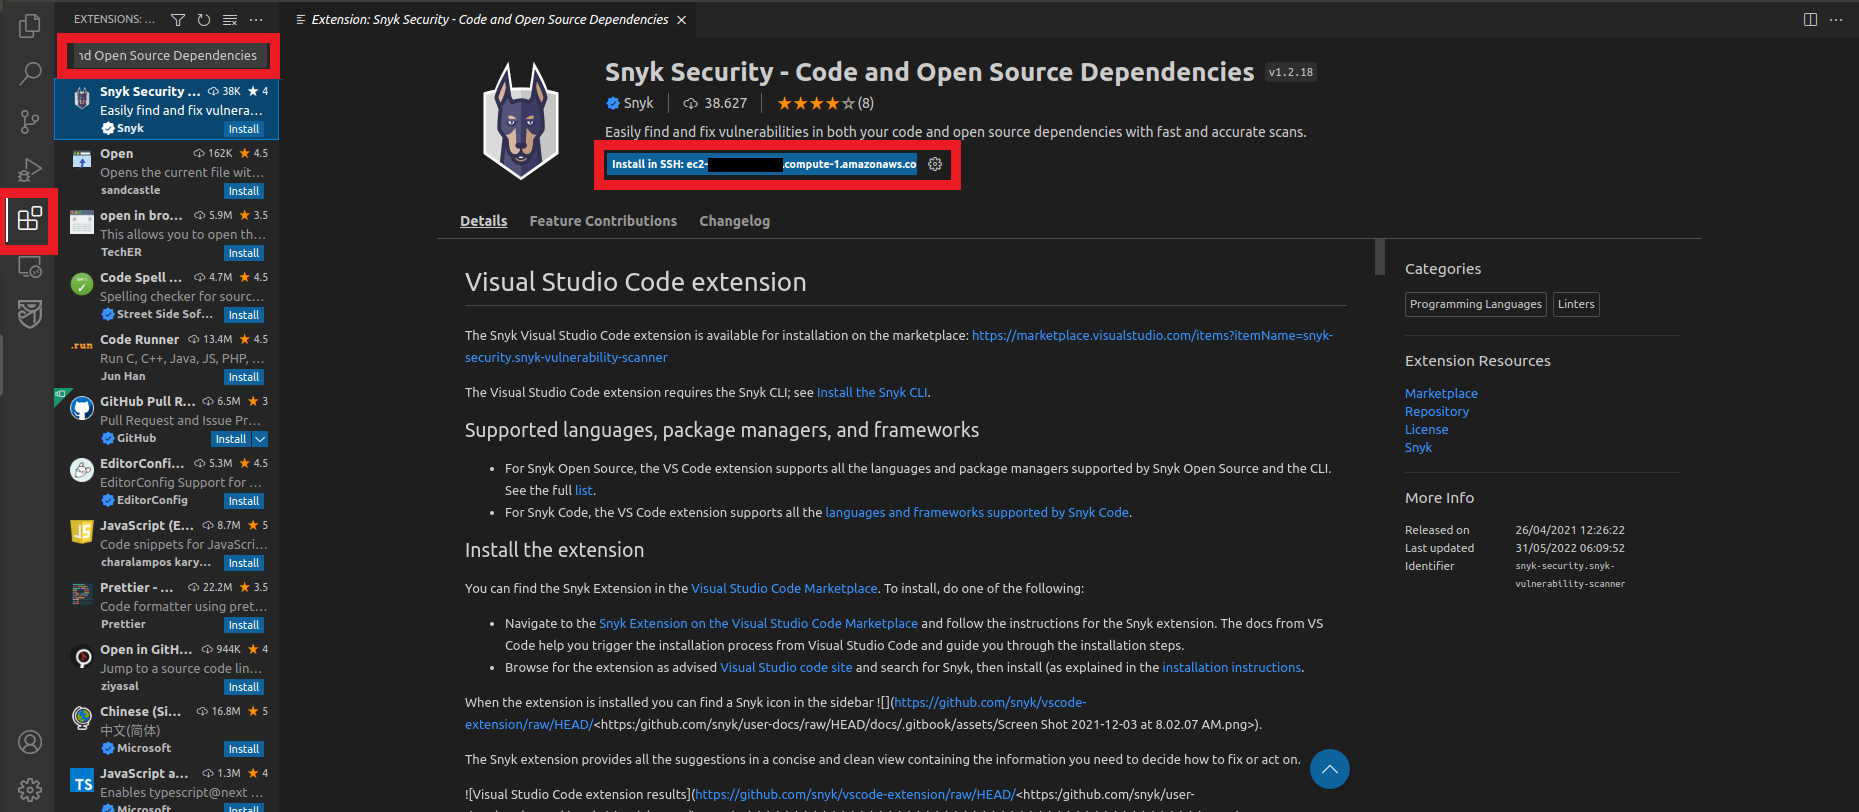
4. Go to VS Code
- Click on extensions
- Search for
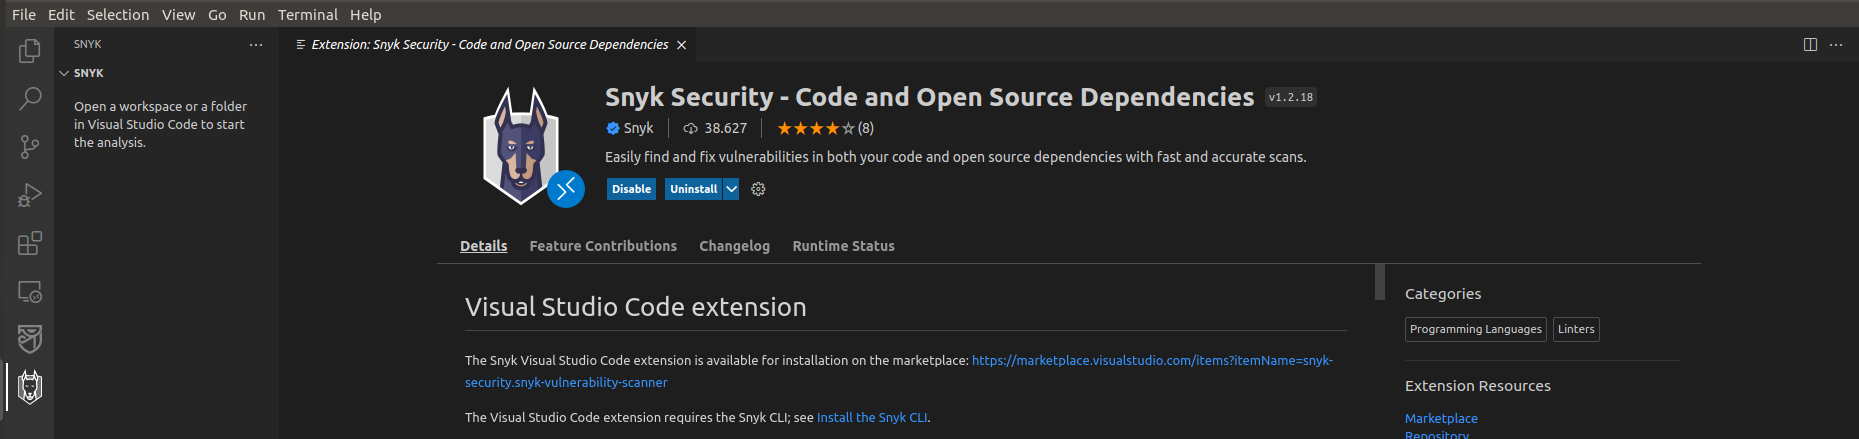
Snyk Security - Code, Open Source Dependencies, IaC Configurations - Click on install in the ec2 machine
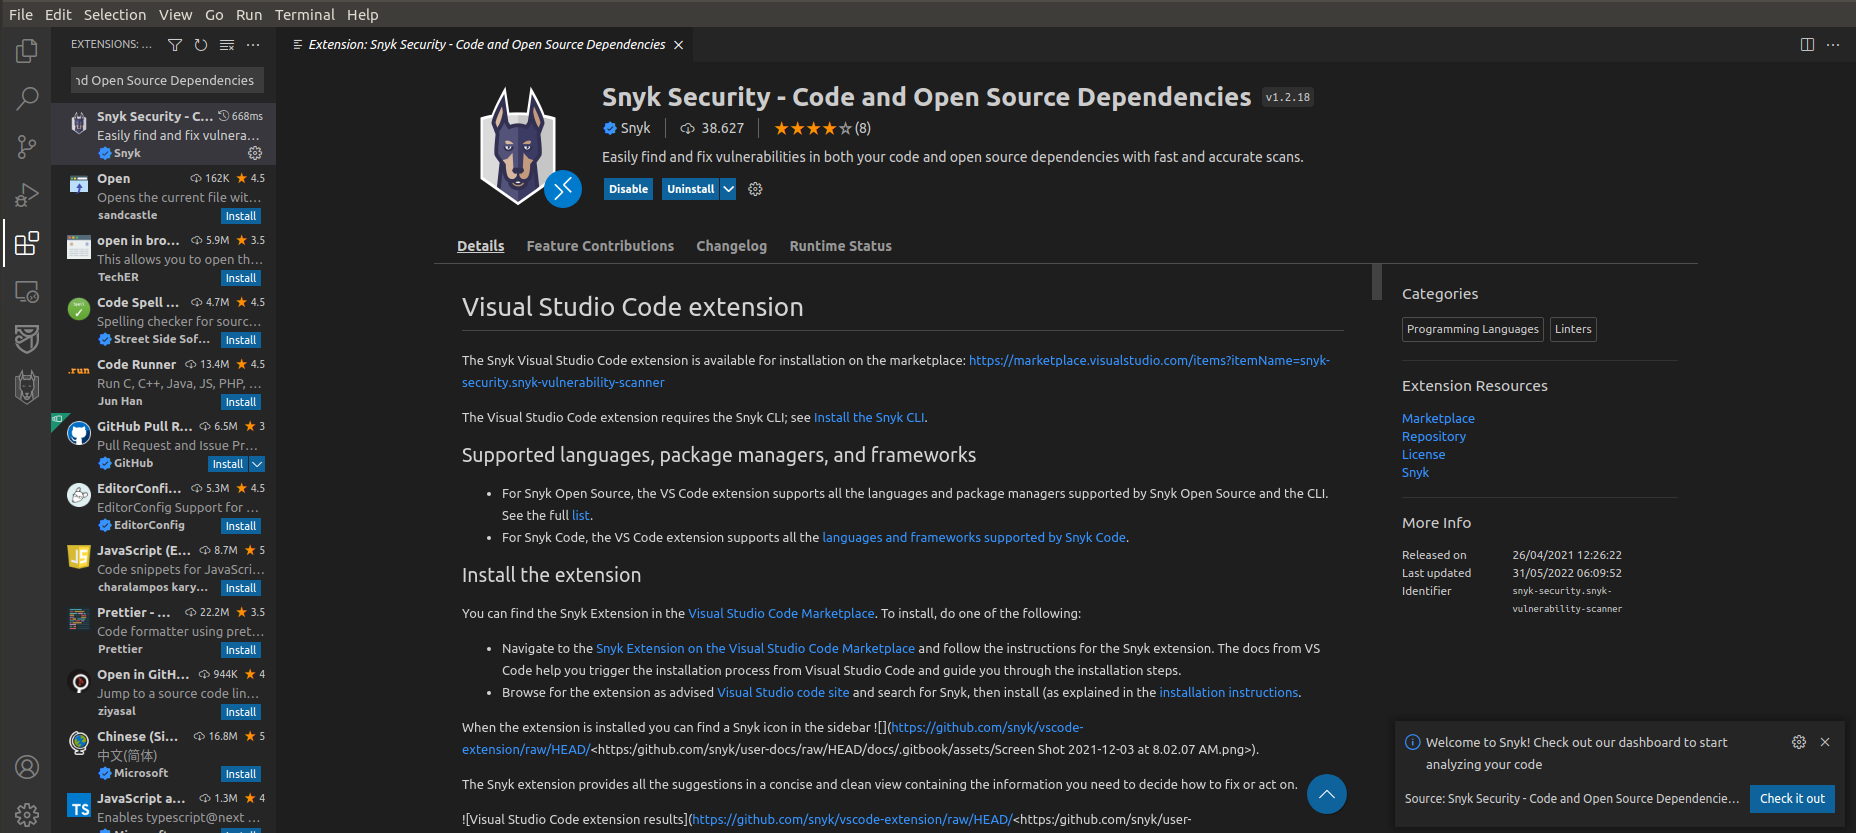
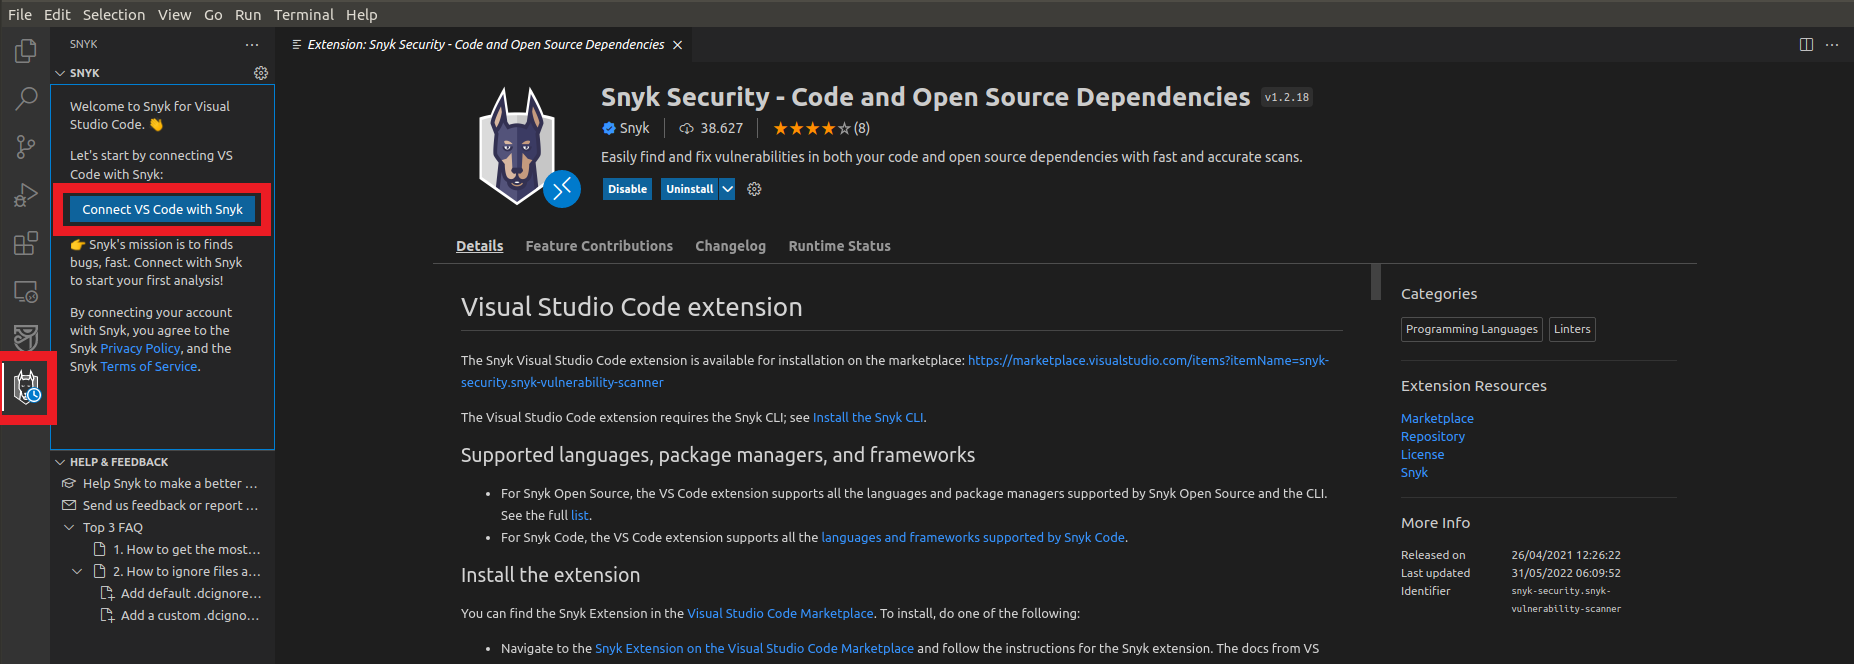
5. Click on the Snyk Extension icon in the left column
- Click on the button Connect VS Code with Snyk
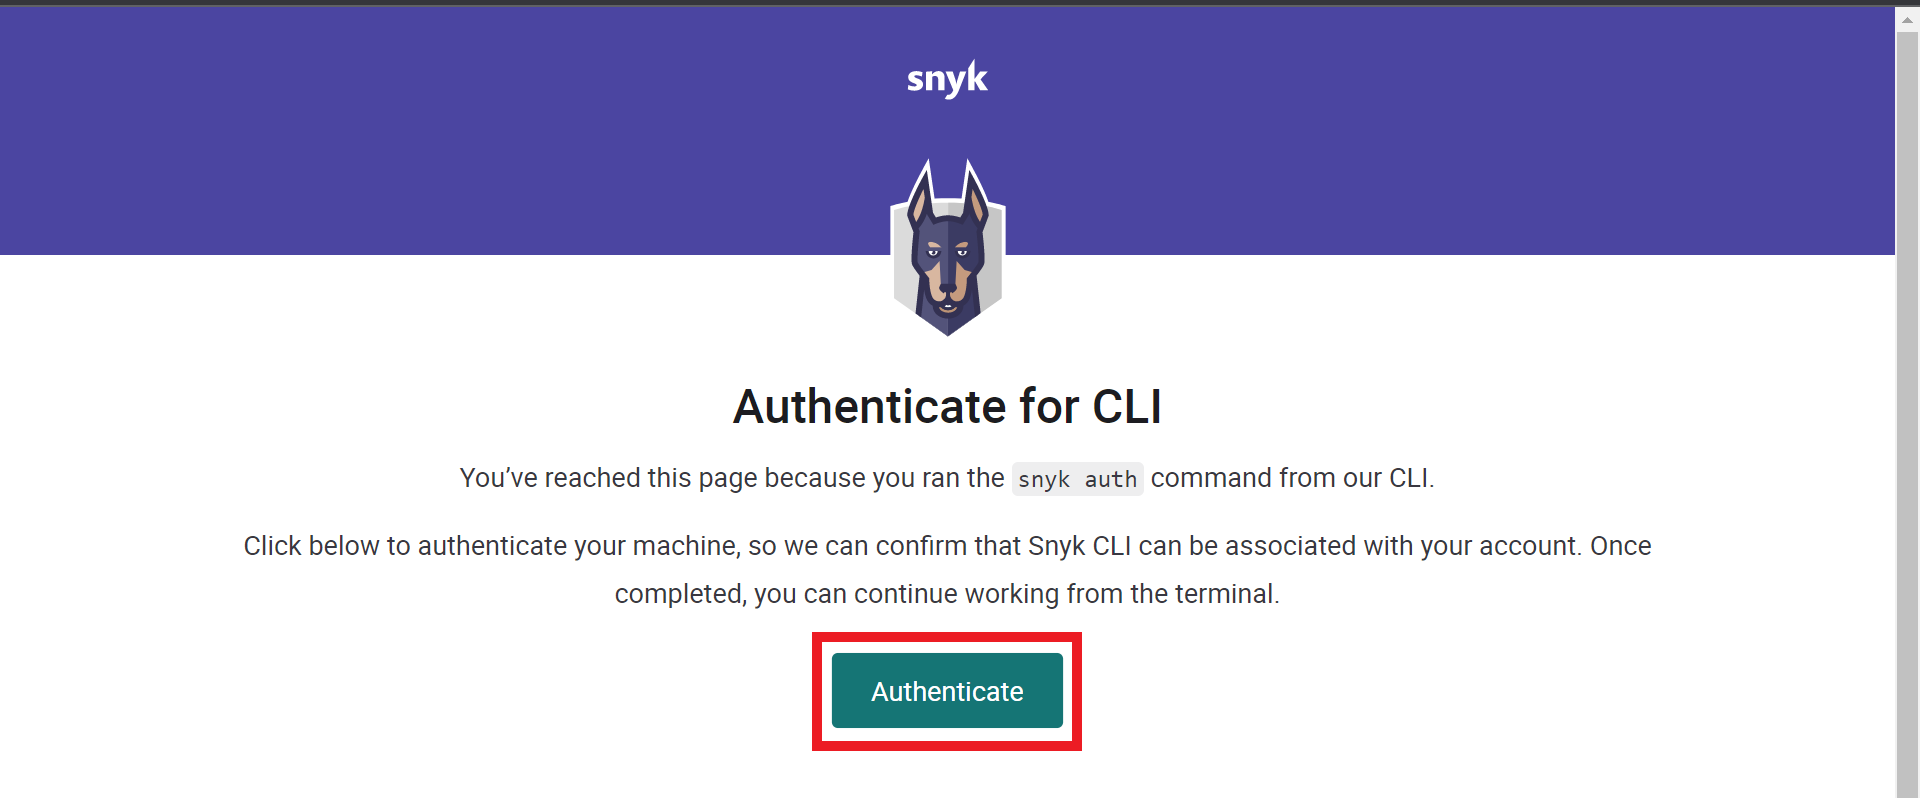
6. You will be redirected to authorize the connection
You have to be logged in to Cloud One for this screen to appear
- Click on Authenticate
5.1. In case of an error when authenticating through the browser
- Go to Open Source Security by Snky in your Cloud One account
- Click on your username in the upper right corner
- Click on the option Account Settings
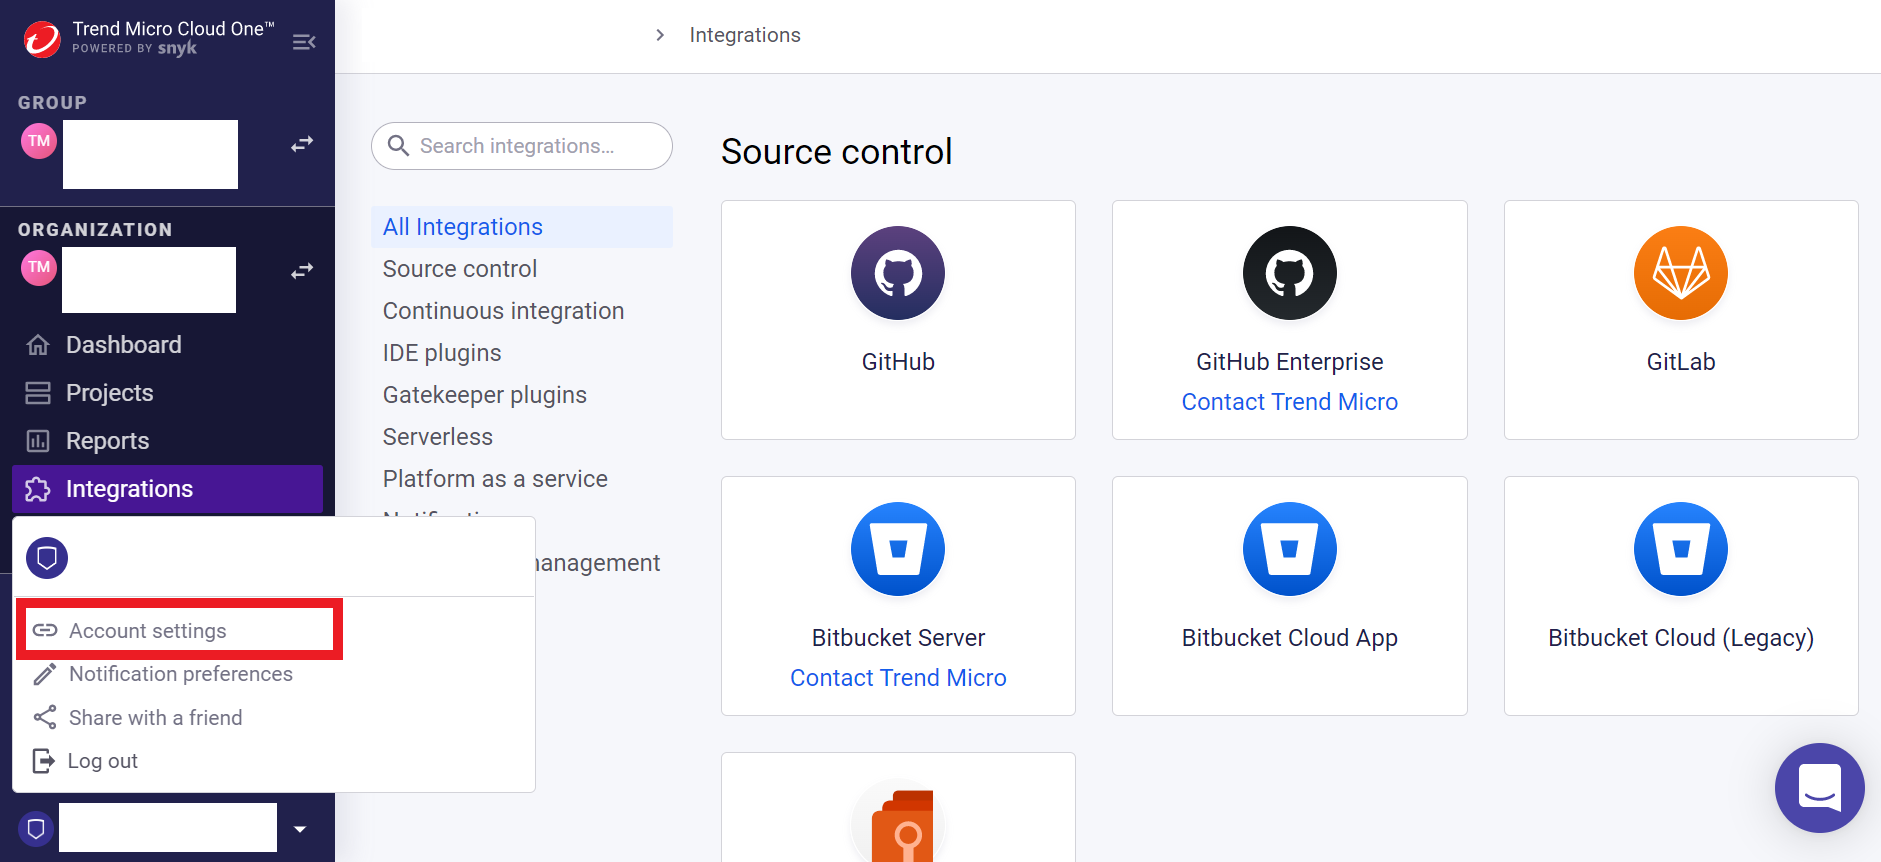
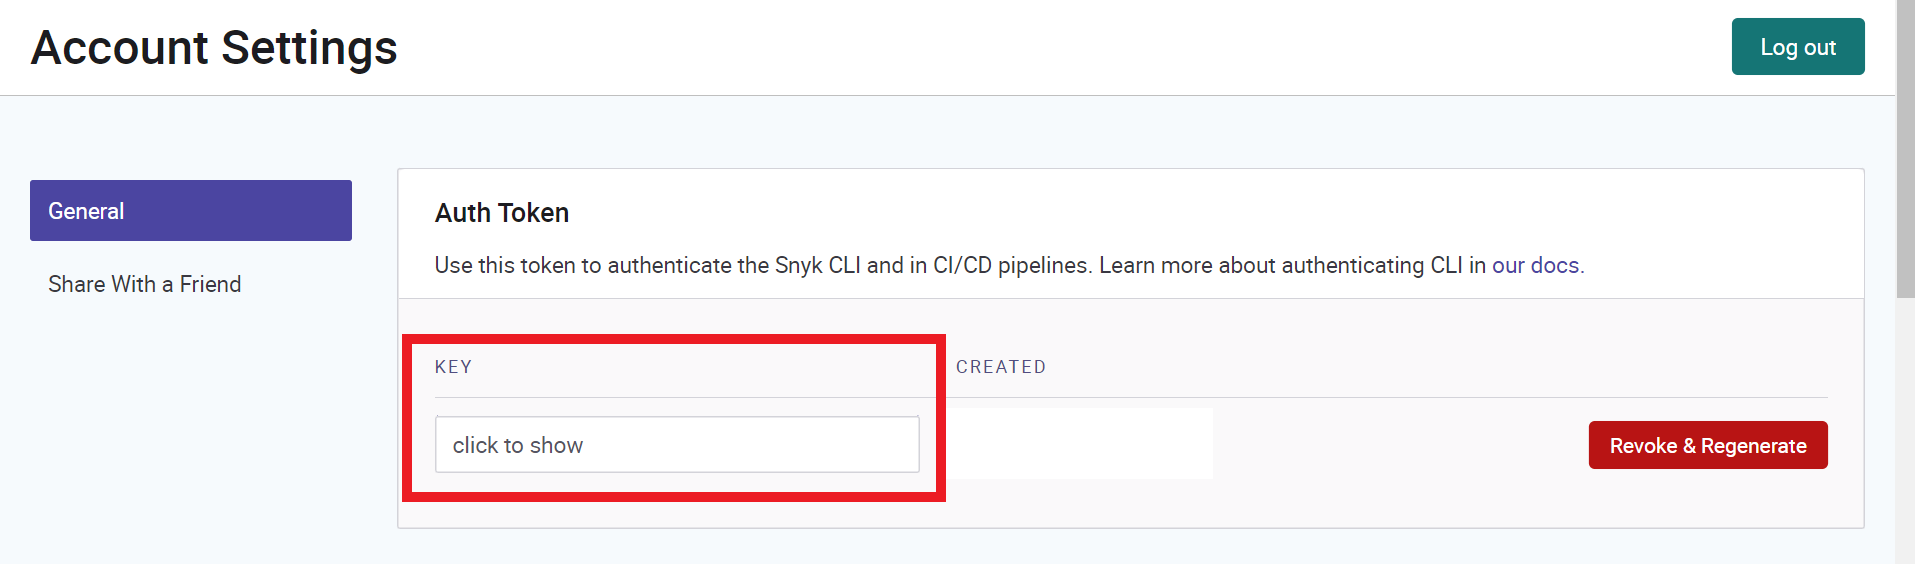
- in the written area Auth Token
- Click under key on the field click to show
- Copy your key
- Go back to VS Code
- Click on the F1 button on your keyboard or Ctrl+Shift+P
- Type the command
Snyk: Set Tokenand then press enter - Put your account token that you copied earlier


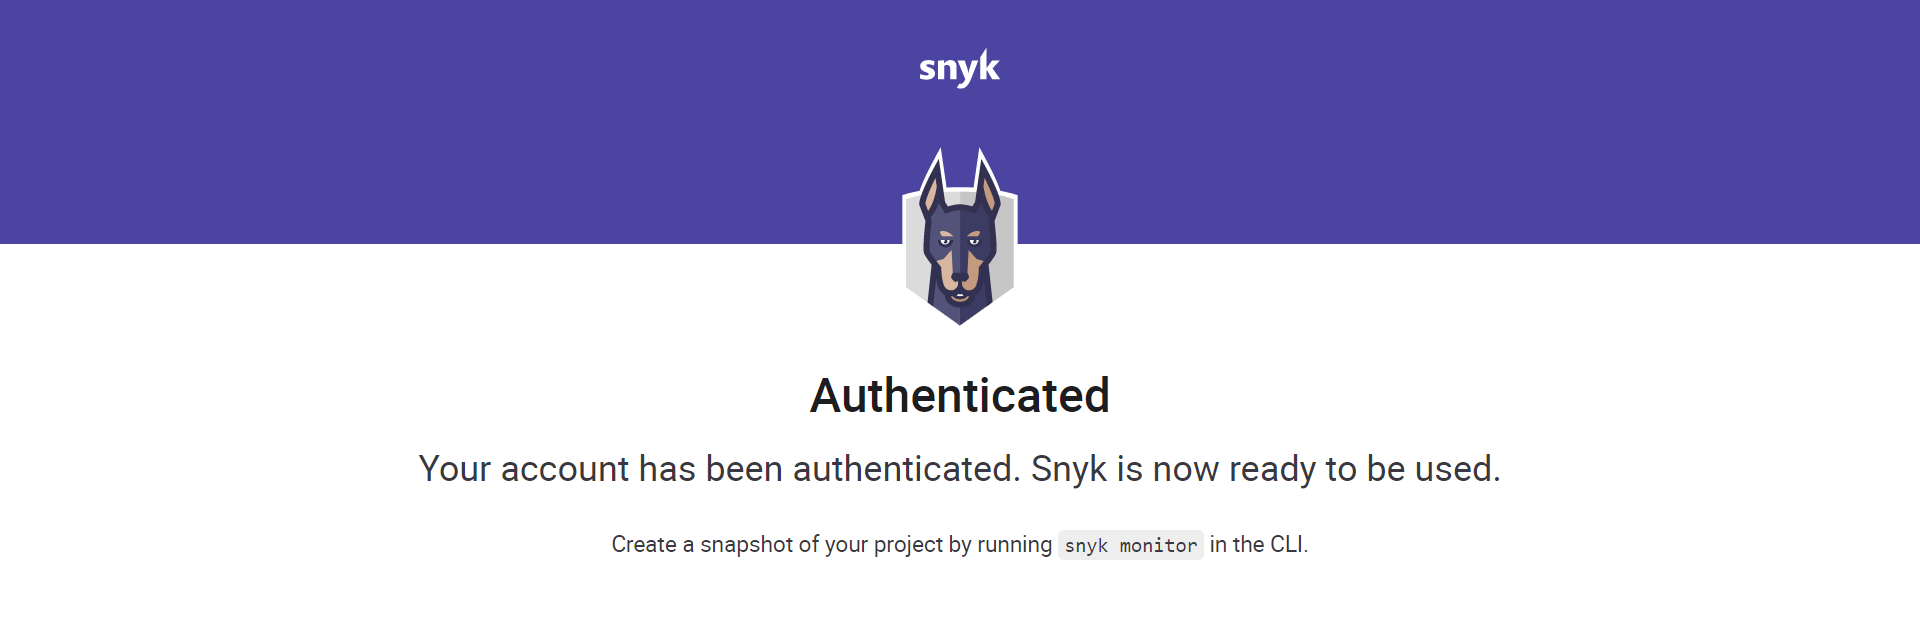
5.2. You will be logged in
5.3. If you have not yet opened your application directory
- Click on the button Explorer which is the first icon in the left column
- Click on the button Open Folder
- Click on the button pygoat-tm
- Click on the button Ok
- Wait for the directory to open in VS Code
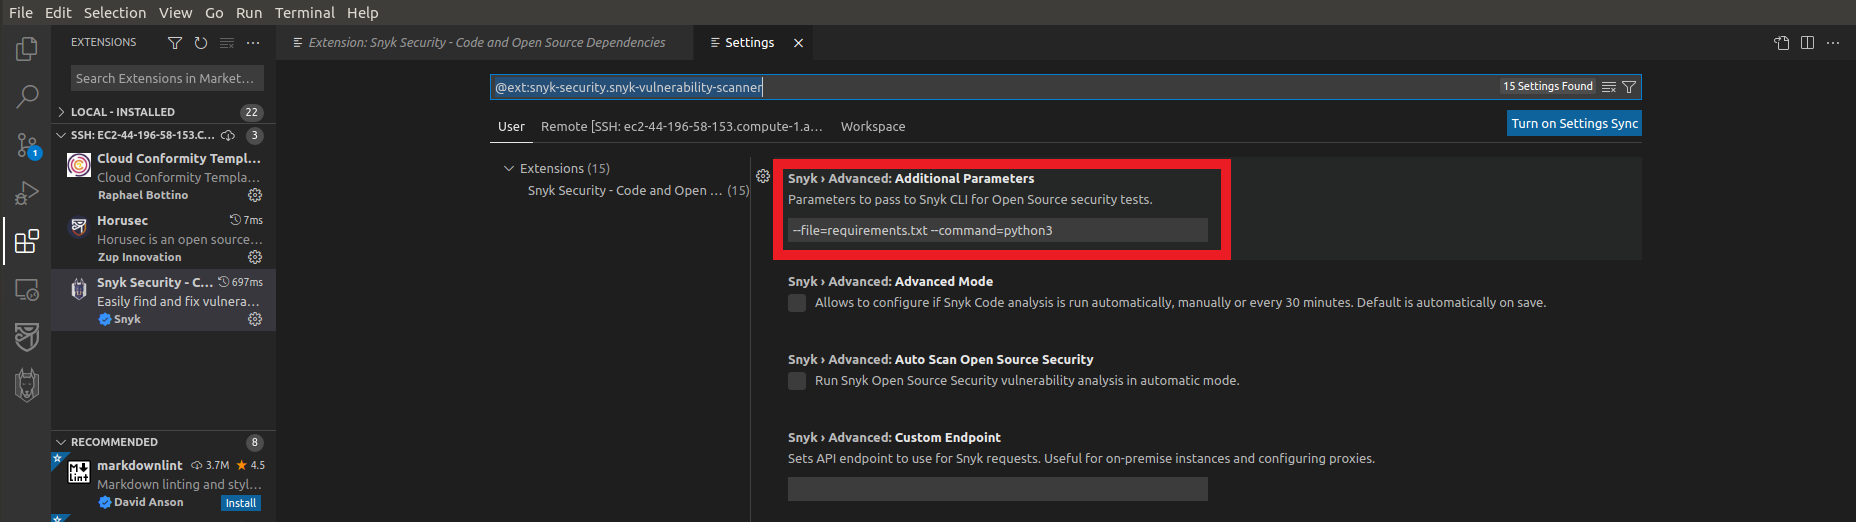
6. Let’s quickly configure the Extension
- Click on the Extensions icon
- Click on the Extension settings Snyk Security - Code and Open Source Dependencies already installed
- Click on the option Extension Settings
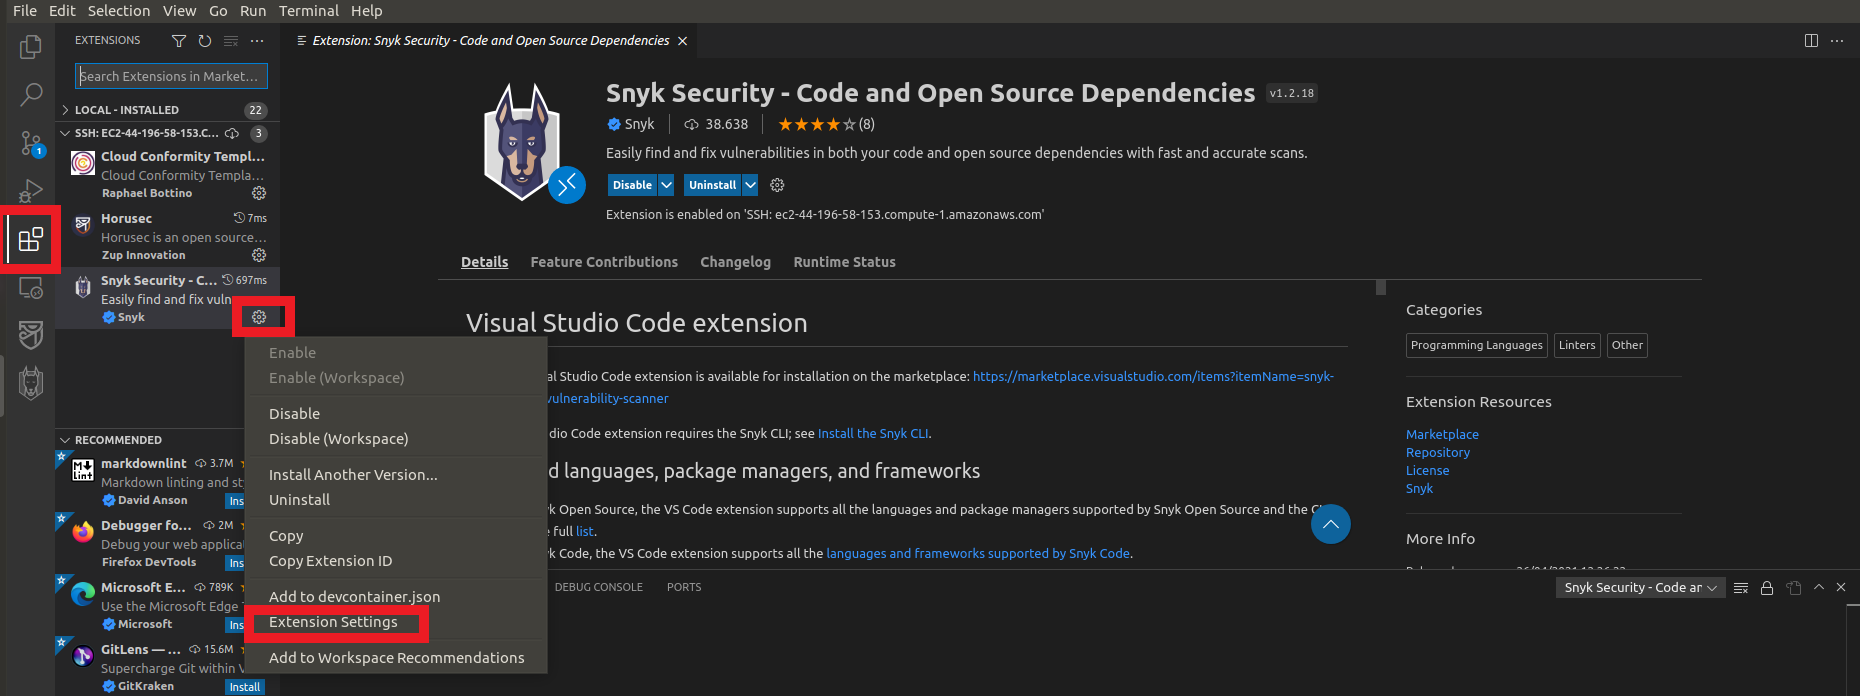
- In the field Snyk › Advanced: Additional Parameters
- Type the command
--file=requirements.txt --command=python3
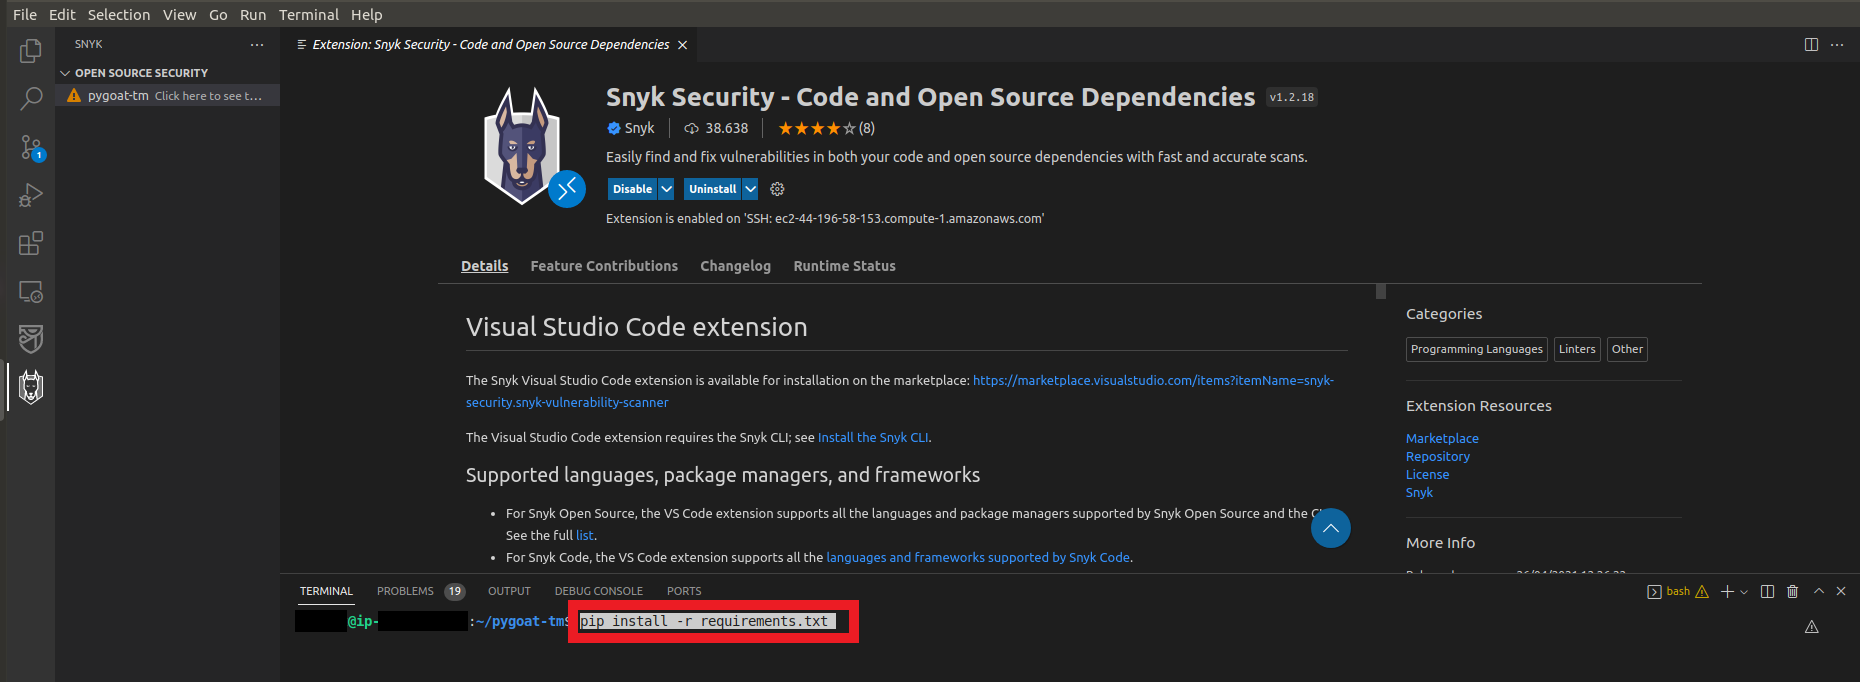
- Open a terminal in VS Code and type the command
pip install -r requirements.txt
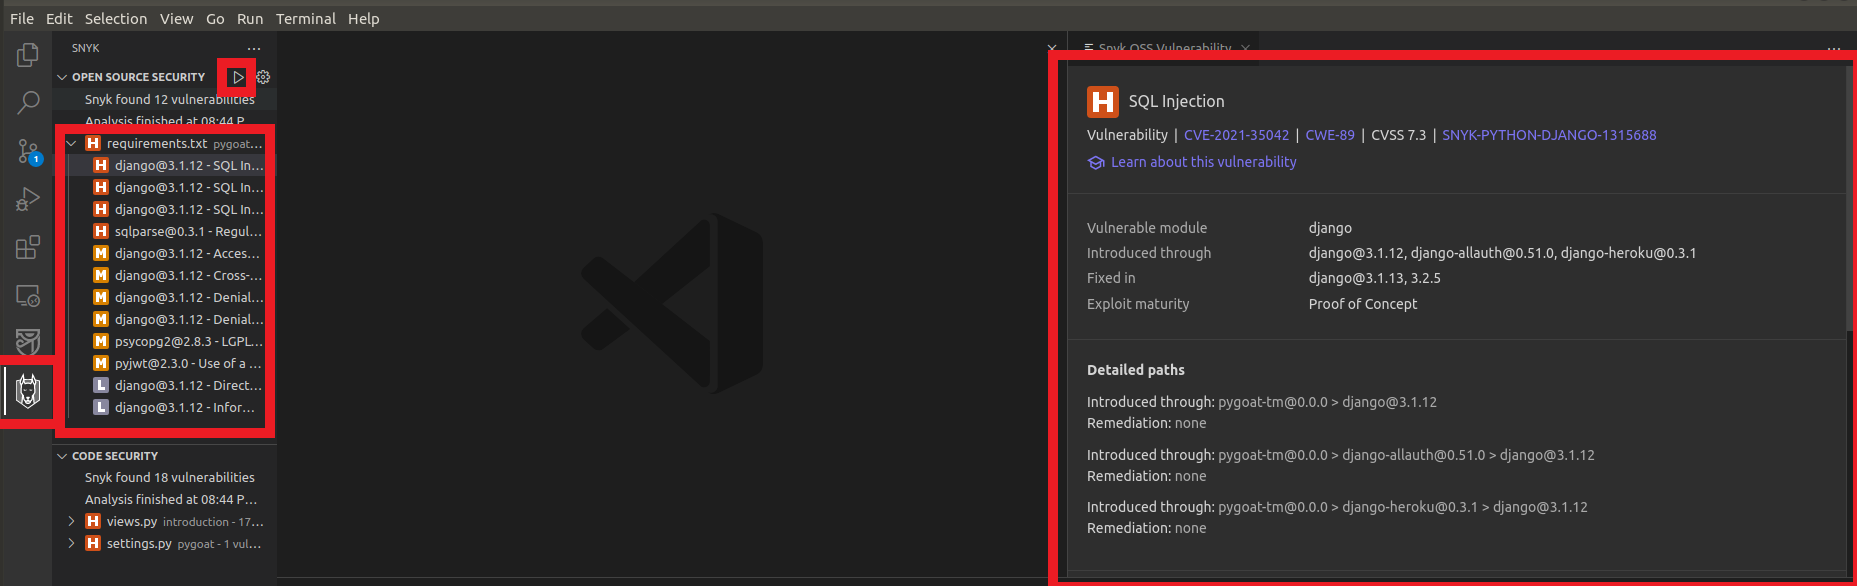
Okay, now we can see which dependencies have some kind of vulnerability
- Click on the Extension icon Snyk Security - Code and Open Source Dependencies in the left column
- In the first tab with name Open Source Security
- Click on the Play button
- Now you can see the vulnerabilities by double clicking on it
Introducing Trend Micro Cloud One™ – Conformity
Cloud One - Conformity is a cloud native service that helps us avoid cloud service misconfigurations. With Conformity, we can achieve continuous security, compliance, and governance for our multi-cloud environment.
In this part we will scan the Cloud Formation Template of the infrastructure that will host our application.
Let’s scan our templare in VS Code itself via plug in.
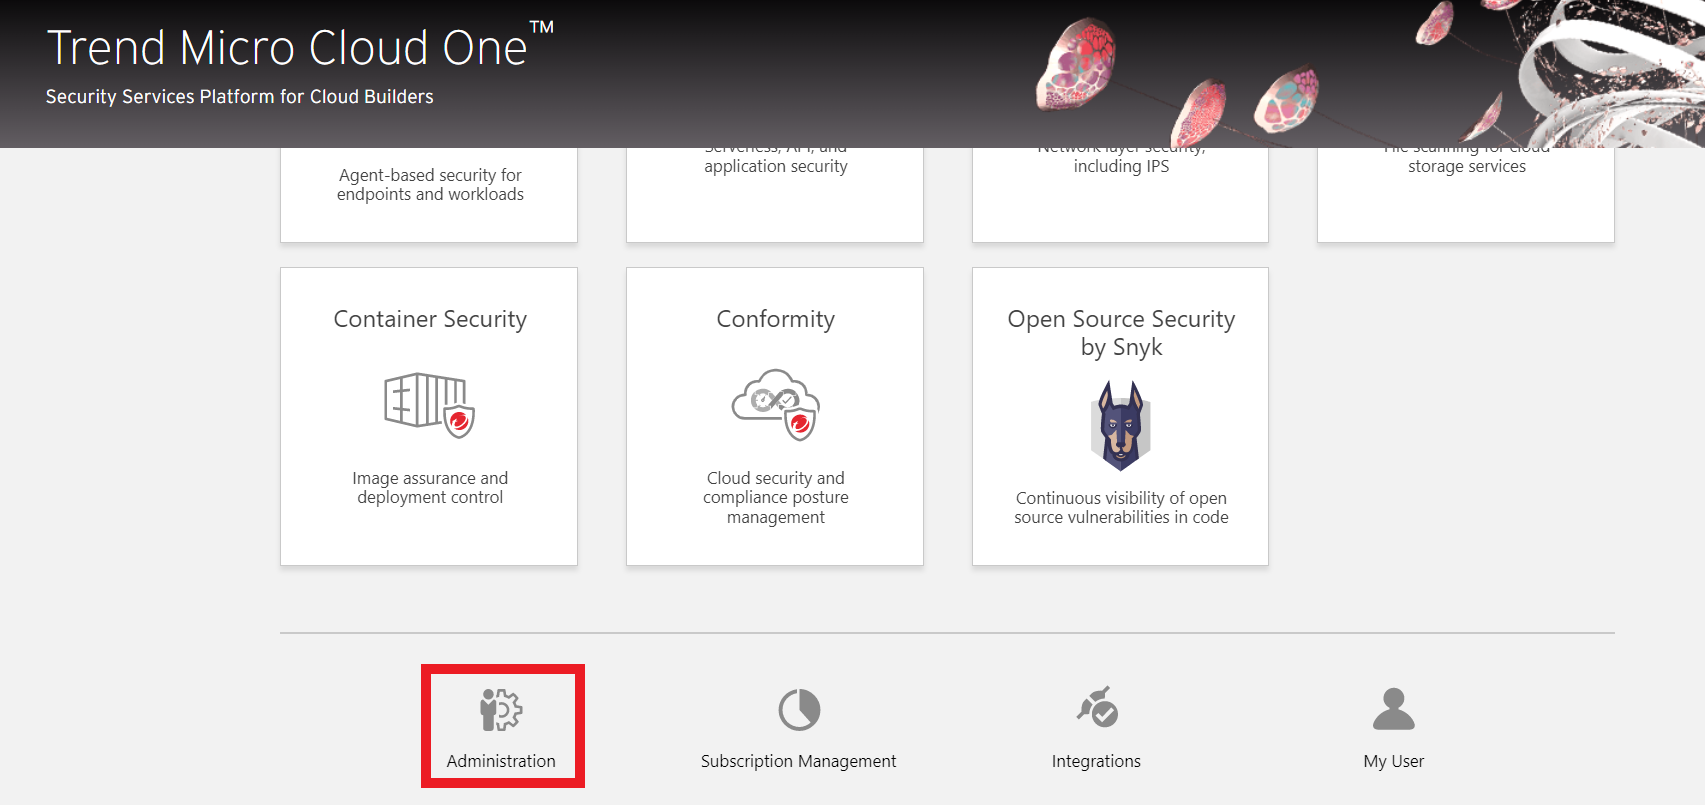
1. Let’s log in to Trend Micro Cloud One
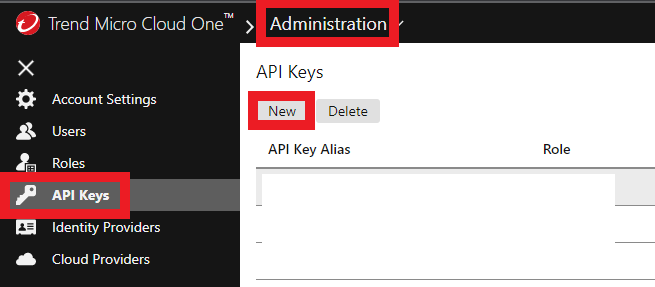
2. Click the Administration box
2. Create your API Key
- Click on API Keys
- Click on New
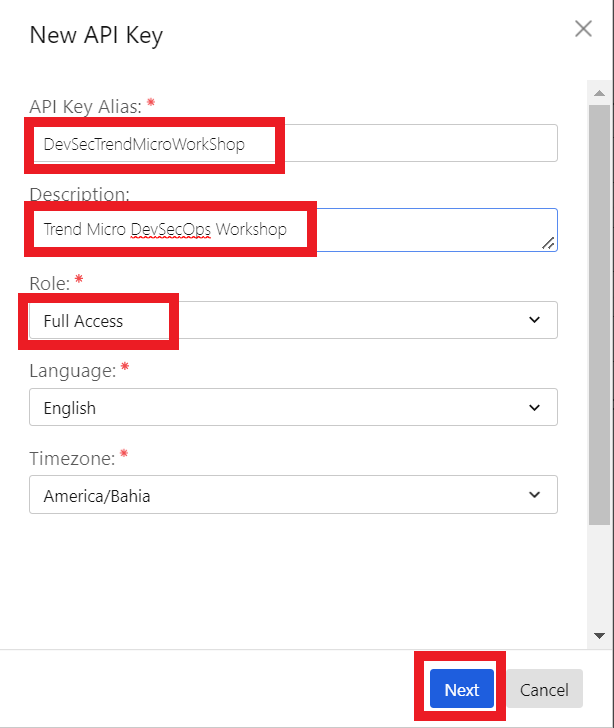
3. Configure the API Key
- Give your API Key a name
DevSecTrendMicroWorkShop - A Description if you want
Trend Micro DevSecOps Workshop - For this workshop we can choose Full Access
- We can leave Language as English
- And choose what your appropriate Timezone is
- Click on Next
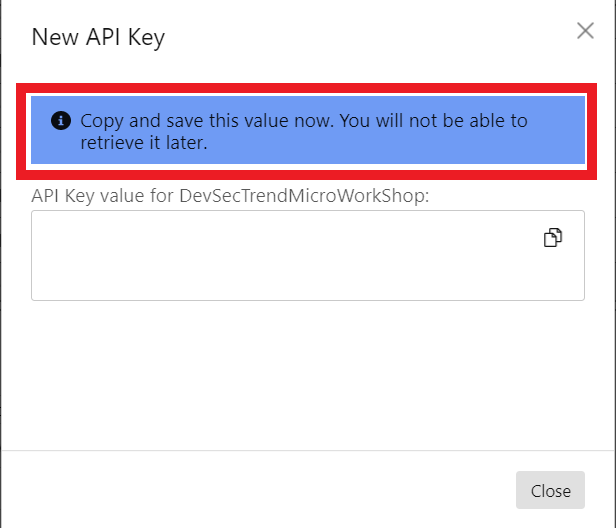
4. Copy and Store your API Key
Caution: You won't be able to retrieve the Key later!
5. Go back to VS Code
- Click on the Extension icon in the left column
- Type in the search box
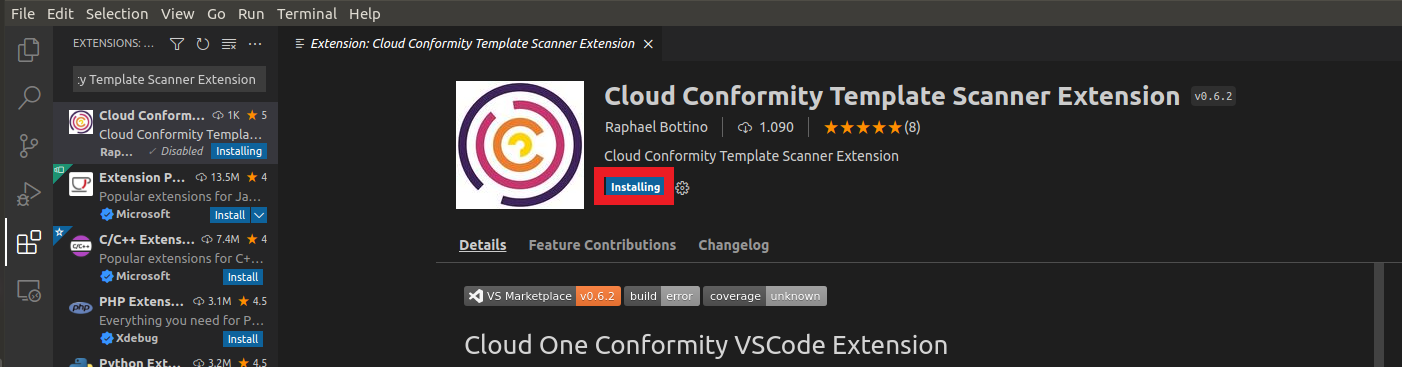
Cloud Conformity Template Scanner Extension - Click on install in the ec2 machine
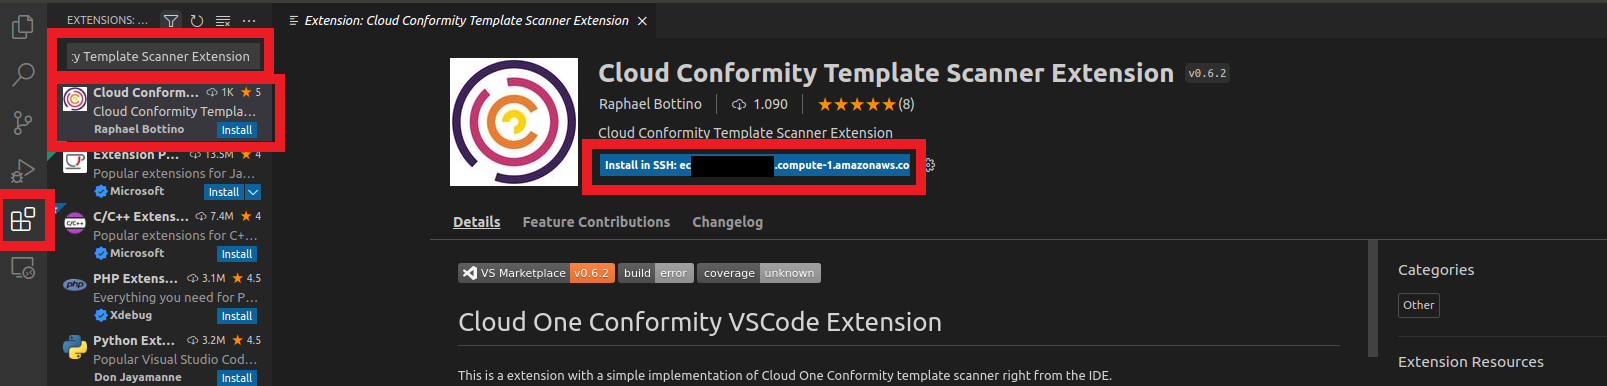
- Wait until installation is complete
6. Let’s configure the Extension
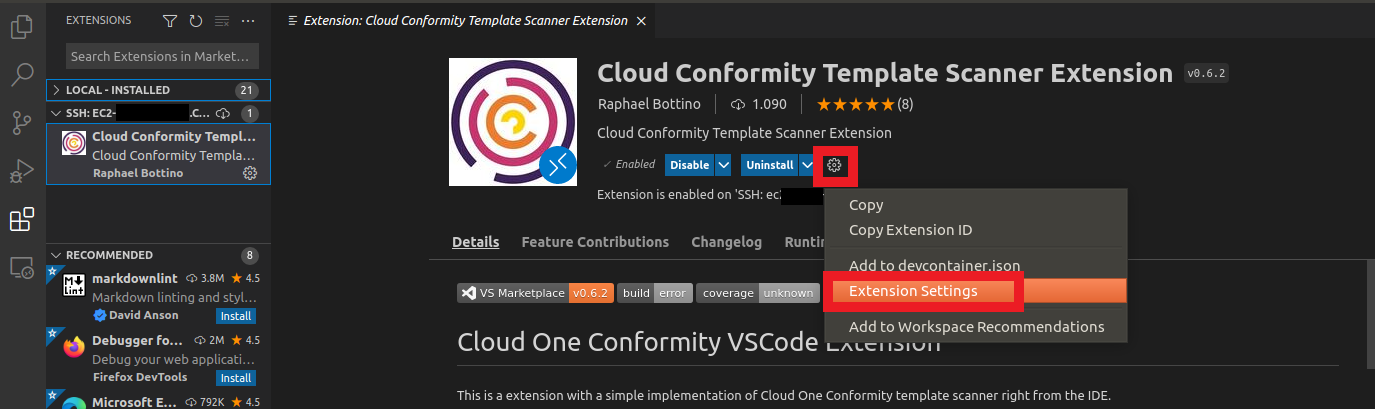
- On the same page click on the Settings icon
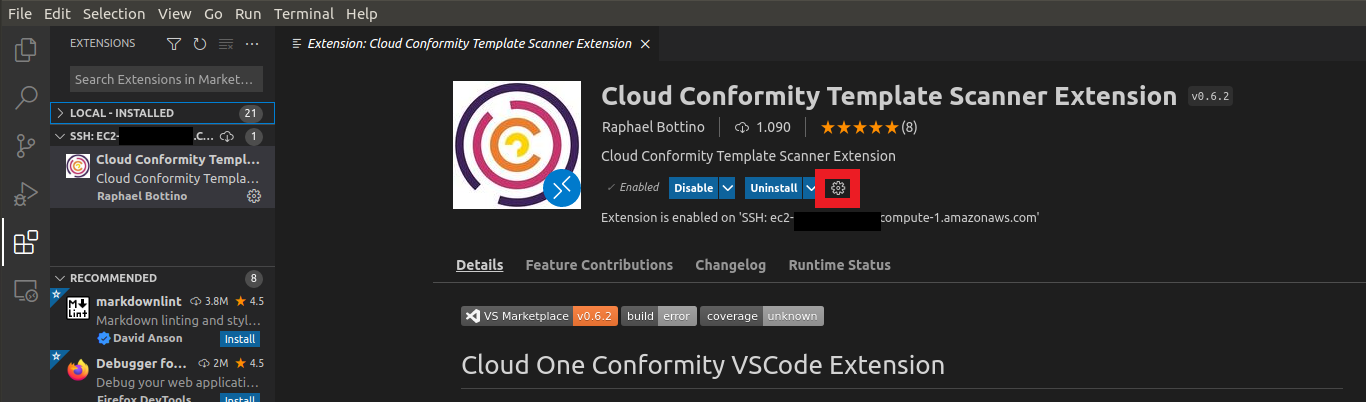
- Click on Extension Settings
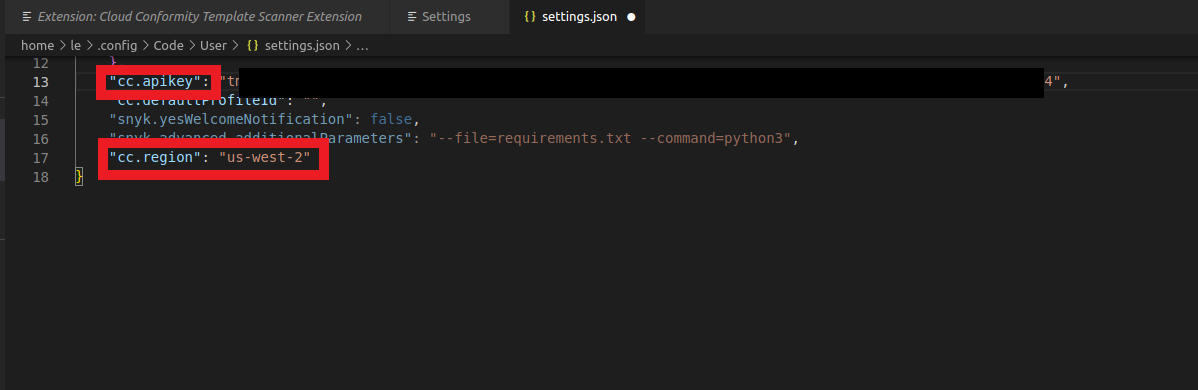
- In the Cc:ApiKey area
- Click on Edit in settings.json
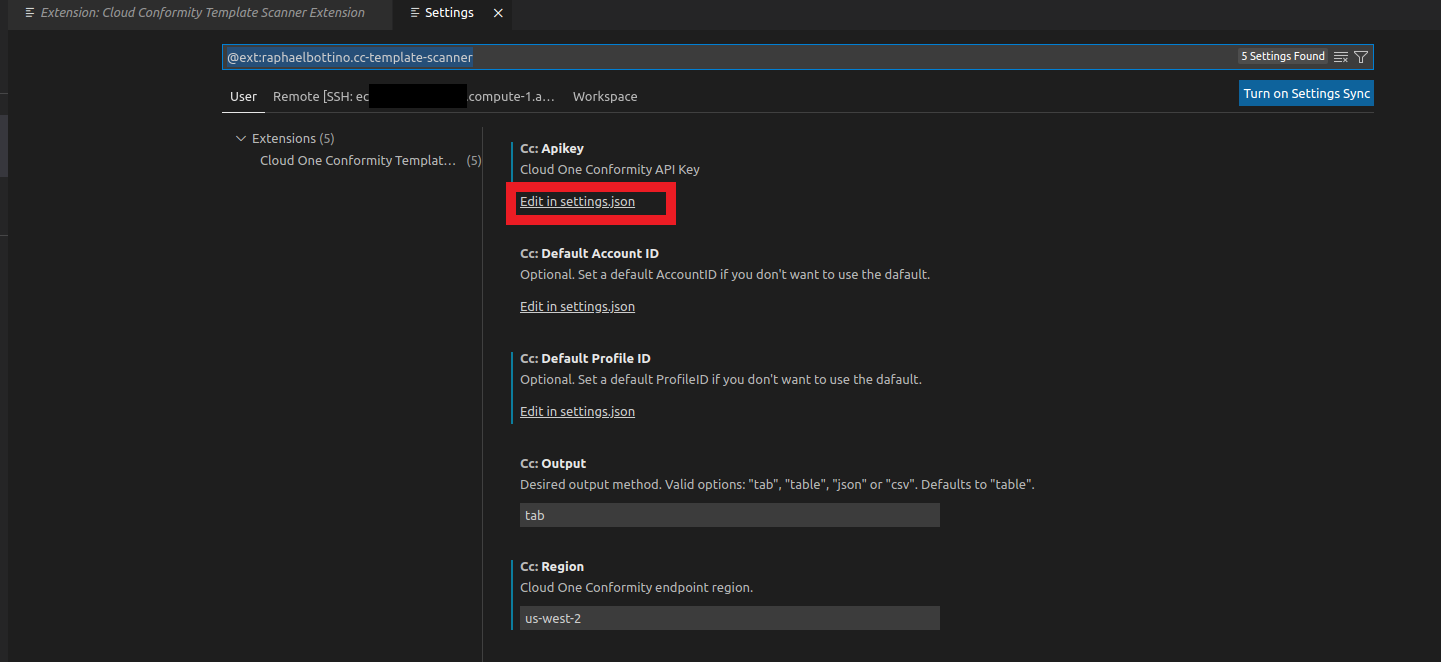
- Paste your API Key that you generated in the previous step in Cloud One
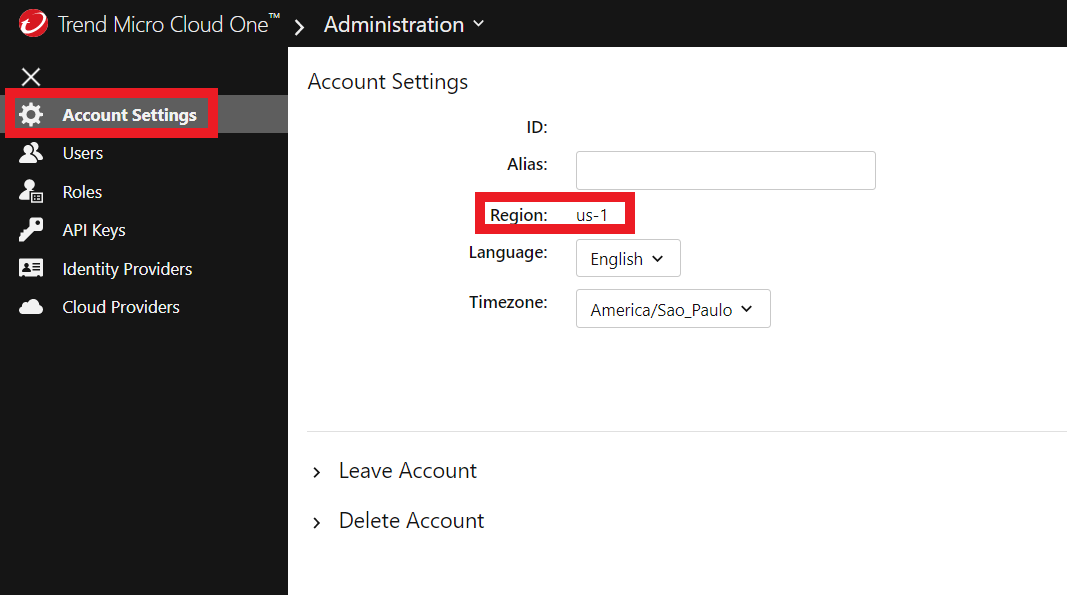
6.1. Check which region your Cloud One account is in
- Make sure which Cloud One region you are in
- To see which region your Cloud One account is in
- Go to the Cloud One console
- Click on User Management
- Click on Account Settings
- And your region will appear in Region
- Here the region of this account is in us-1
- When we configure our VS Code Extension
- The region us-1 in the Cloud Conformity Template Scanner Extension will be us-west-2
7. Let’s check if our CFT that will deploy the infrastructure and will support our application has any issues
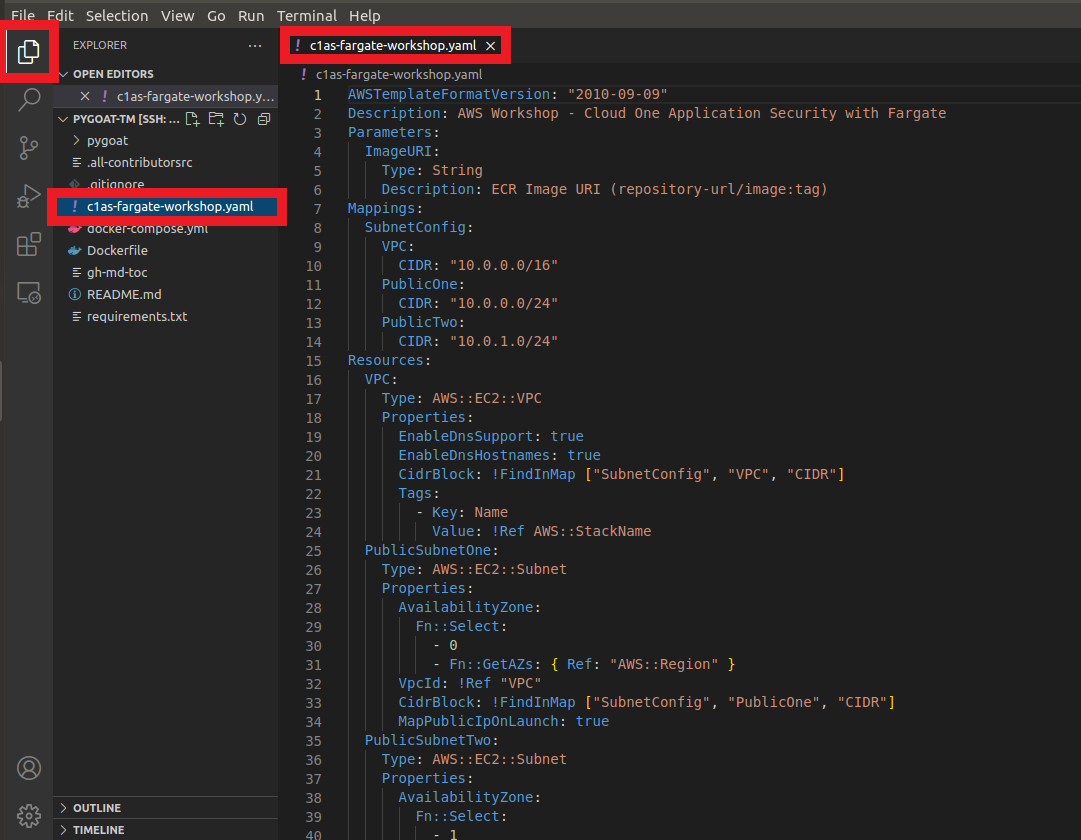
- Open the c1as-fargate-workshop.yaml file in VS Code
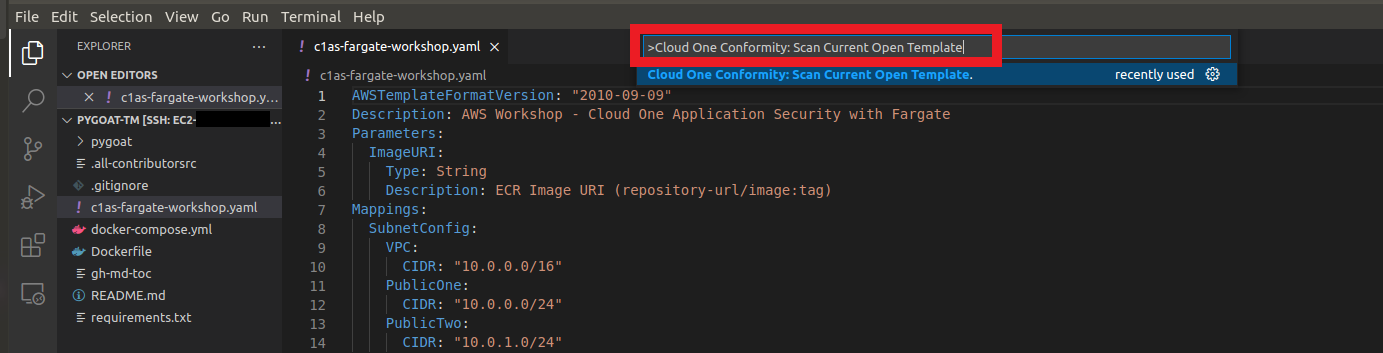
- Click on the F1 button on your keyboard or Ctrl+Shift+P
- Type
Cloud One Conformity: Scan Current Open Template - Click on the option
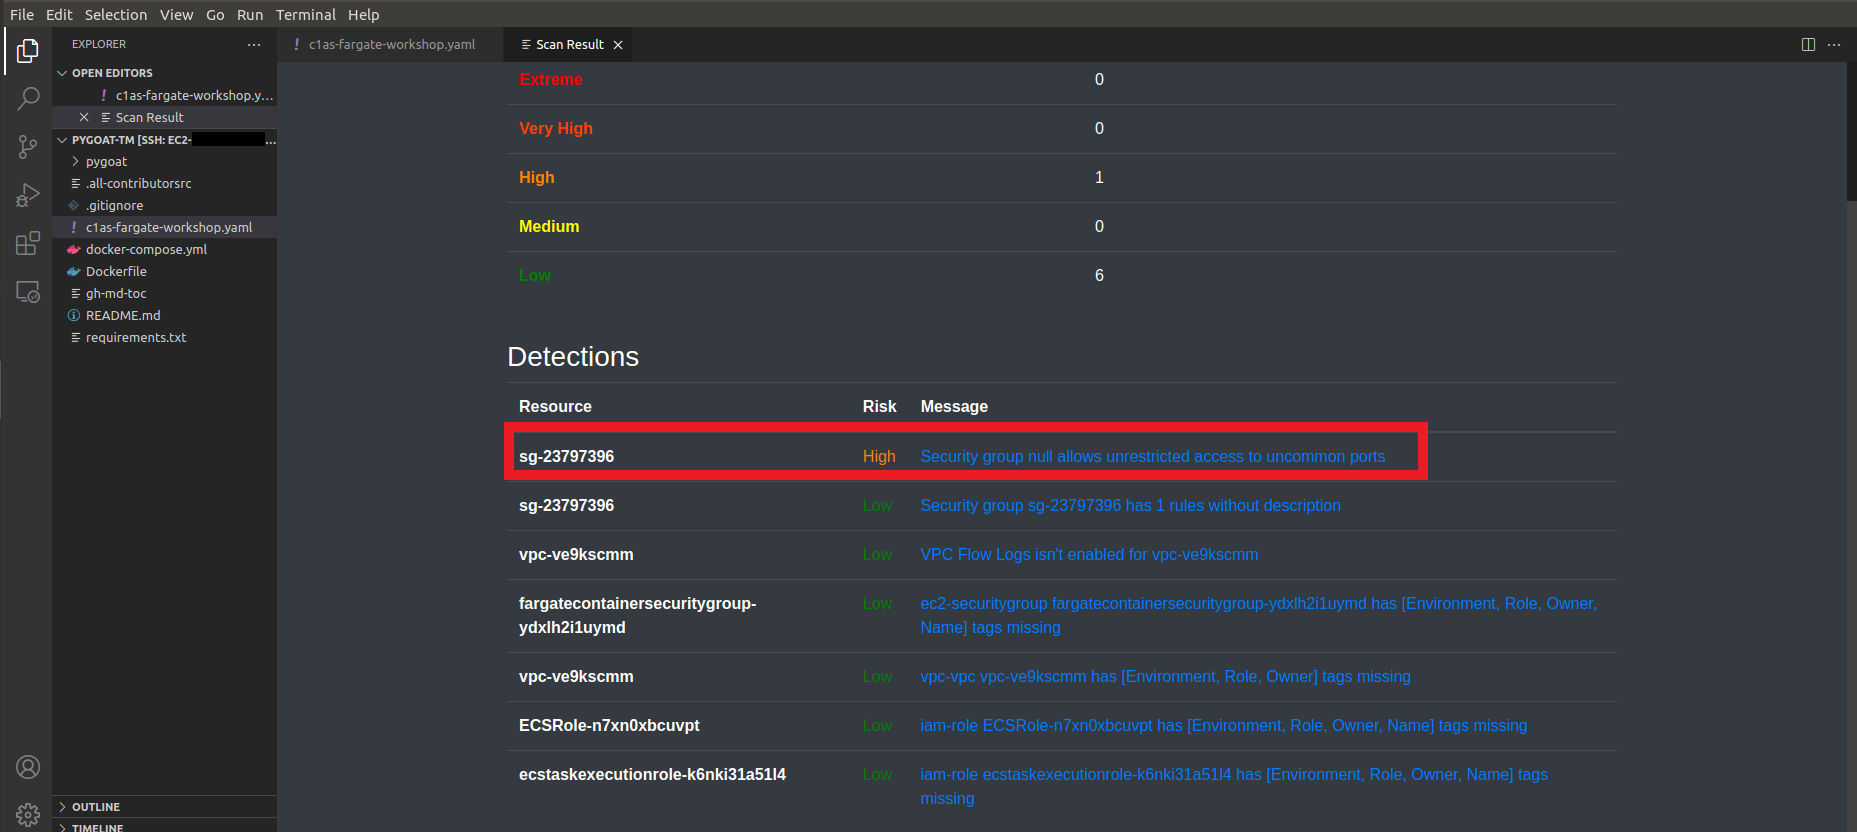
8. This will open a new tab where it will show how many Issues and which Issues are
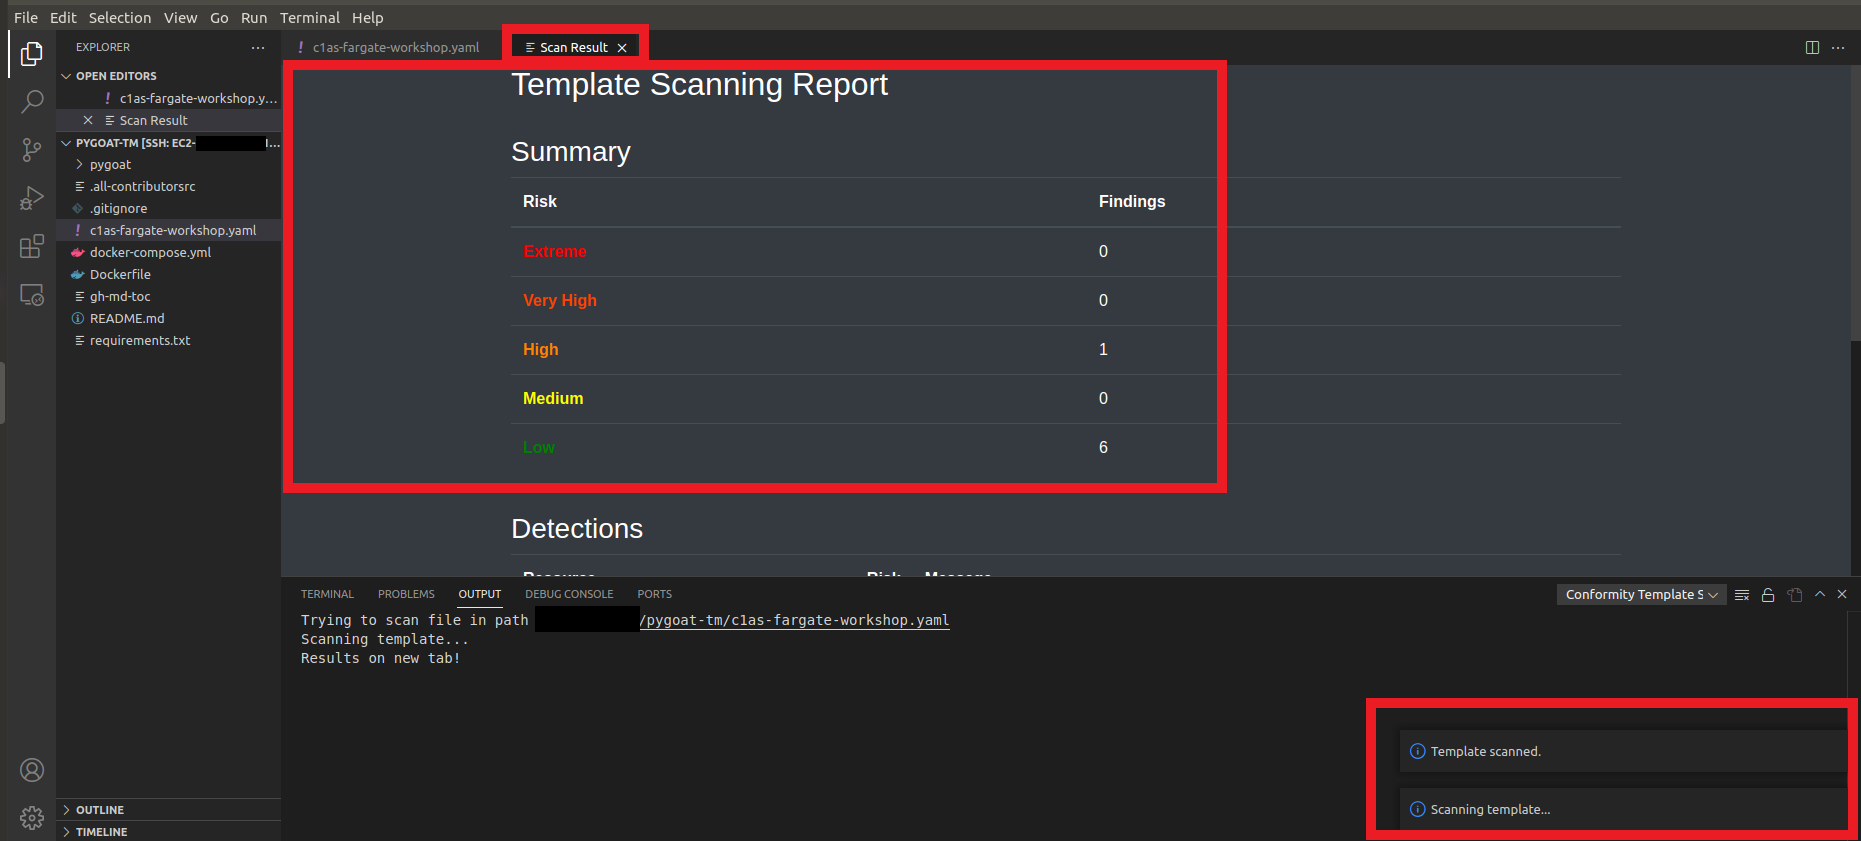
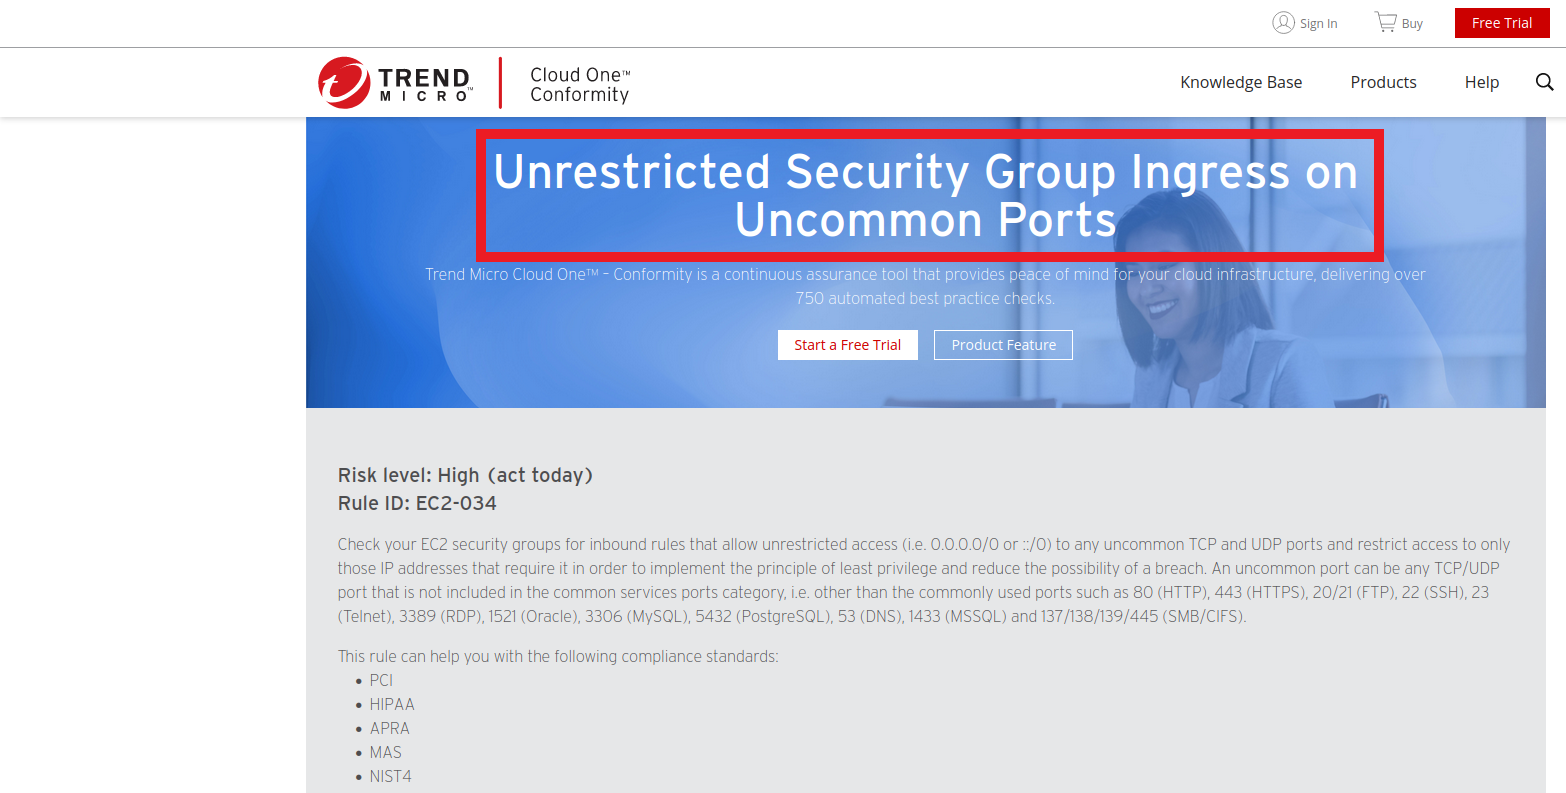
- You can click on the Issue and you will be redirected to the Conformity Knowledge Base to learn more about the Issue
Detect Secrets
We will use Detect Secrets Hook to see if there is any secret (API Key, secrets etc) hardcoded in our code before we commit it.
If you are going to install Detect Secrets on your local machine, you will need to have pre-commit installed before
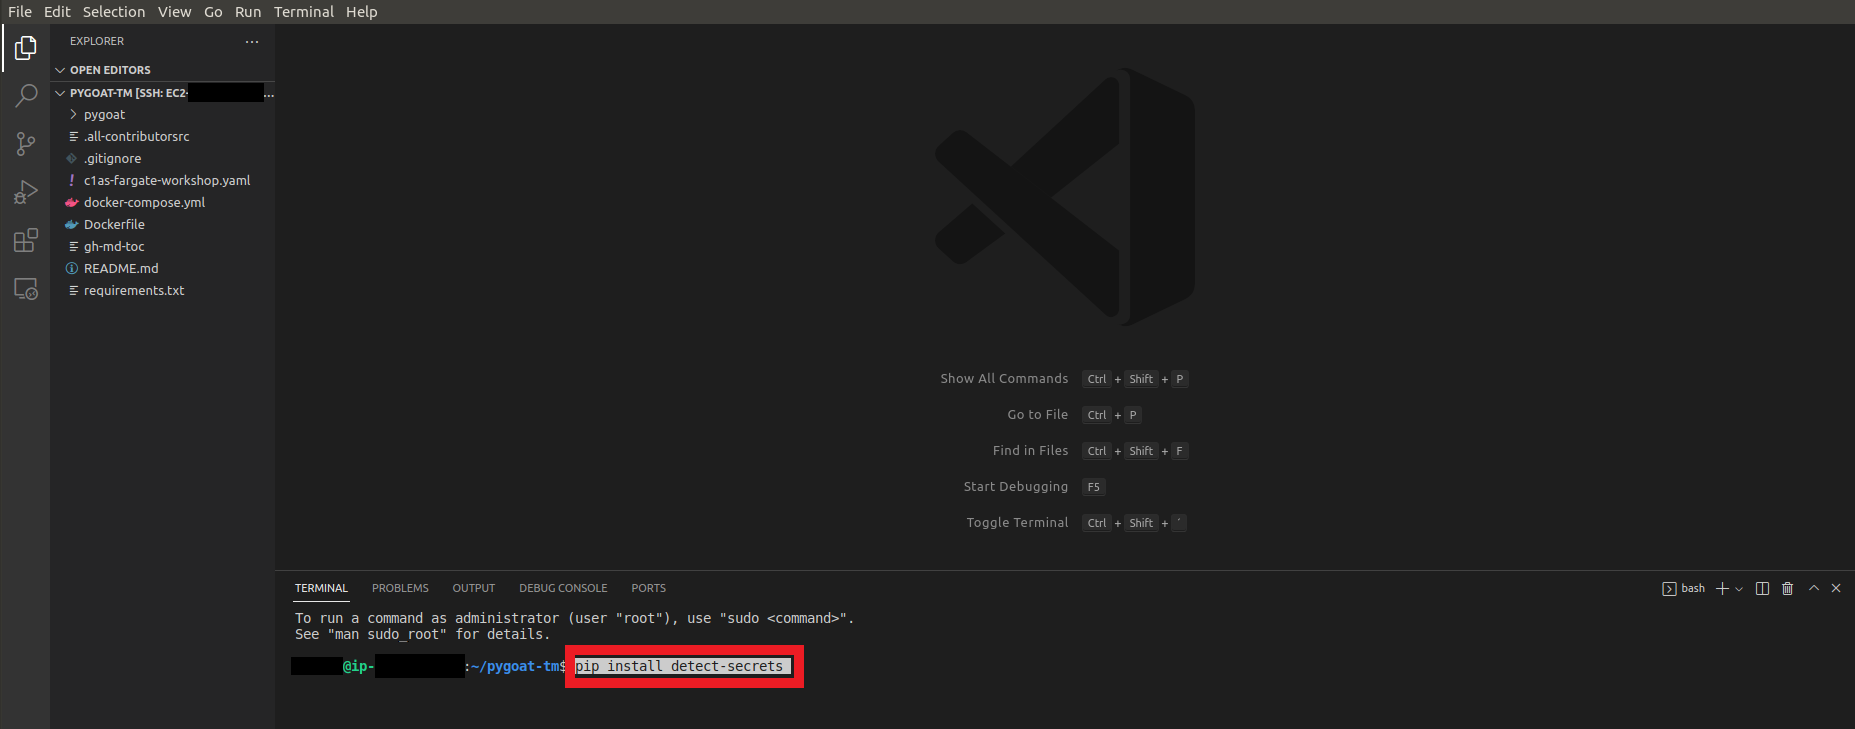
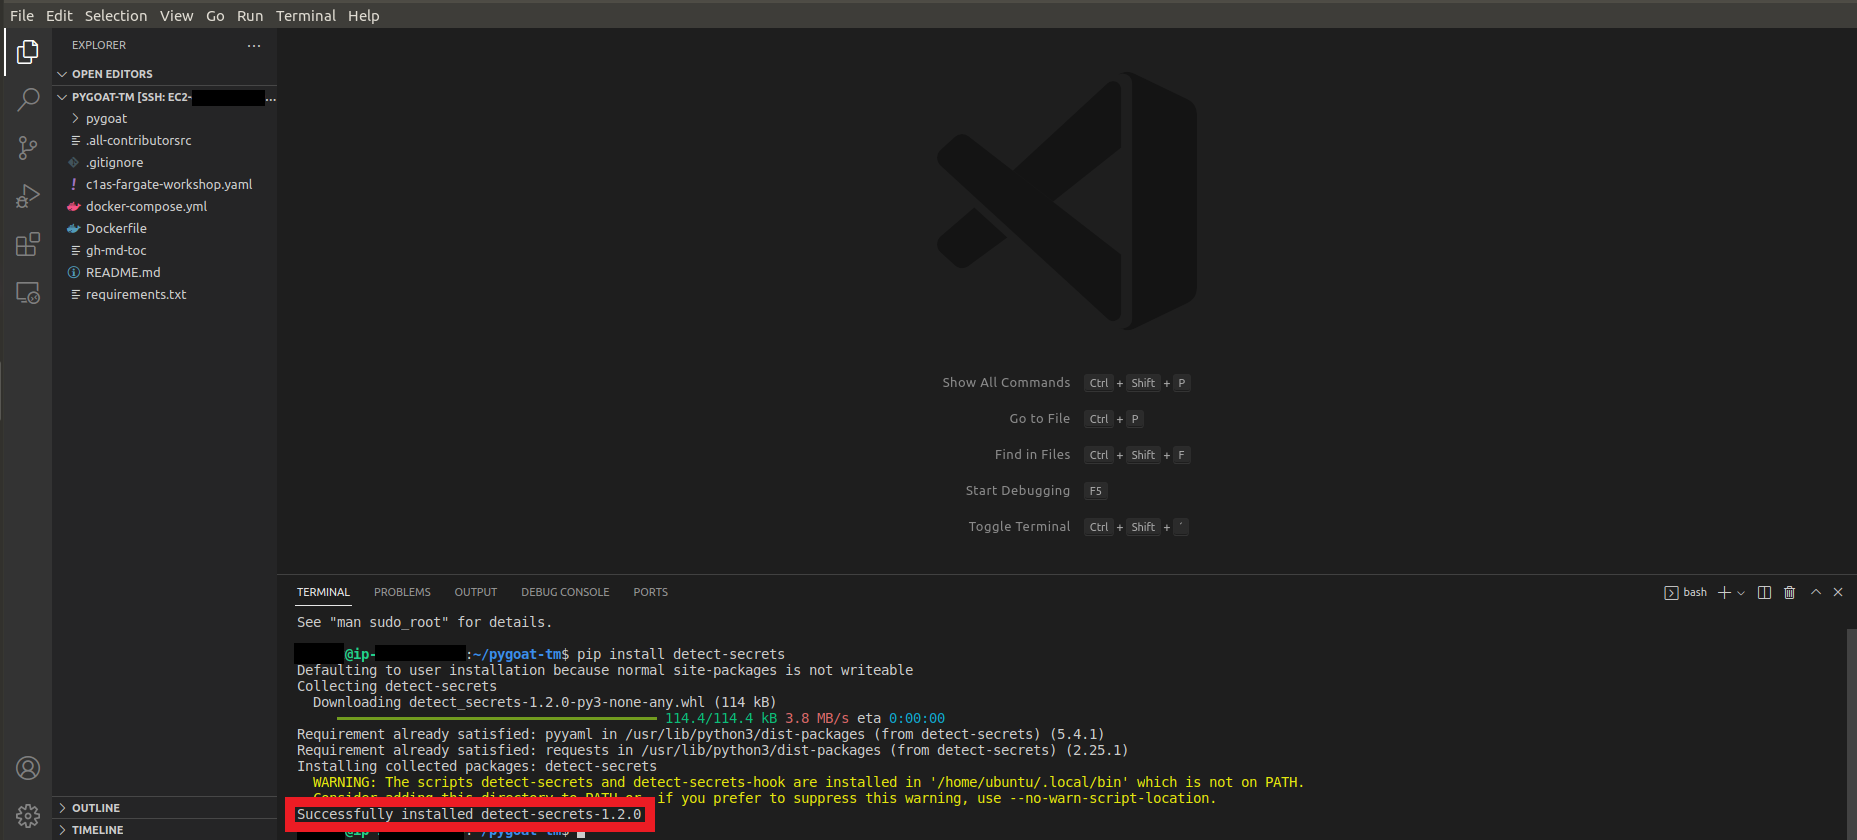
1. Let’s install
- Type the command
pip install detect-secrets
- Wait until install
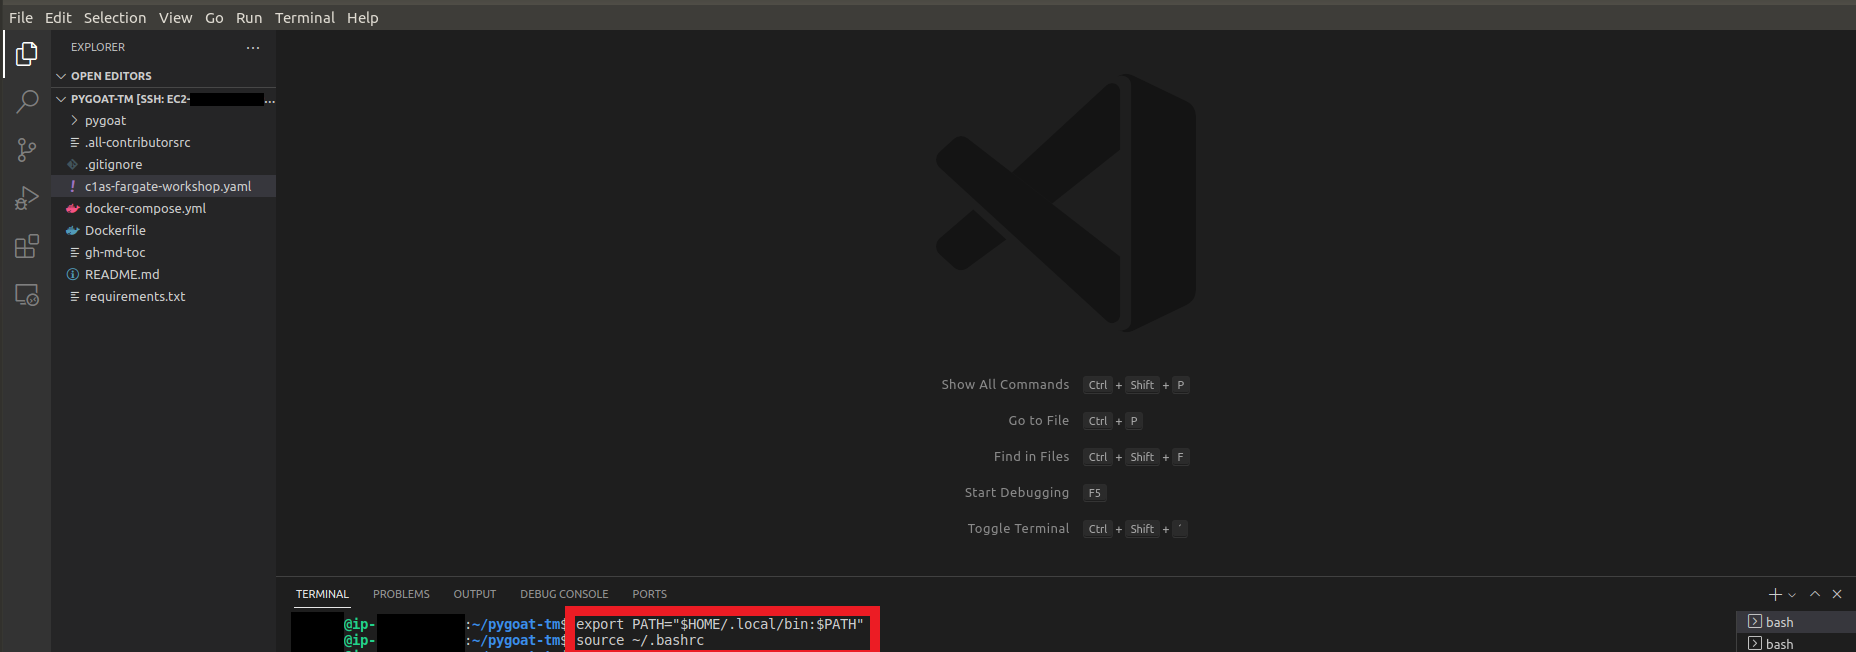
- Enter the command to configure the PATH
export PATH="$HOME/.local/bin:$PATH" - Enter the command to reload .bashrc
source ~/.bashrc
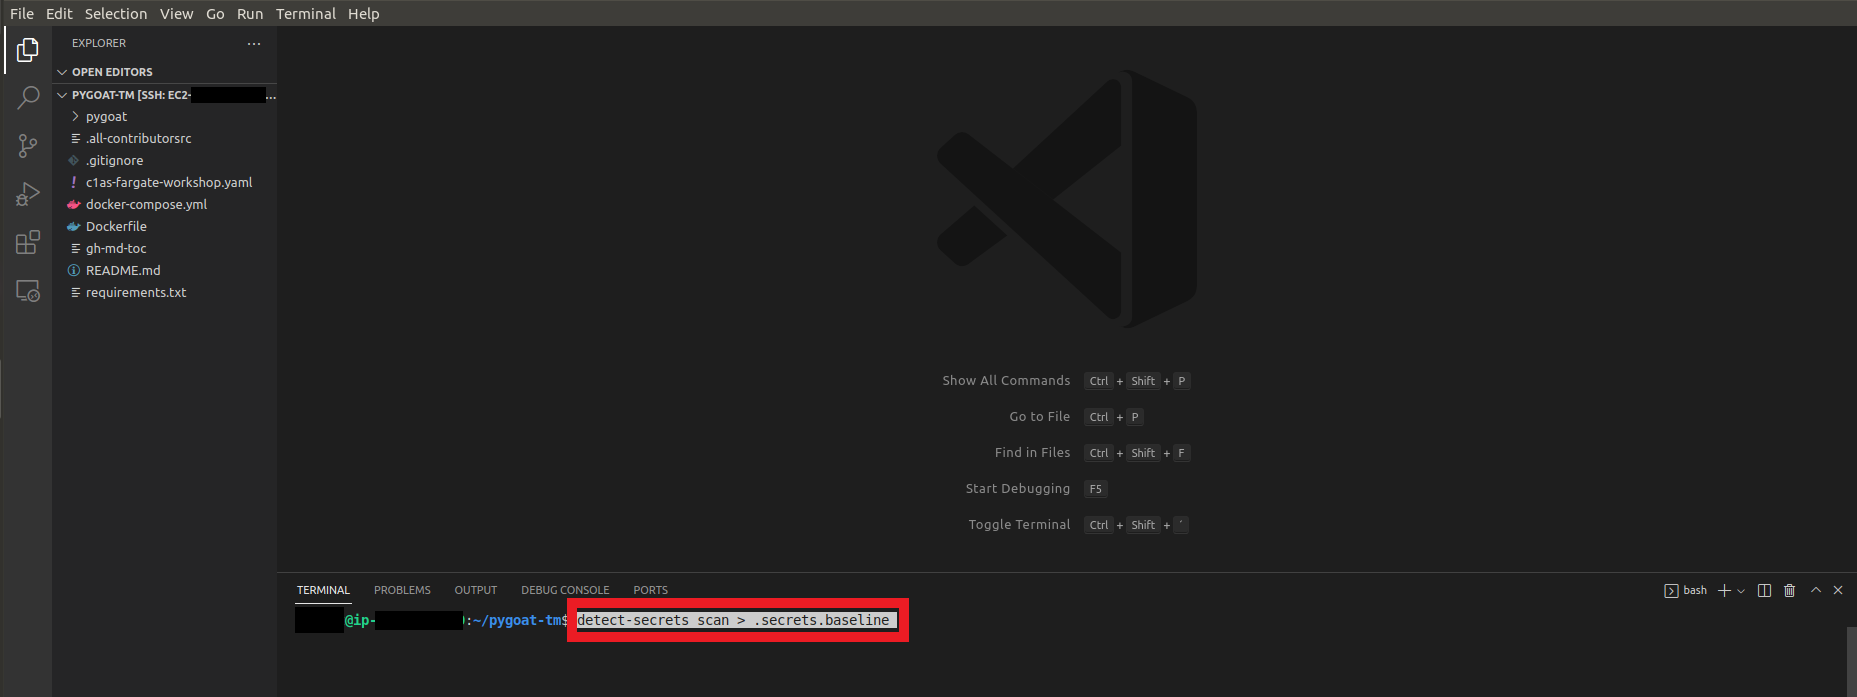
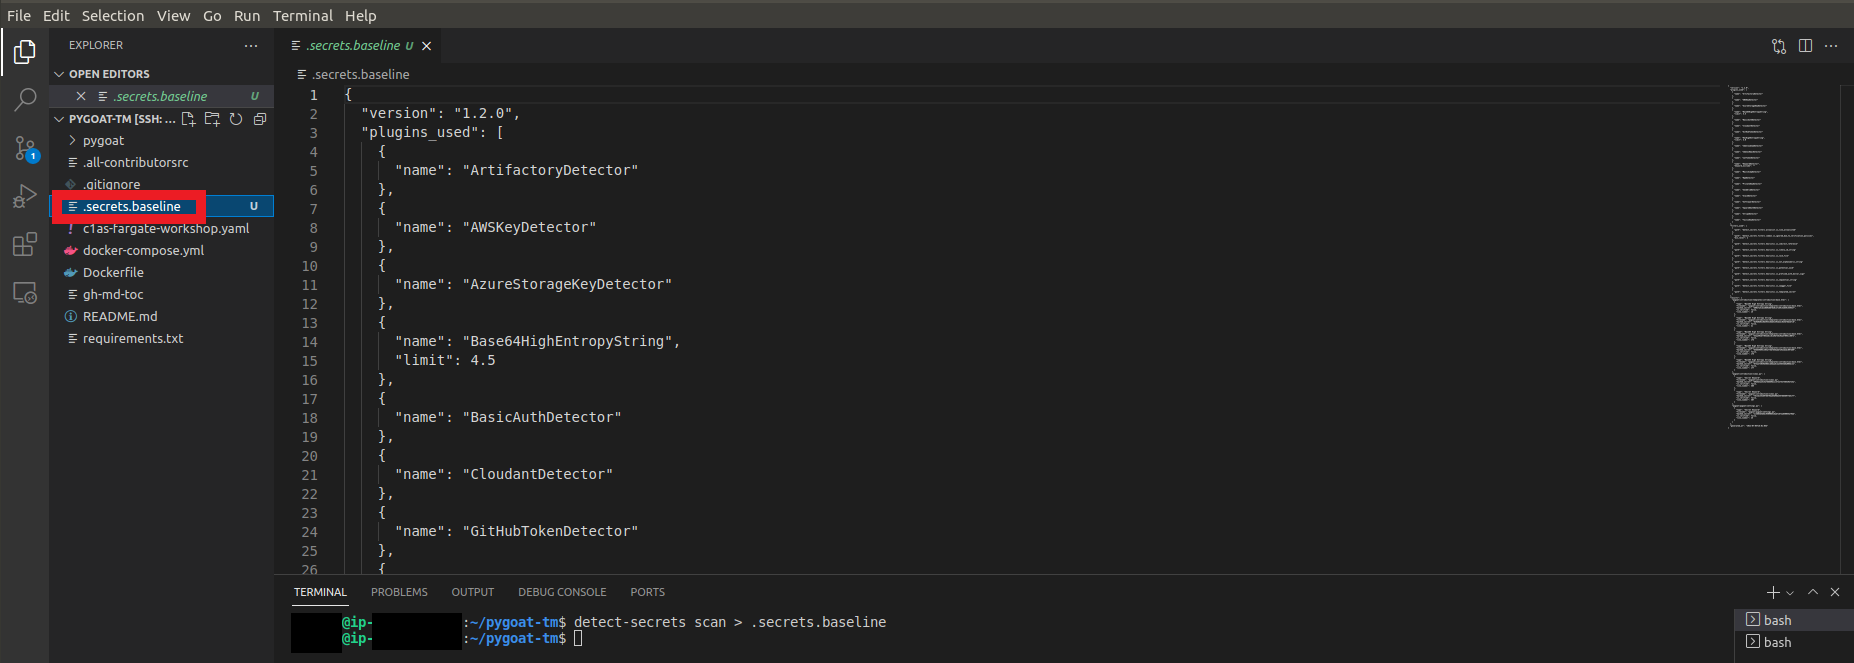
2. Now let’s scan our code to create a baseline
- In the root of our repo pygoat-tm
- Type the command
detect-secrets scan > .secrets.baseline
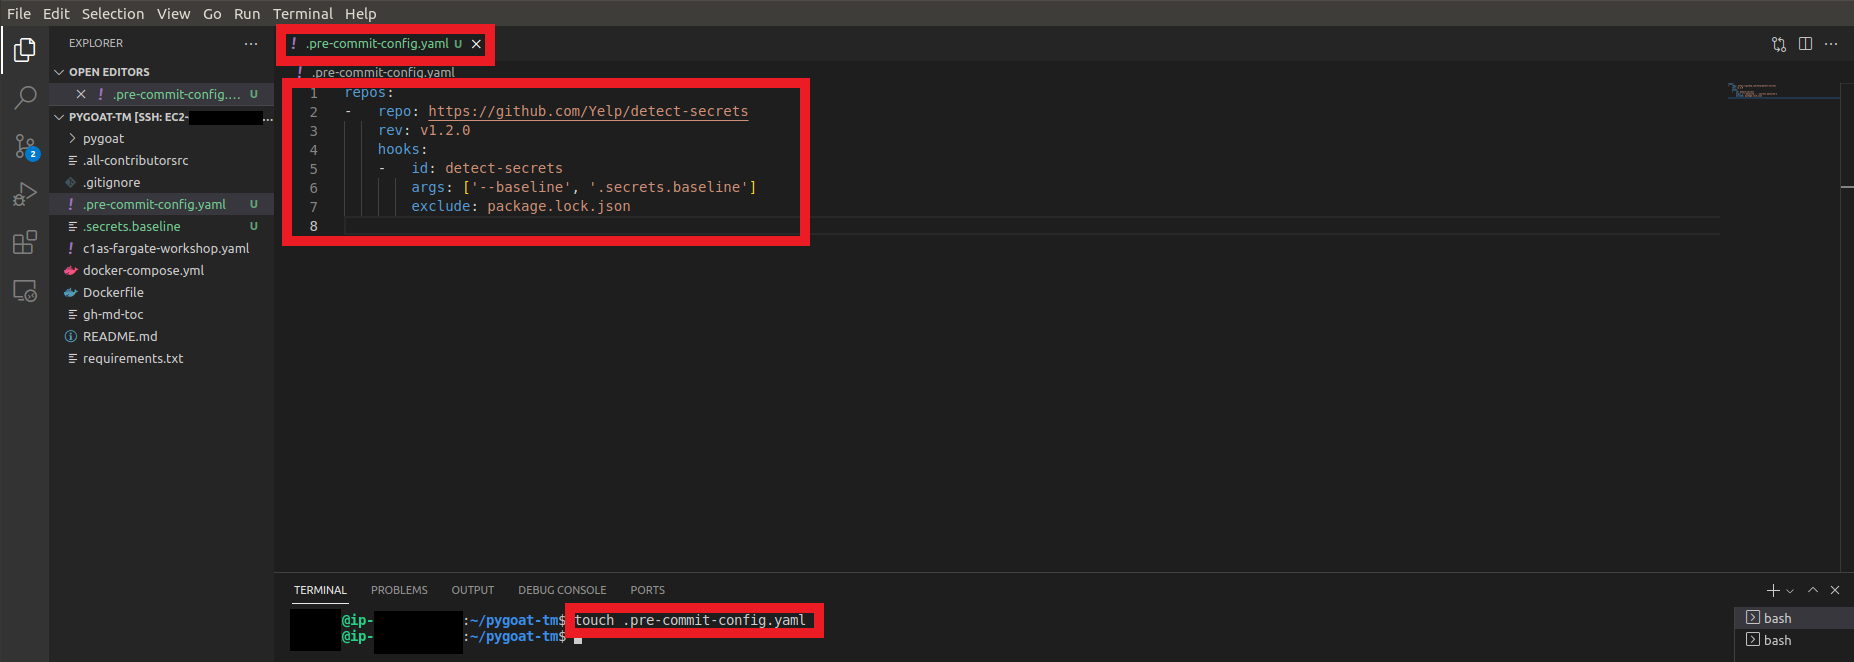
3. Let’s create the Pre-Commit file
-
Enter the command to create the file in the root of the repo
touch .pre-commit-config.yaml -
Open the file and copy:
  repos:
  -   repo: https://github.com/Yelp/detect-secrets
      rev: v1.4.0
      hooks:
      -   id: detect-secrets
          args: ['--baseline', '.secrets.baseline']
          exclude: package.lock.json
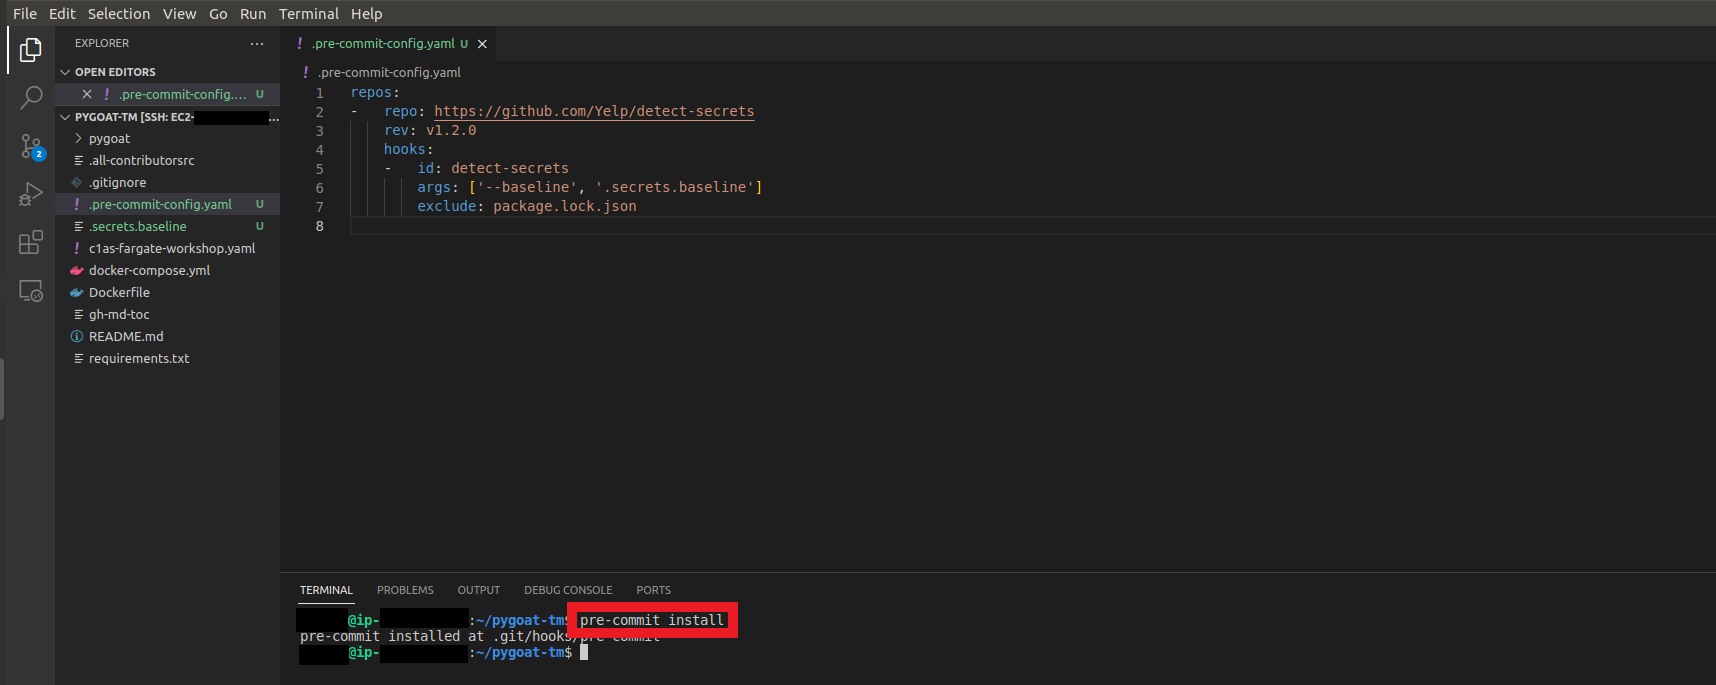
- Type the command
pre-commit install
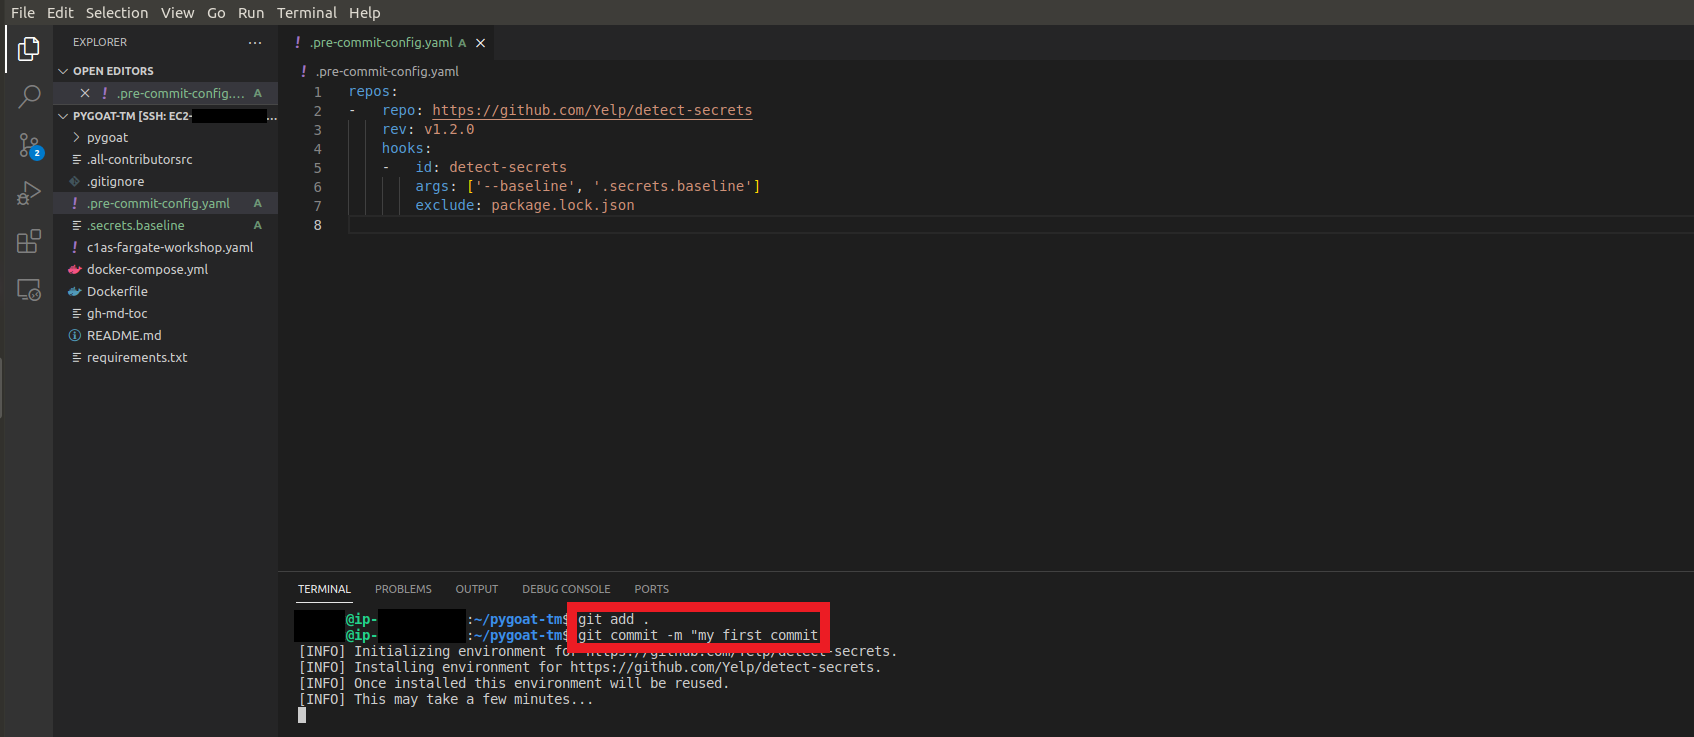
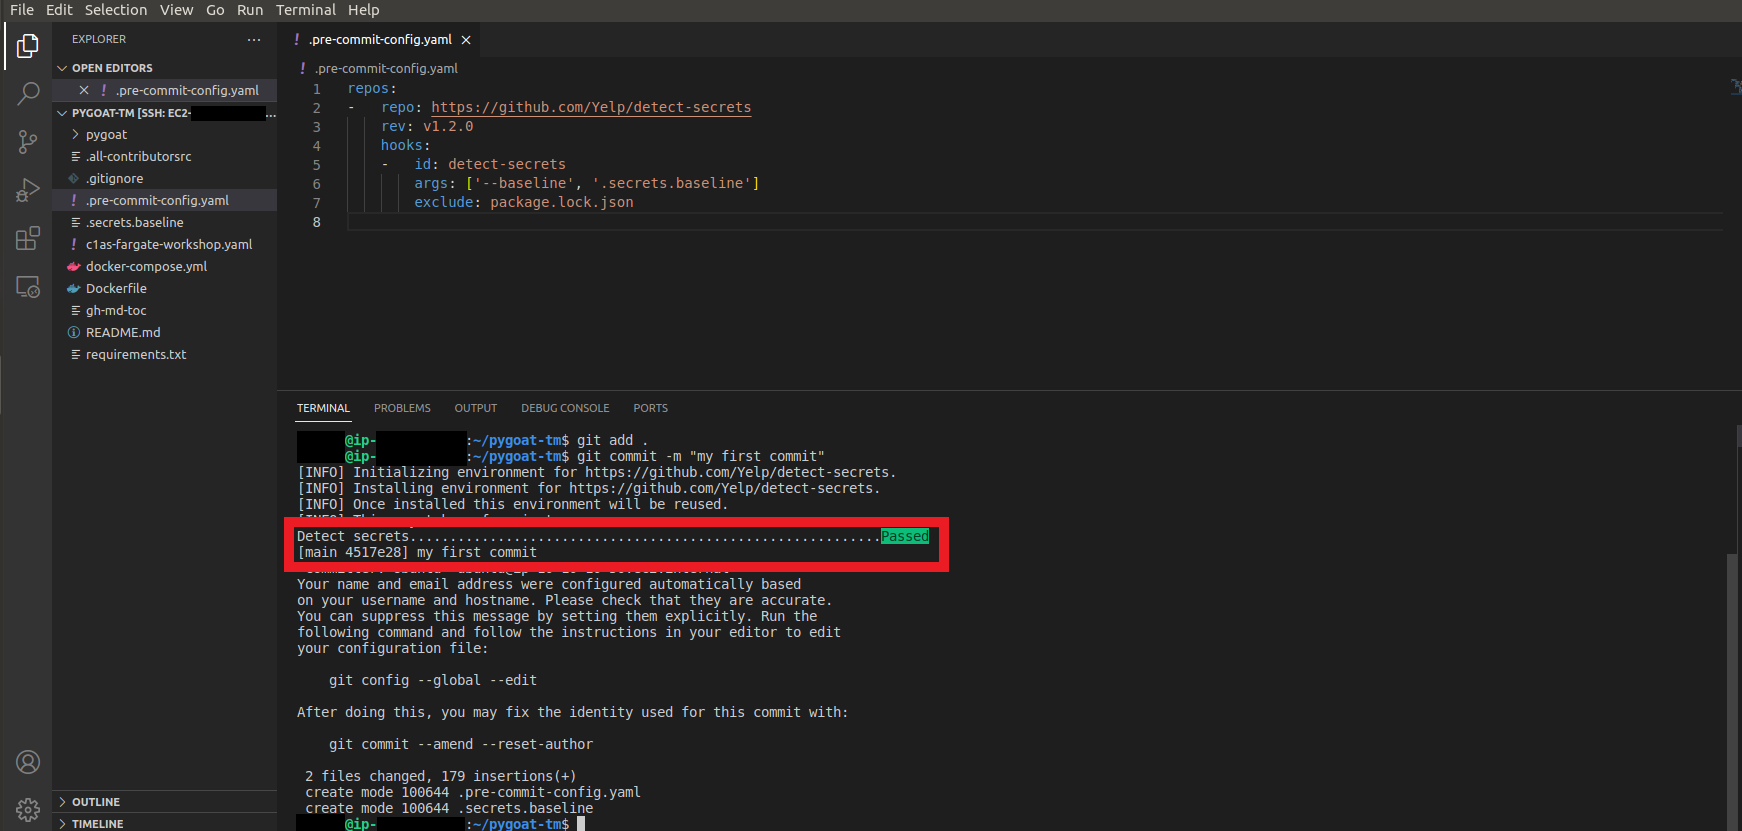
4. Let’s commit the code and check if we have any secrets in our code
- Type the command
git add . - Type the command
git commit -m "my first commit" - Wait a while for the Detect Secrets environment to be initialized
We can see that no secret was detected in our code!
4.1. But what would detection be like if we had a Secret
- Open the tests.py file in pygoat/introduction/tests.py
- Enter the line
my_api_key="your-api-key-here" - Type the command
git add .to add the change - Type the command
git commit -m "my second commit"

- We can see that it was not possible to commit the changes with an API Key hardcoded in the code!