Code Stage
We will simulate that we work in a company where we will implement security in the code phase with the developers and also ensure that our security conduct is followed in the Pipeline if this is not practiced while the code is being done. Our team is responsible for the security of the cloud infrastructure and also the application. For this, we will use 4 technologies in this step:
The application that we will use in our company will be this one:
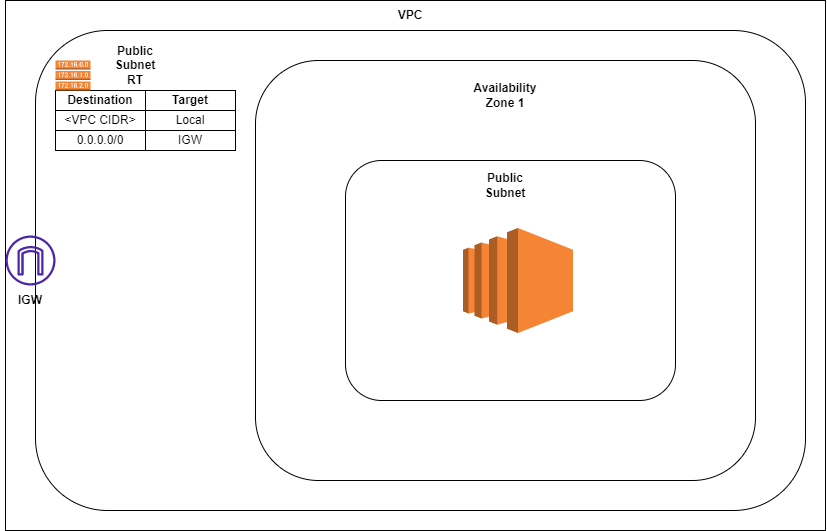
And this is the template that we can use as the application infrastructure
1. First let’s deploy our infrastructure
If you don’t want to download the tools on your local machine that we will use in this Phase, you can use the template below to create a EC2 Linux Machine that we will use to download and install the tools and use VS Code remotely to connect.

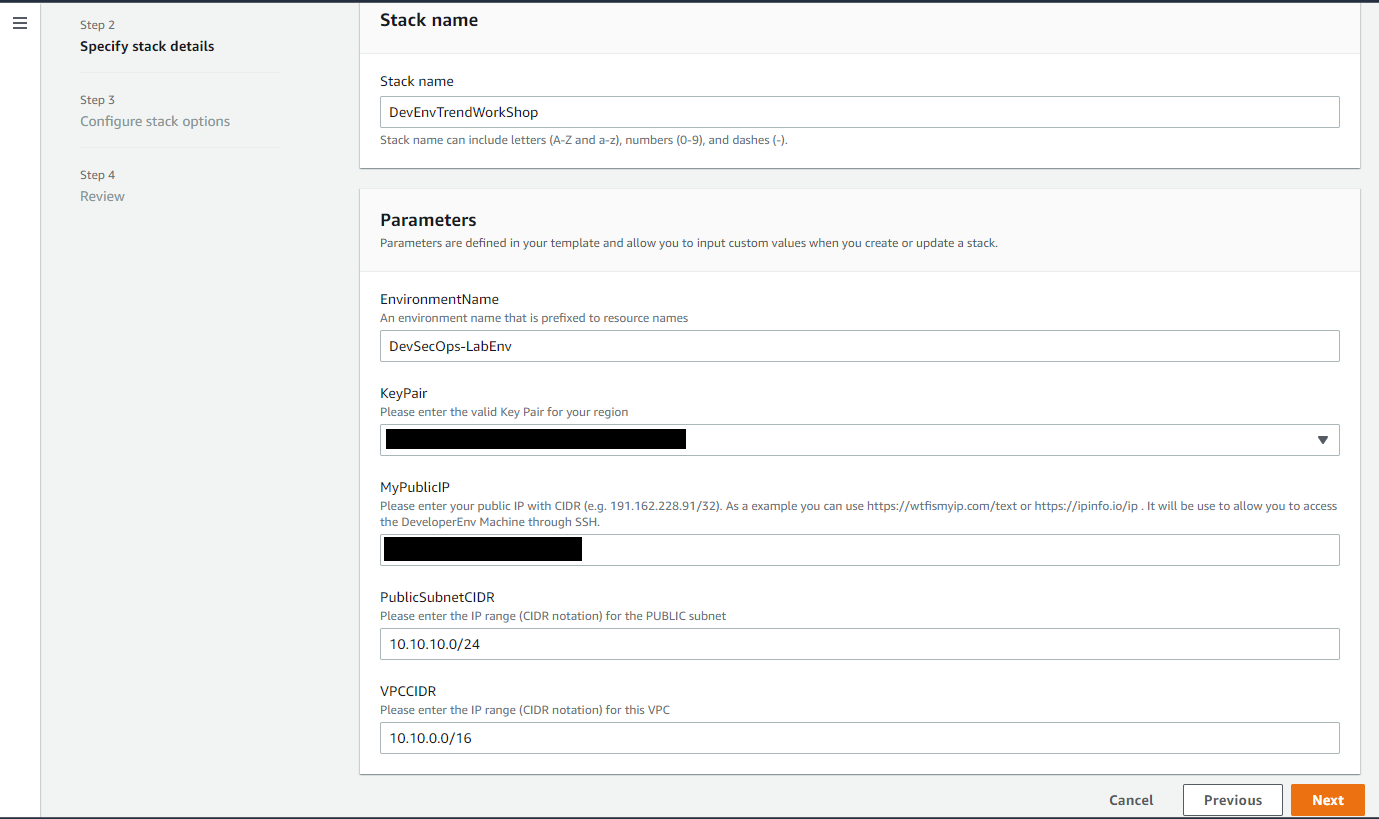
1.2. Specifying additional stack parameters
-
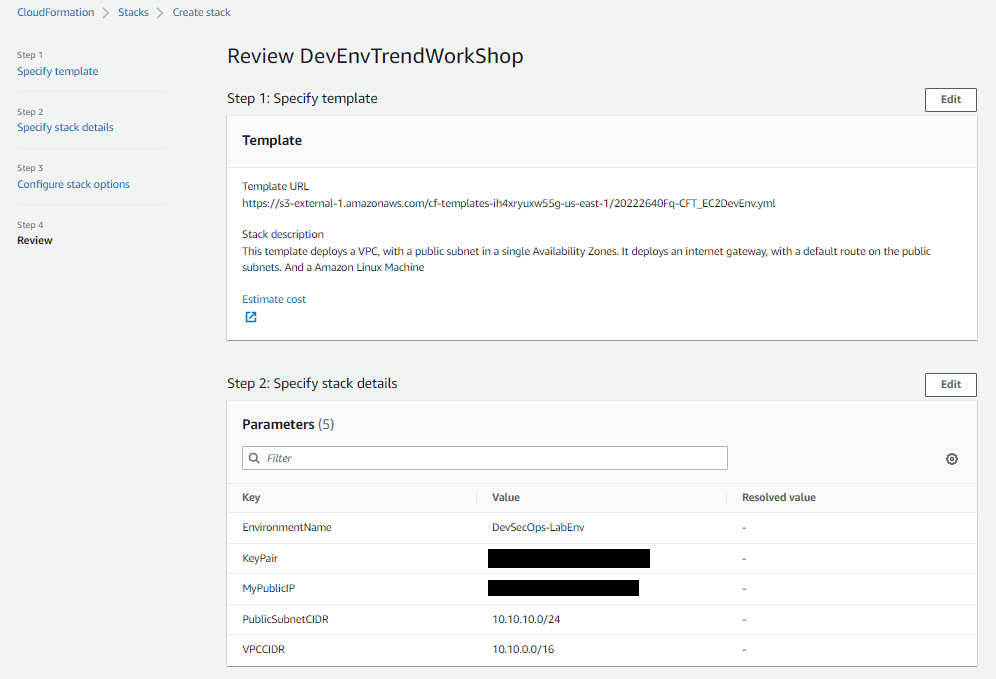
Stack Name:
DevEnvTrendWorkShop -
VPCCIDR: the CIDR that you want to use for the VPC. You don’t need to change it, if you don’t want to change the default configuration.
-
KeyPair: Your KeyPair name
-
MyPublicIP: Your public IP in CIDR. (e.g. 191.162.228.91/ 32 . You can grab it using a few tools or websites (https://ipinfo.io/ip). It will be use to only allow your IP to access the DevEnv Machine)
-
PublicSubnetCIDR: the AZ what you want to use to your Public subnet. You don’t need to change it, if you don’t want to.
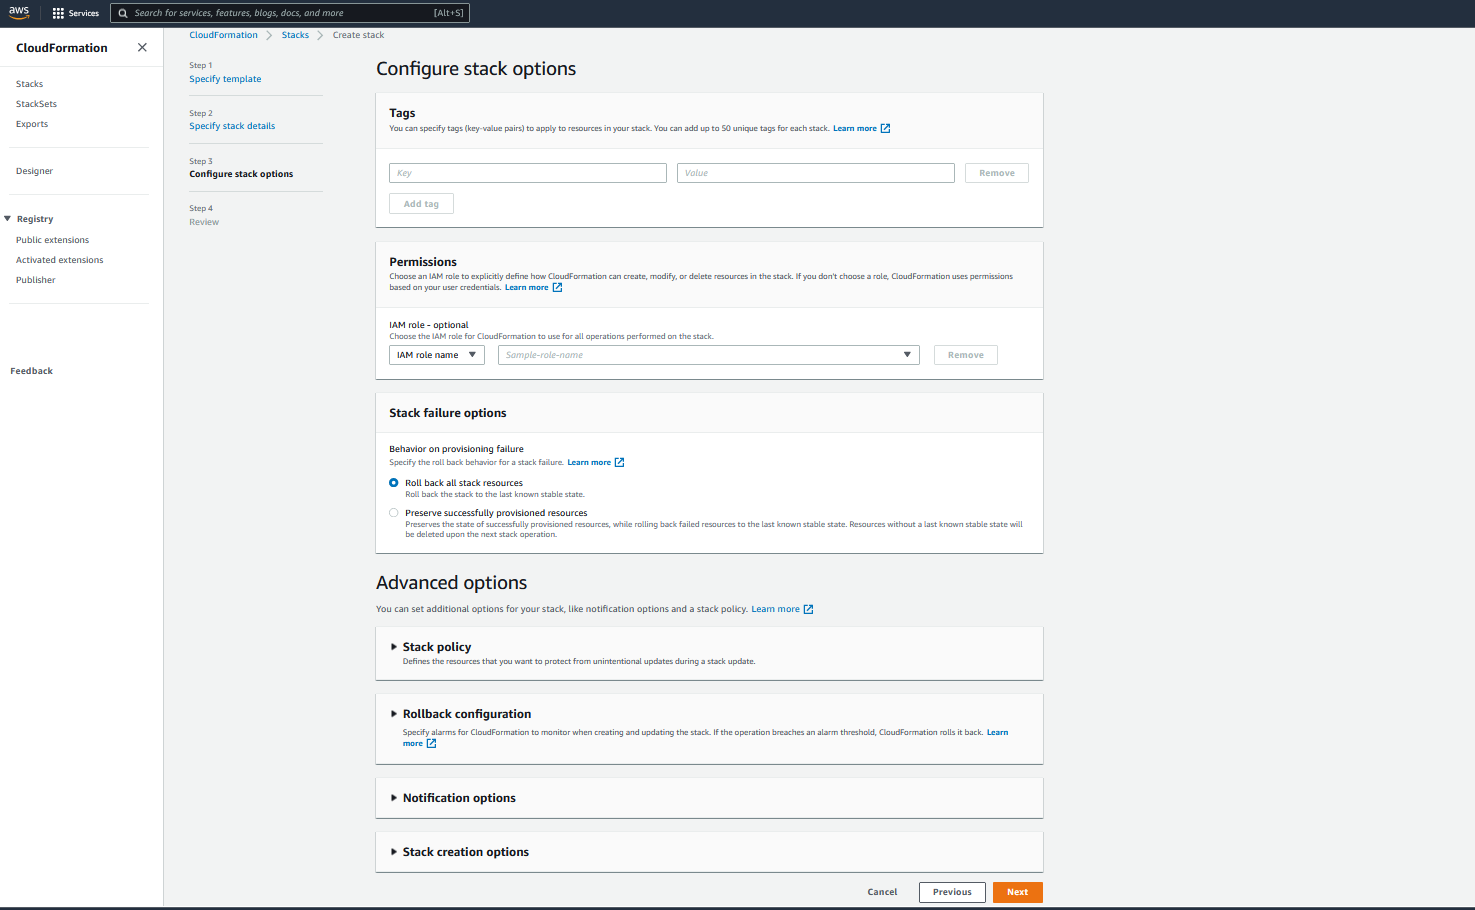
1.3. Configure stack options
Leave as fields as default and click Next, or optionally define tags to the evironment if desired.
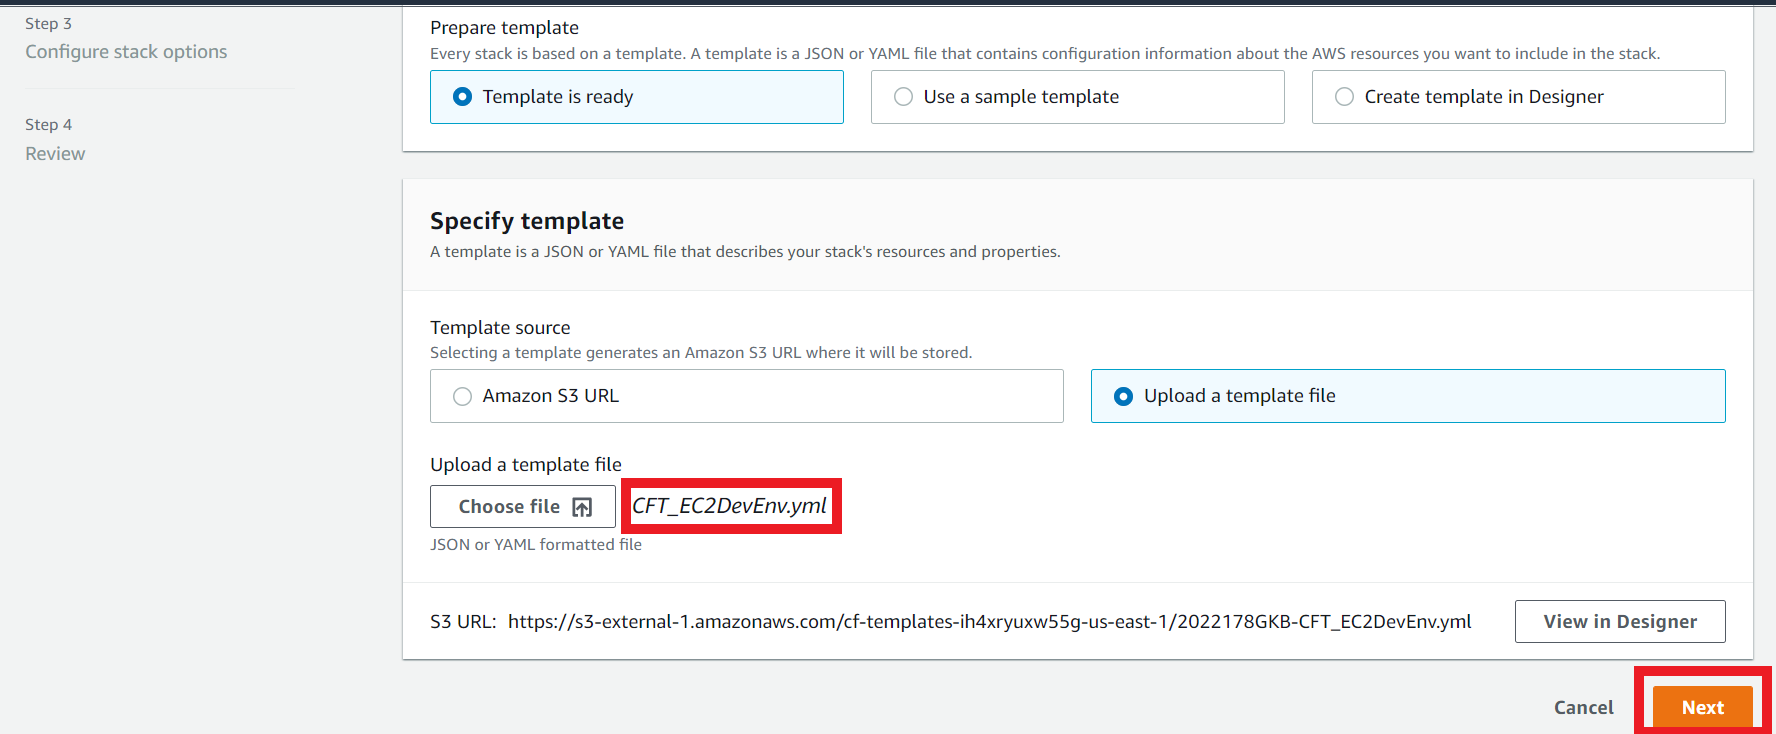
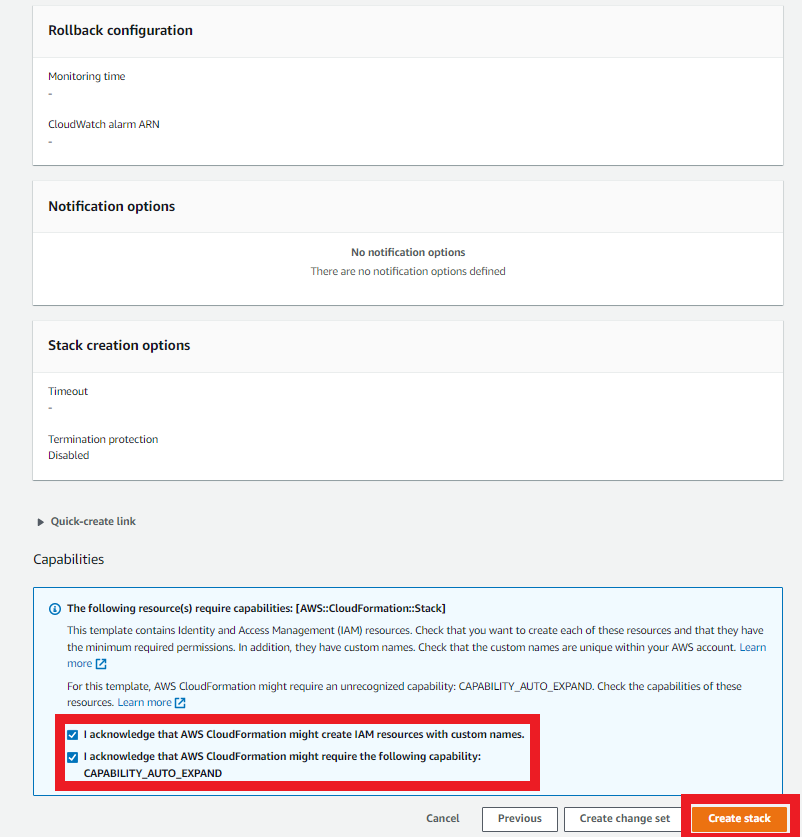
1.4. Review the template parameters
- Mark the checkbox the “I acknowledge… “
- Click on Create Stack
1.5. Follow up the events during creation of the stack.
- Select the Events tab
- Click Refresh
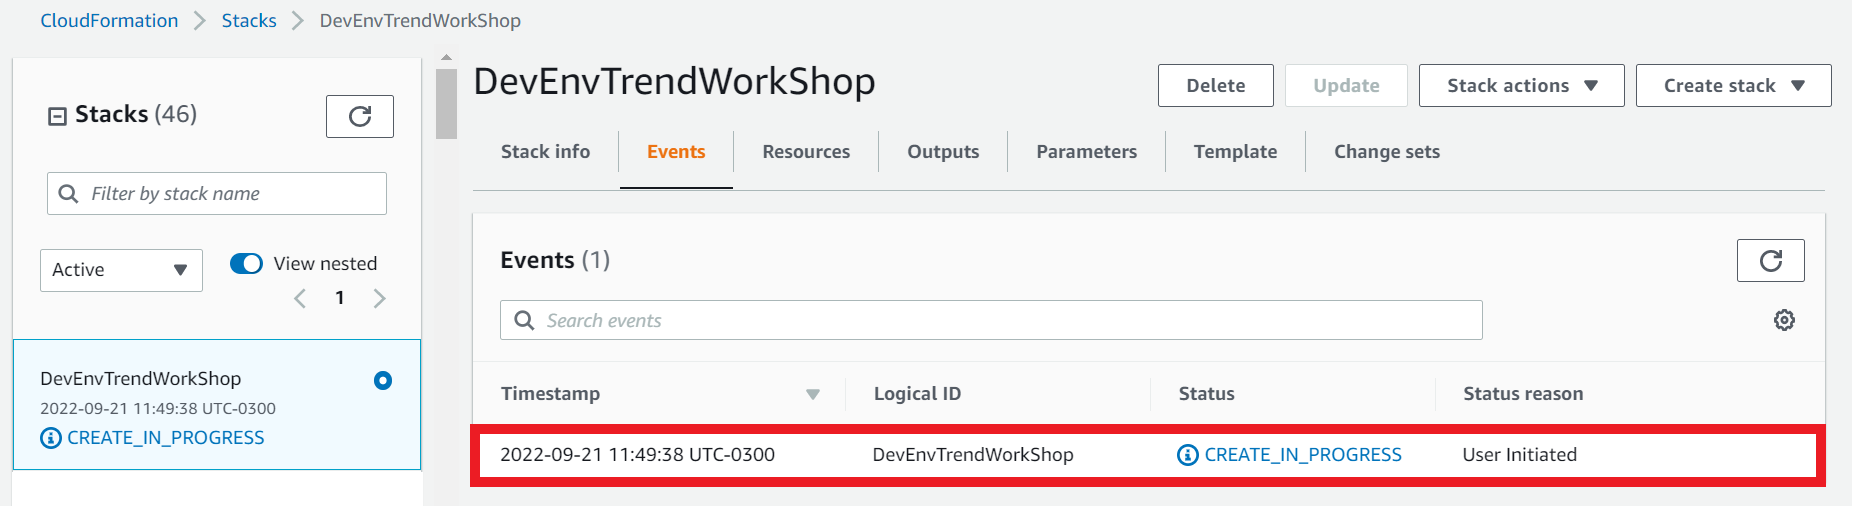
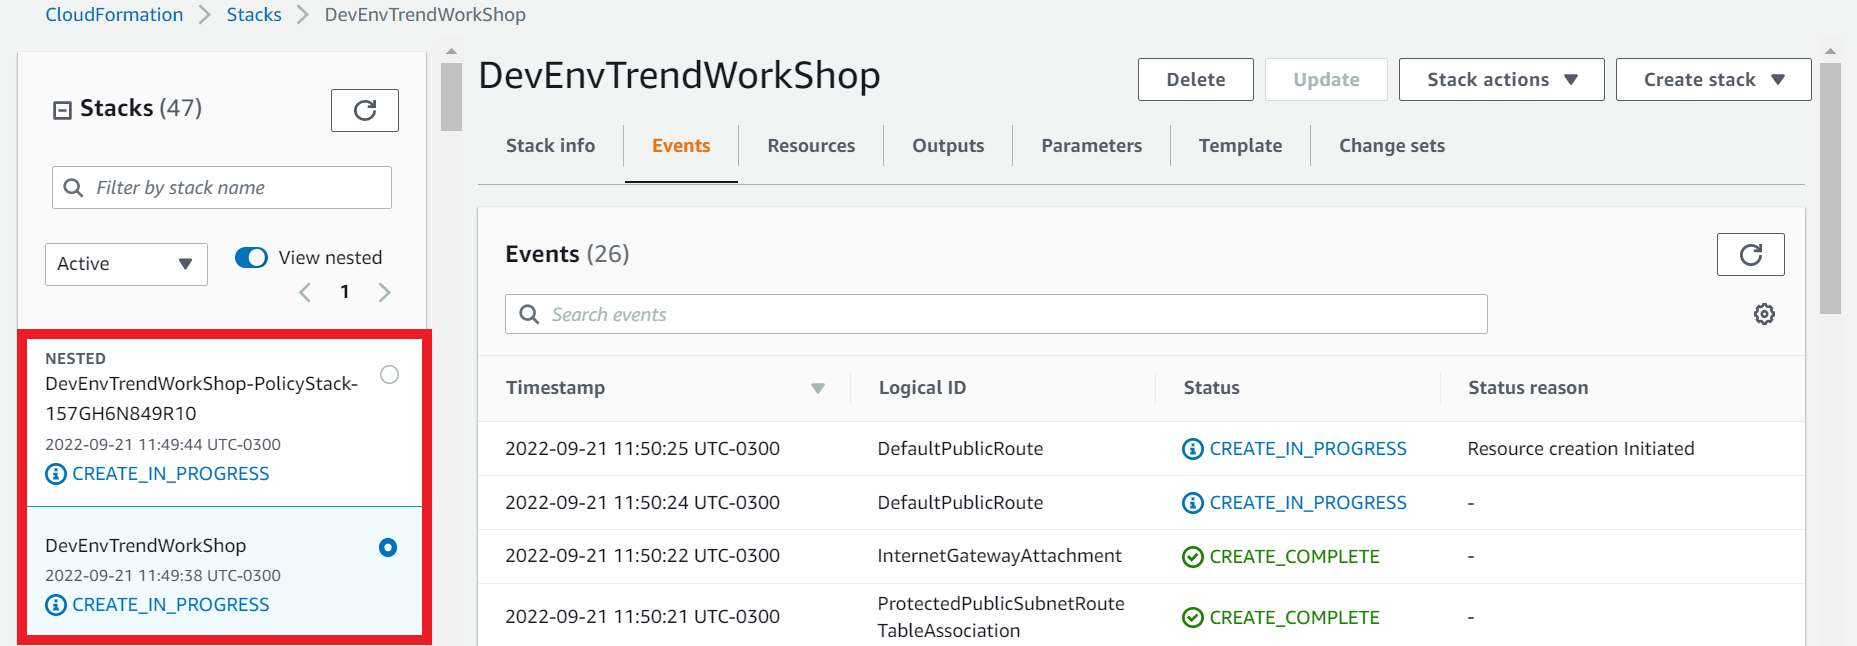
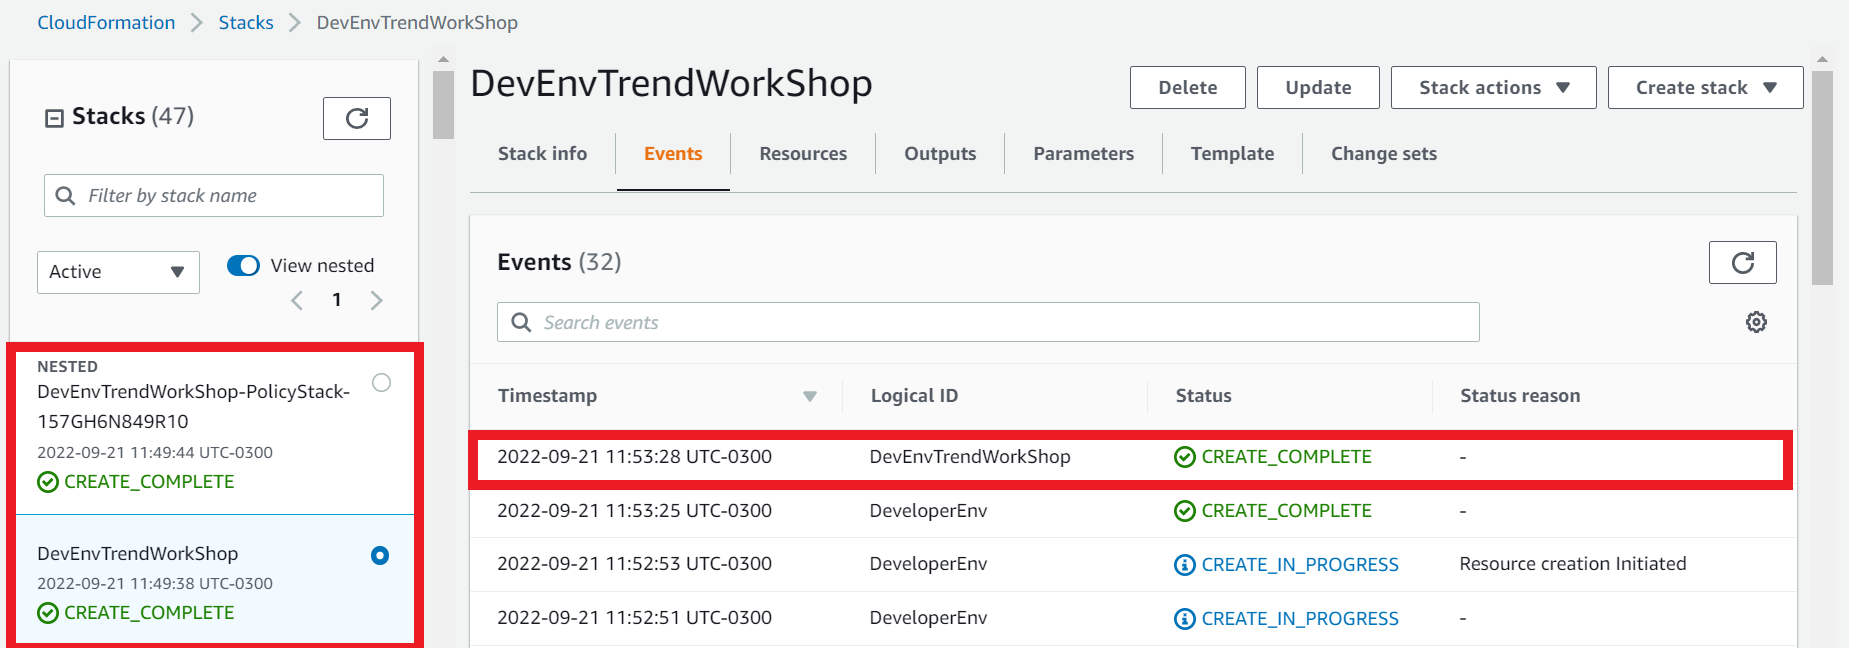
1.6. Ensure the stack status has reached Create_Complete.
- Select the Stack info tab
2. Download VS Code on your machine if you don’t have
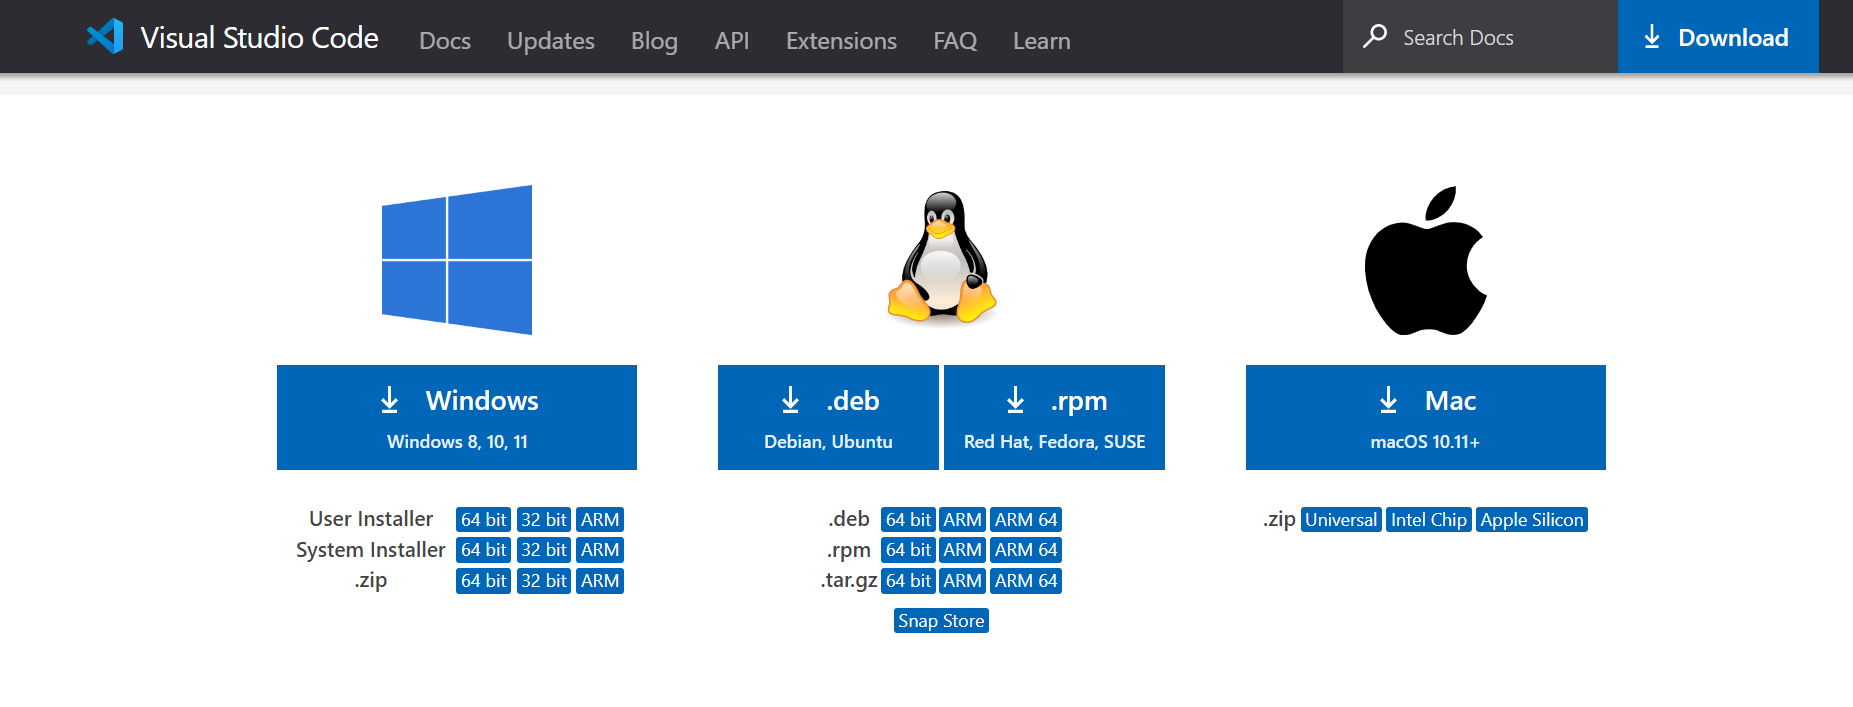
If you want to install all the tools (Horusec, Detect Secrets, Cloud One Open Source Security by Snyk) that we will use on your local machine, it’s not necessary to do step 3 and 4.
3. Let’s install the Remote Development Extension on VS Code, so we can connect to our Linux Machine that will host our tools remotely
Be sure that you have a OpenSSH SSH client installed on your machine before doing the steps below!
4. Connect VS Code to the EC2 Linux Machine
- Open your VS Code

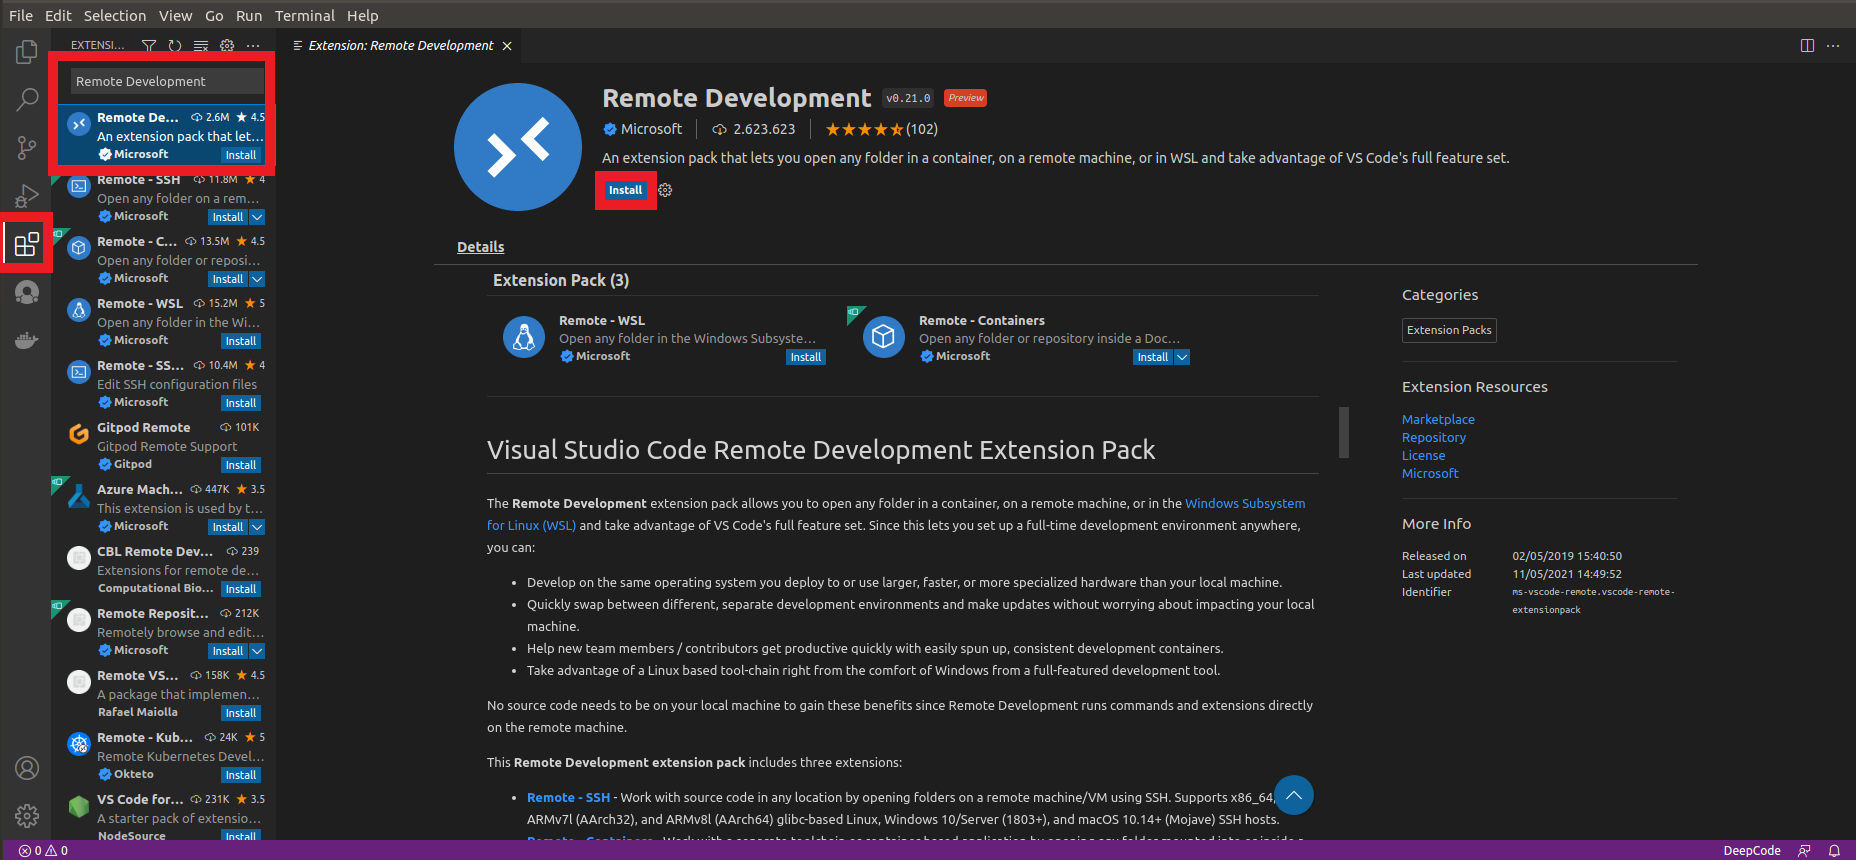
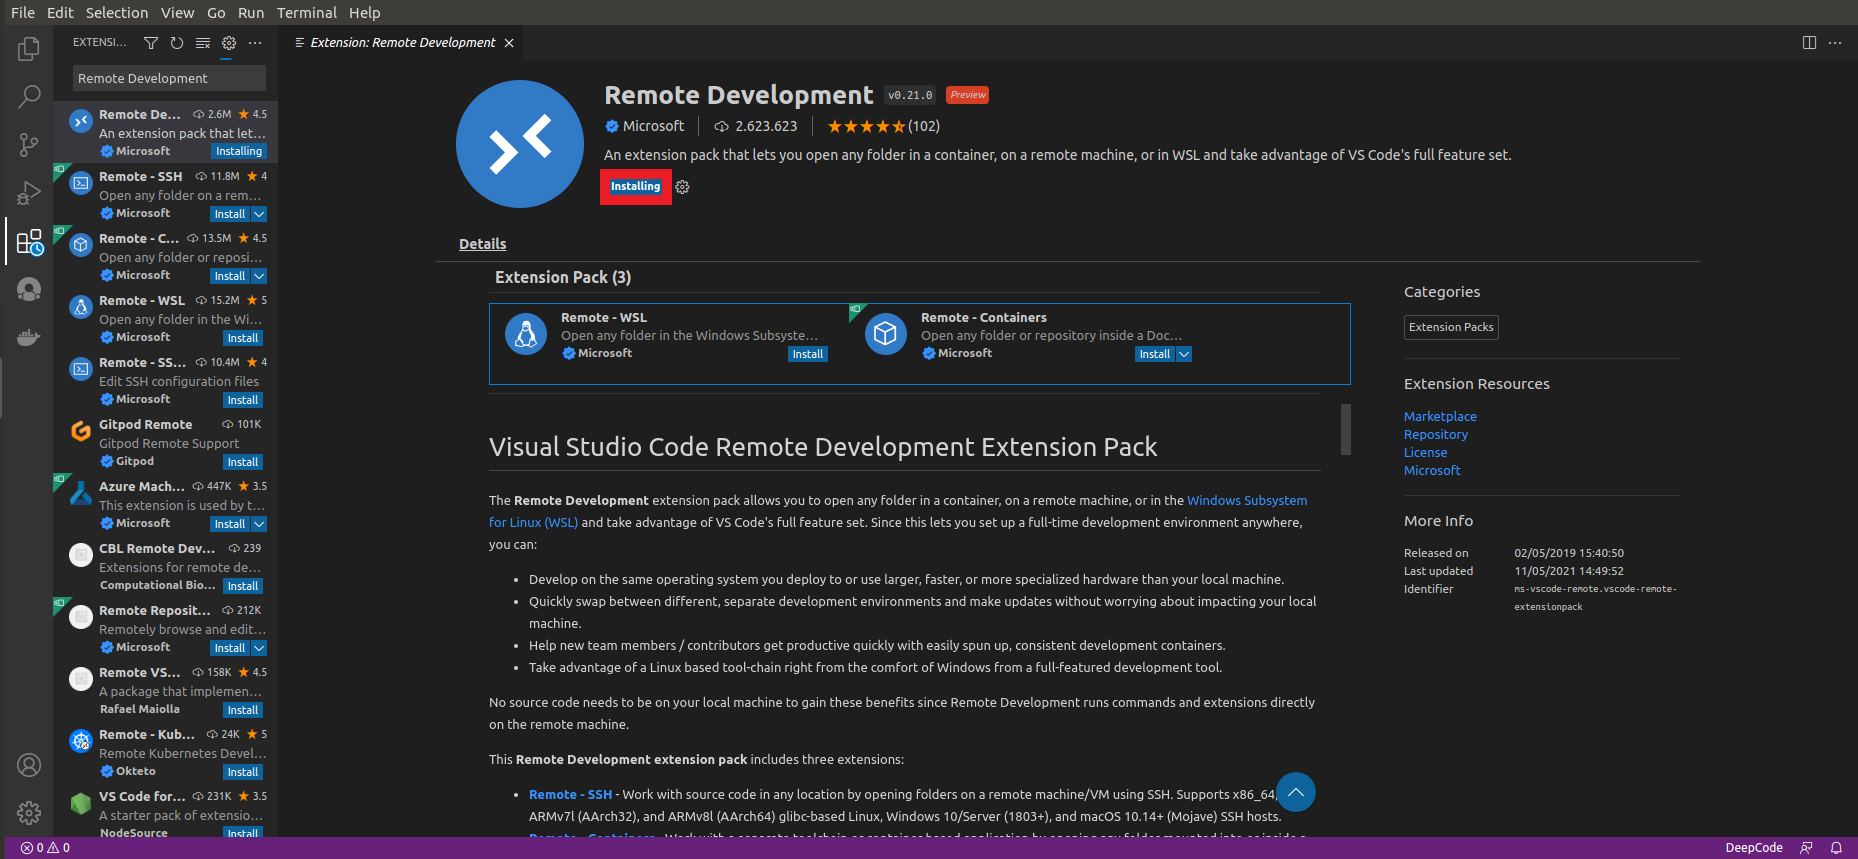
4.1. Install the Remote Development Extension on your VS Code
- Click on the Extension icon in the left column
- Search for
Remote Development - Click on Remote Development
- Click on the Install button
4.2. Wait until it appears as Installed
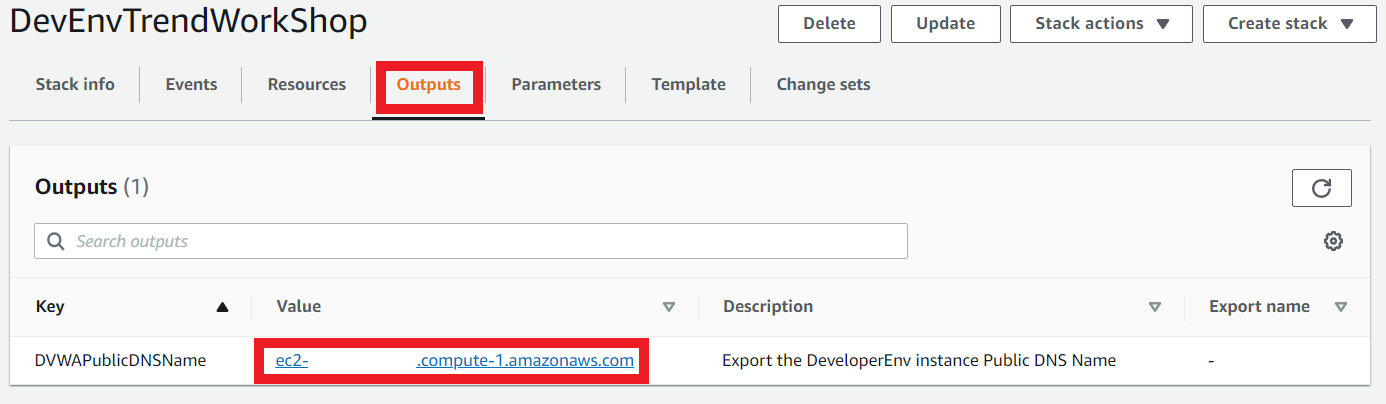
4.3. Go back to your template in the CloudFormation Console
- Click on Outputs
- Copy the value of your Public DNS Name
4.4. In the shell of your machine where VS Code is installed, try to connect remotely with the EC2 machine on AWS
- For example
ssh your_Public_DNS_Name_here

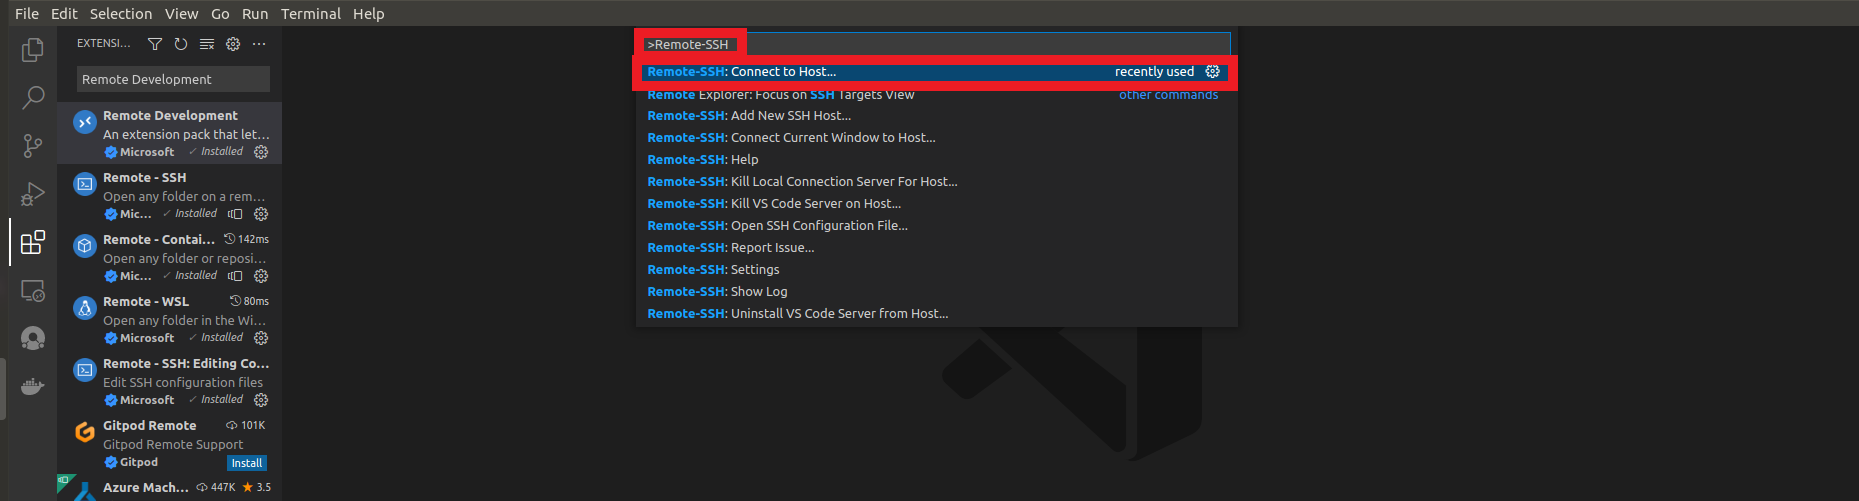
4.5. Go back to your VS Code
- Click on the F1 button on your keyboard or Ctrl+Shift+P
- Type
Remote-SSH - Click on Remote-SSH:Connect to Host…
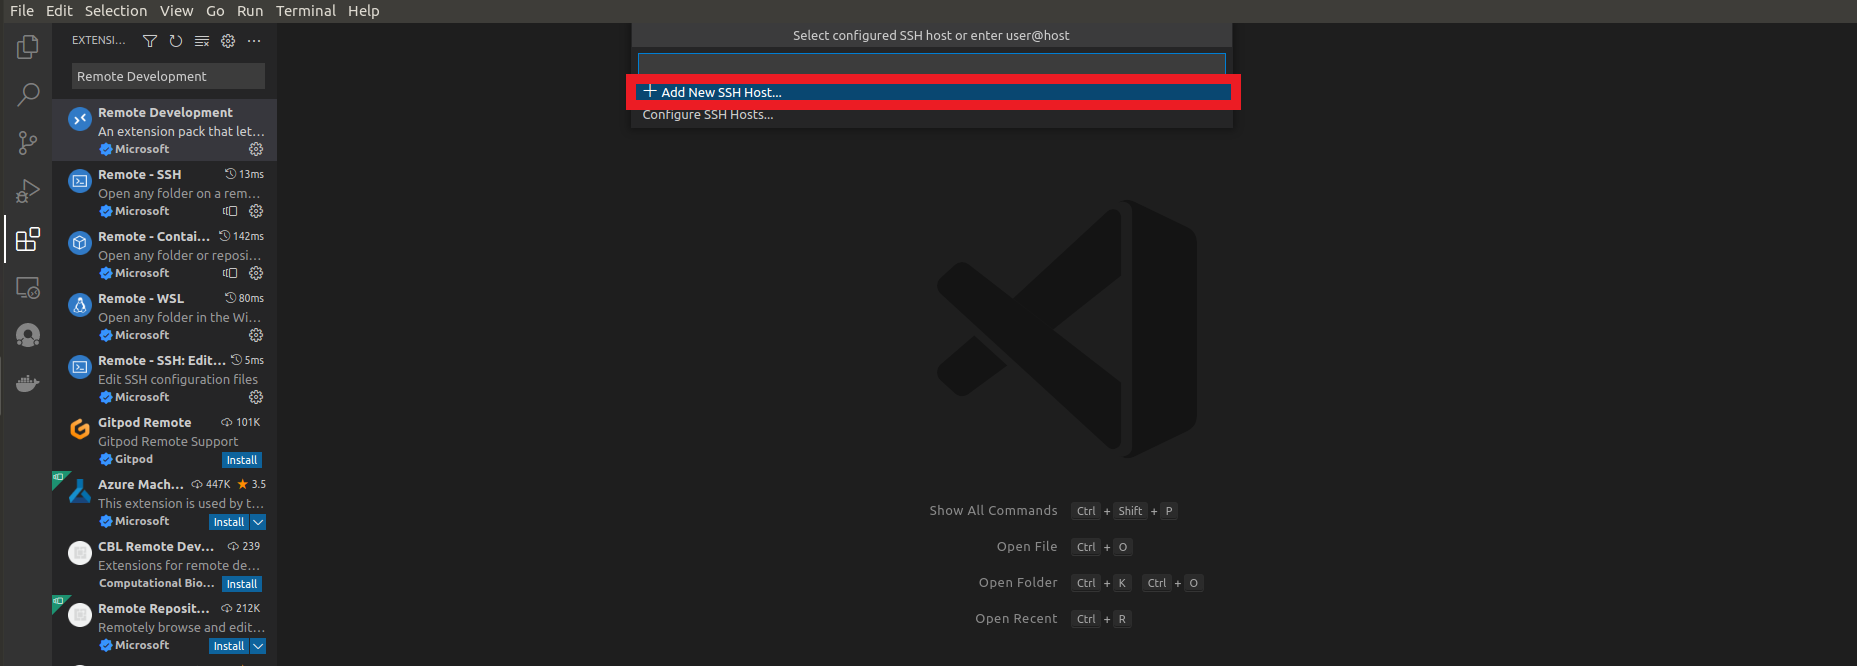
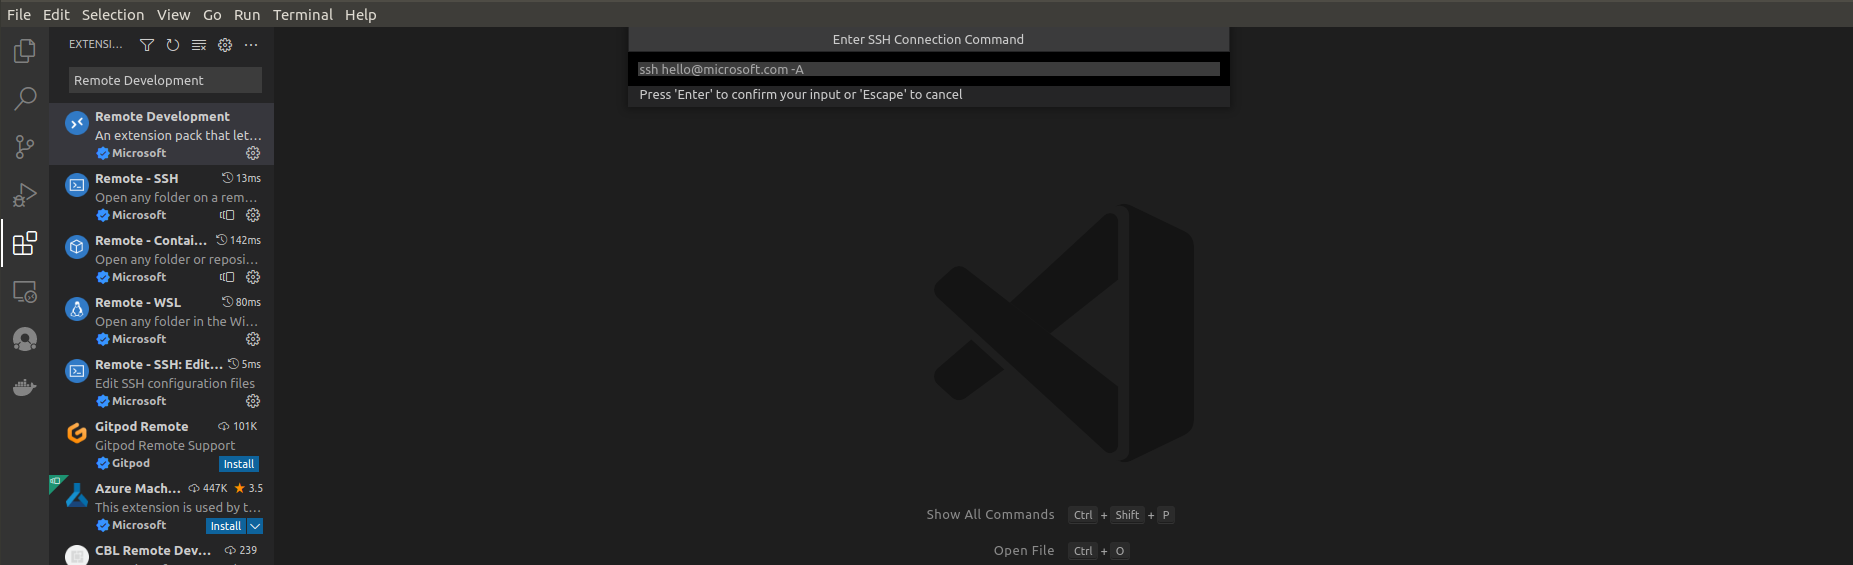
4.6. Click on Add New SSH Host
4.7 Let’s now paste our command to connect to our remote machine
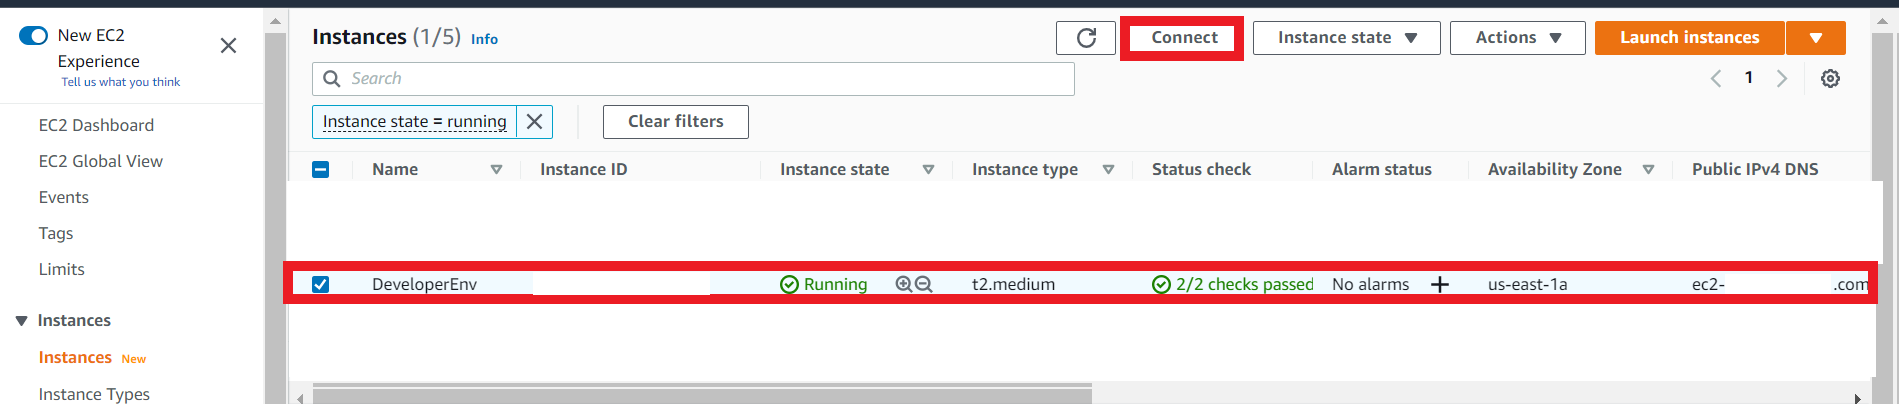
4.8. Go back to your AWS Account
- Go to the EC2 Console
- Select your
DeveloperEnvmachine - Click on Connect
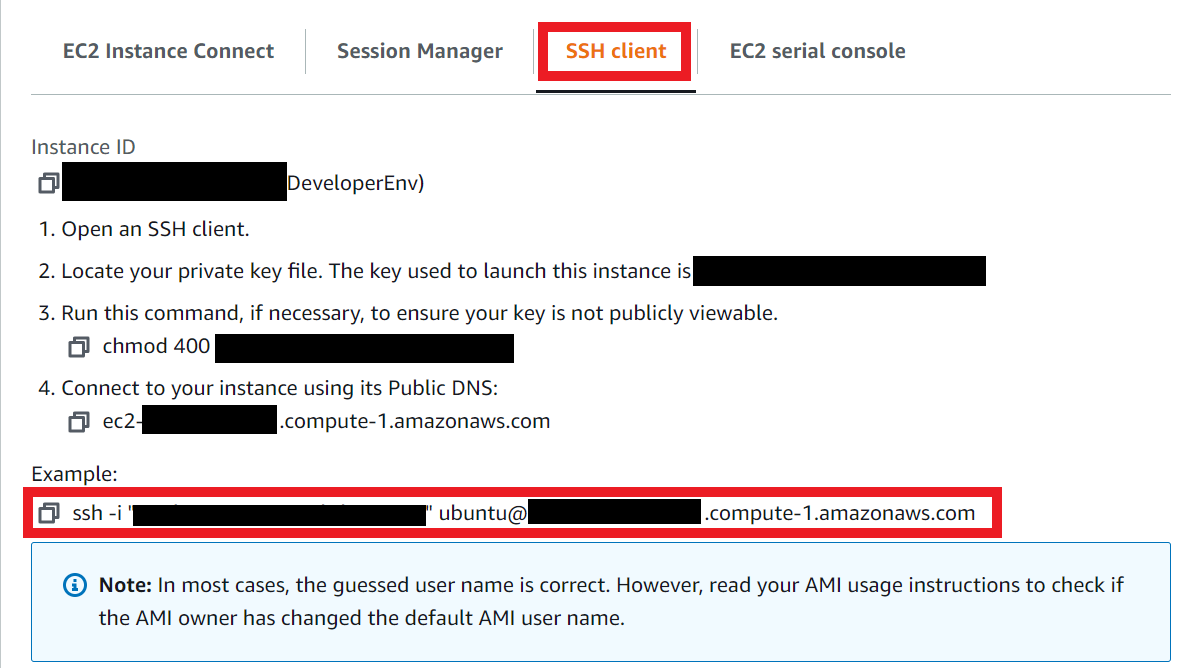
4.9. Select SSH Client tab
- Copy the example command WITHOUT THE QUOTES THAT ARE IN THE KEY
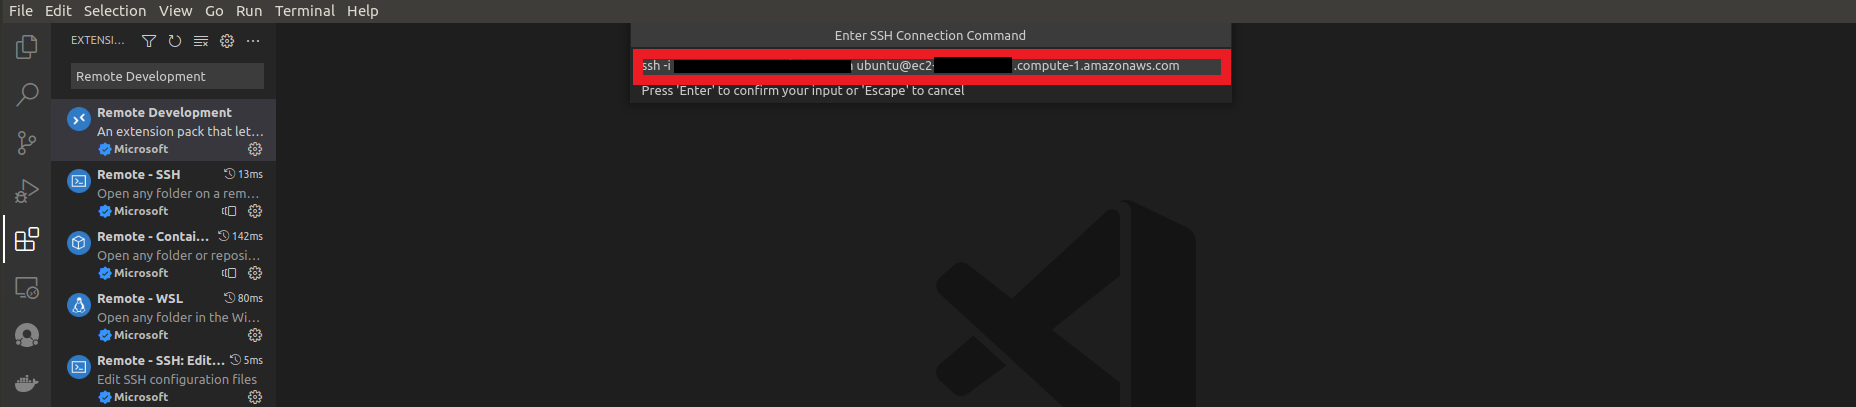
4.10. Go back to VS Code
- Paste the command WITHOUT THE QUOTES THAT ARE IN THE KEY
- Press Enter
4.11. Click on the /.ssh/config to save the command there

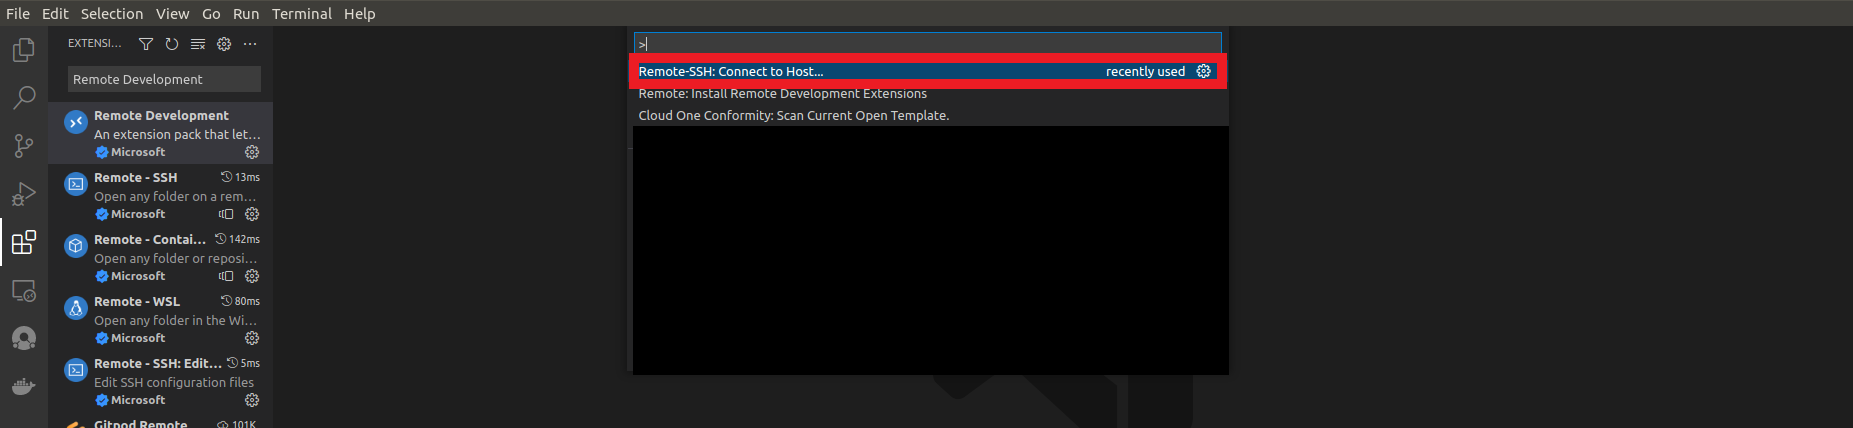
4.12. Click on the F1 button on your keyboard or Ctrl+Shift+P
- Click on Remote-SSH:Connect to Host…
4.13. Click on Configure SSH Hosts…

4.14. Click on /.ssh/config to open the configurations of the Connection

4.15. Check and make sure the key path, addresses and user are correct!
- If necessary, make changes and save the file

4.16. Remember to give the necessary permissions to ensure your key is not publicly viewable.

- In the shell of your local machine, enter in the directory where your key is, and type the command
- For example
chmod 400 my_key

4.17. In VS Code, click on the F1 button on your keyboard or Ctrl+Shift+P
- Click on Remote-SSH:Connect to Host…

4.18. Click on your EC2 address

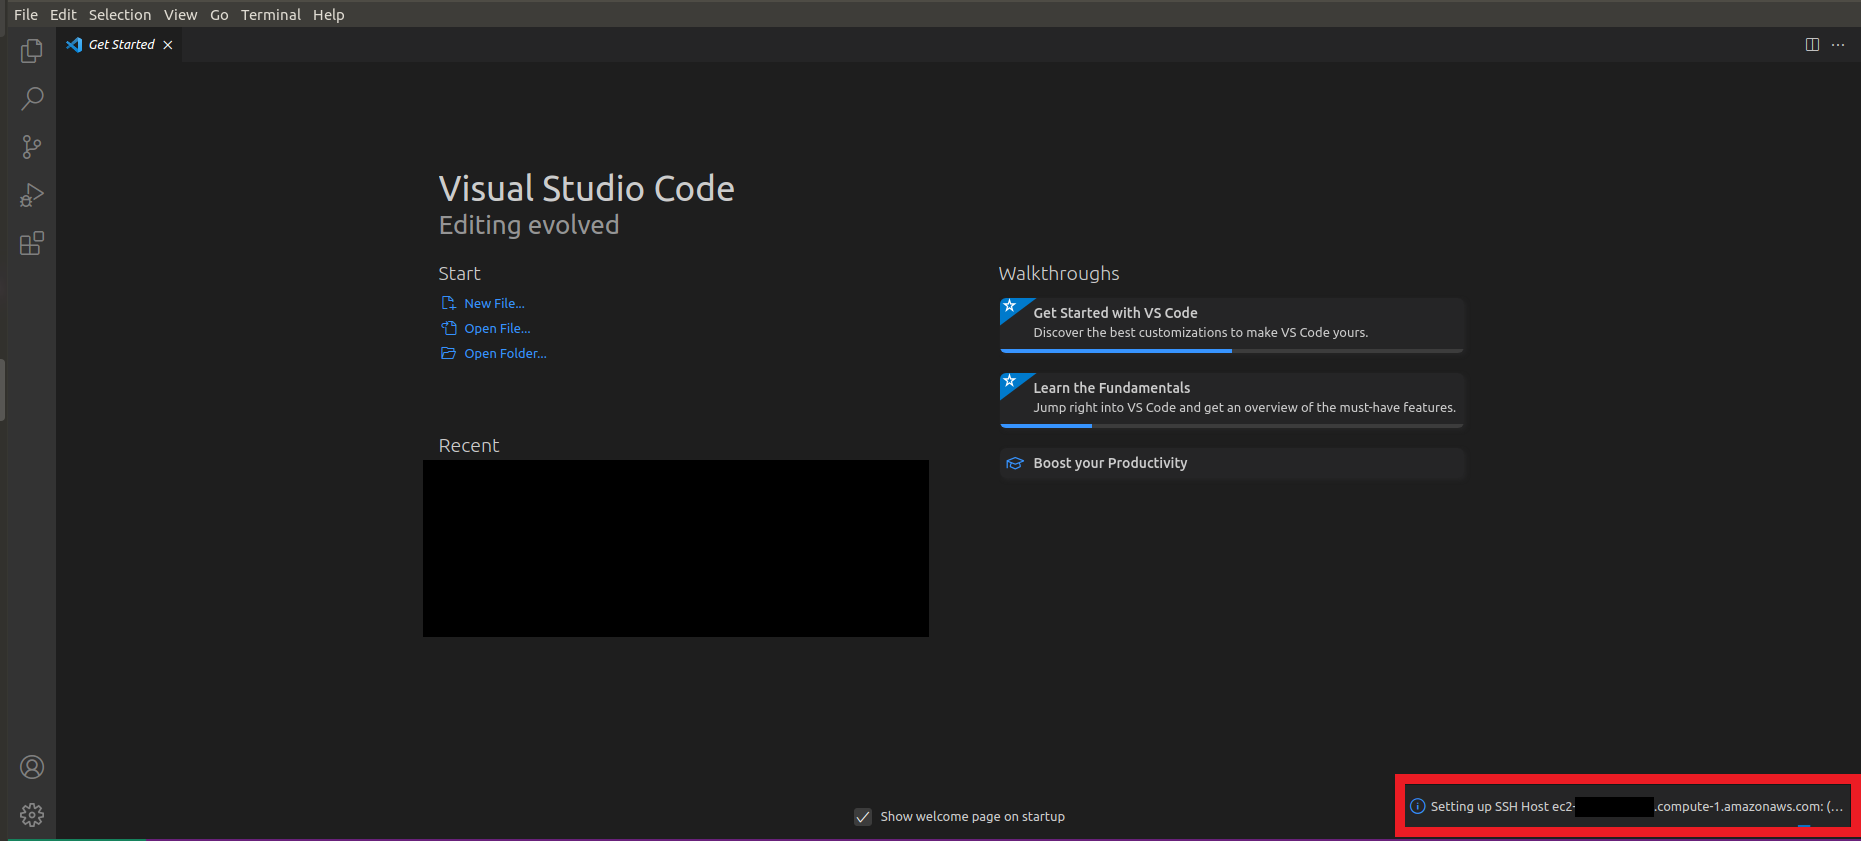
4.19. This will open a new VS Code window
- Wait until VS Code connects to the remote machine
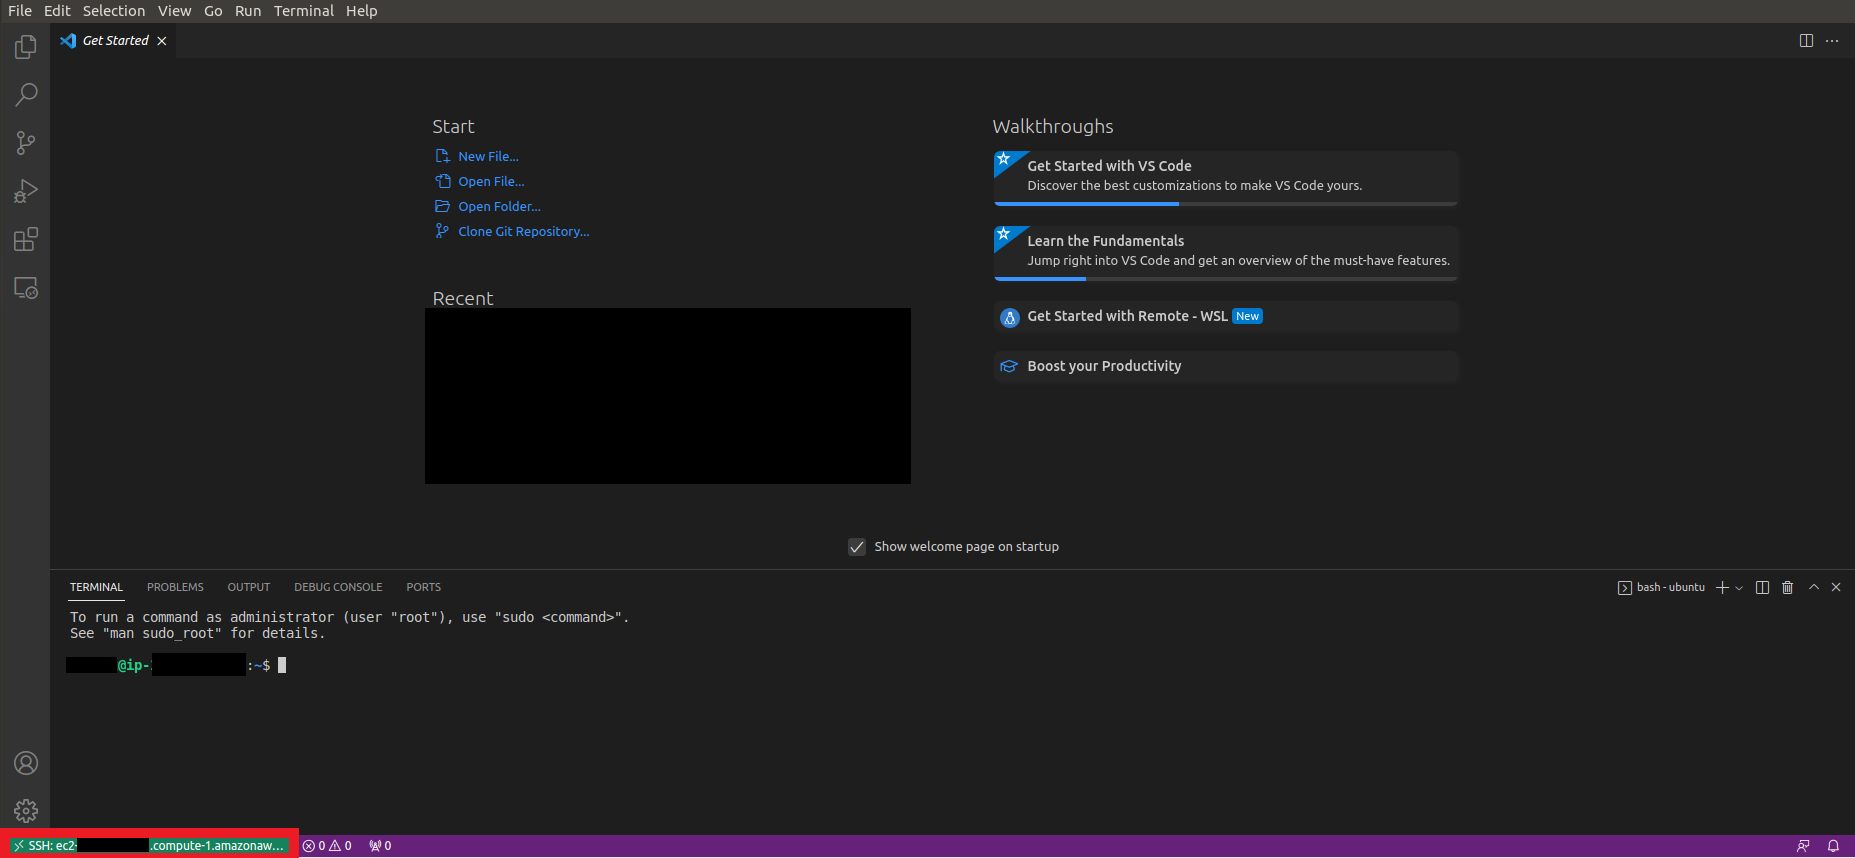
4.20. Now VS Code should be connected to the remote machine
- To open the terminal window of the remote machine in VS Code
- Go to the top tab
- Click on Terminal and New Terminal
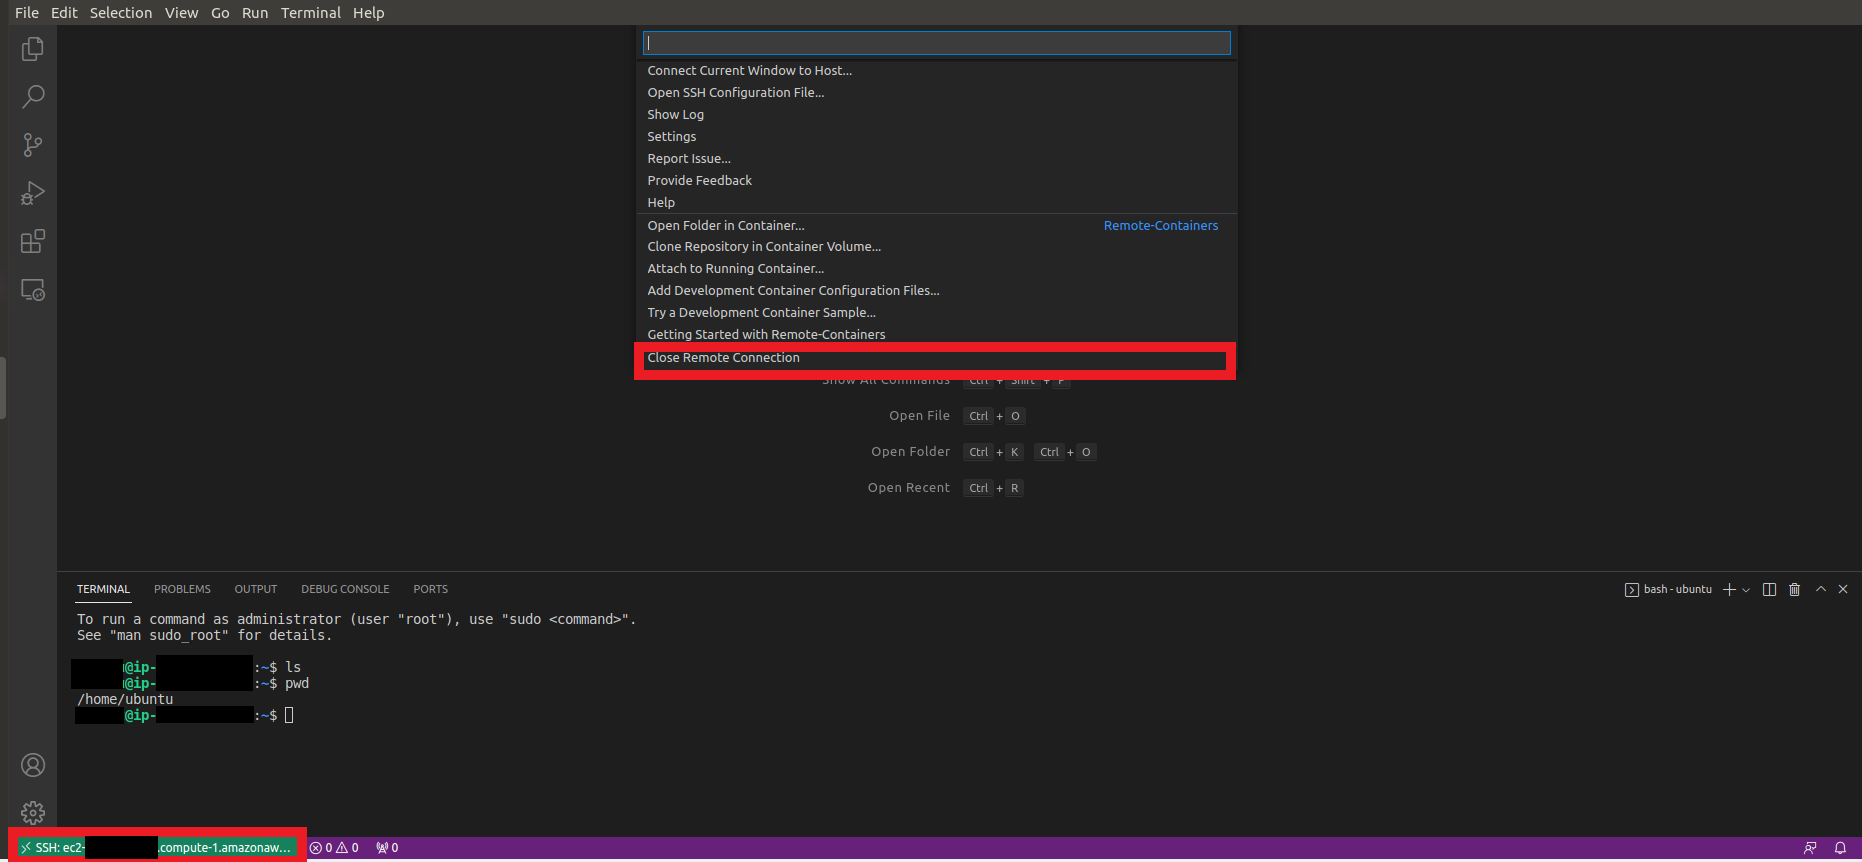
5. If you want to close the VS Code connection with the remote machine
- In the lower left corner
- Click on the green area where your EC2 address appears
- Scroll down a little on the tab that just opened
- Click on Close Remote Connection